Approve, Reject or Delete an Application
Save any changes to the application first: Approve and Reject ask you to if you haven’t. An application also needs a primary applicant before you can approve it. If the Approve / Reject tab is empty, your role can’t approve or reject applications.
Approve an application
Section titled “Approve an application”Approving makes the primary applicant a tenant, with a lease. How Applications Work lists everything it creates.
-
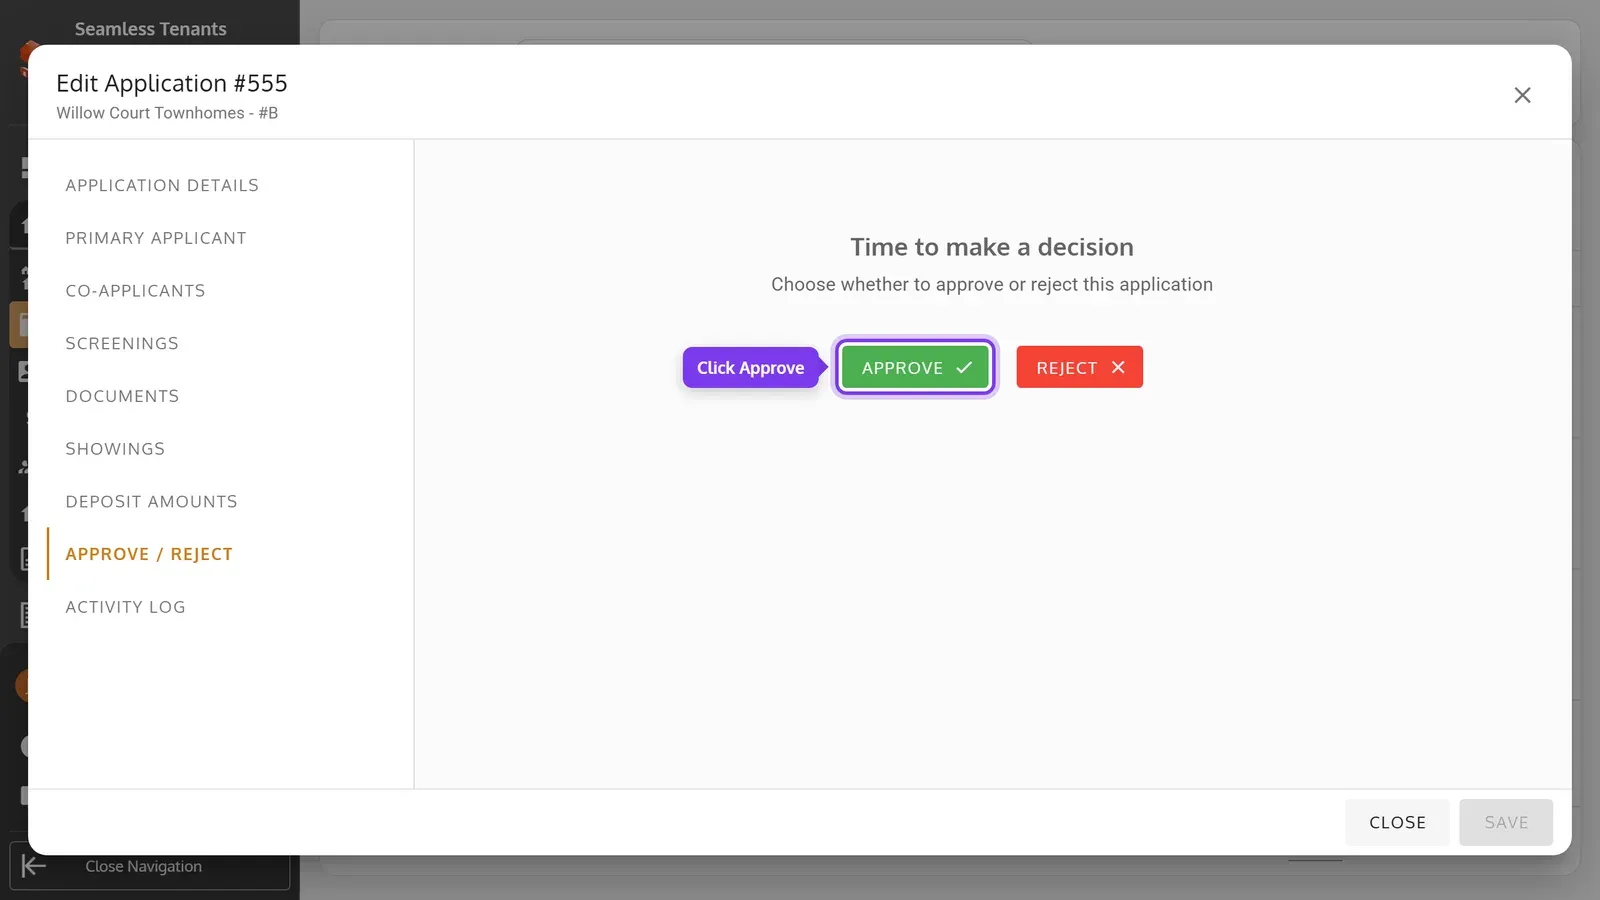
Open the application, click Approve / Reject, then Approve.
-
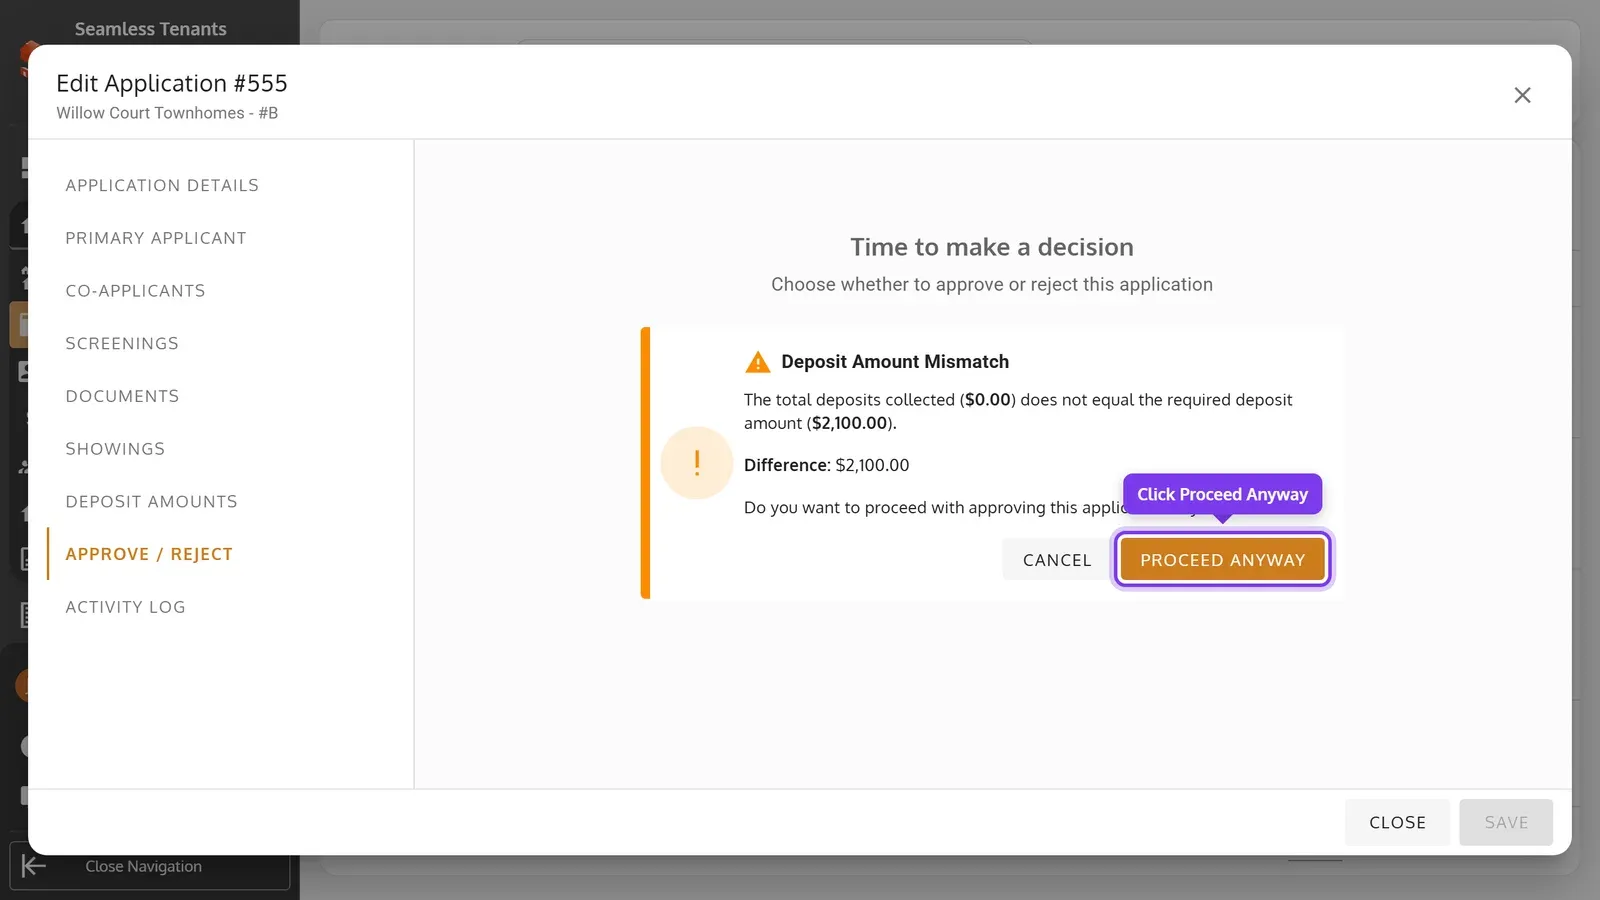
If the deposits recorded on Deposit Amounts don’t add up to the Required Deposit Amount, you’re told the difference. Click Proceed Anyway to go on, or Cancel to record them first.
-
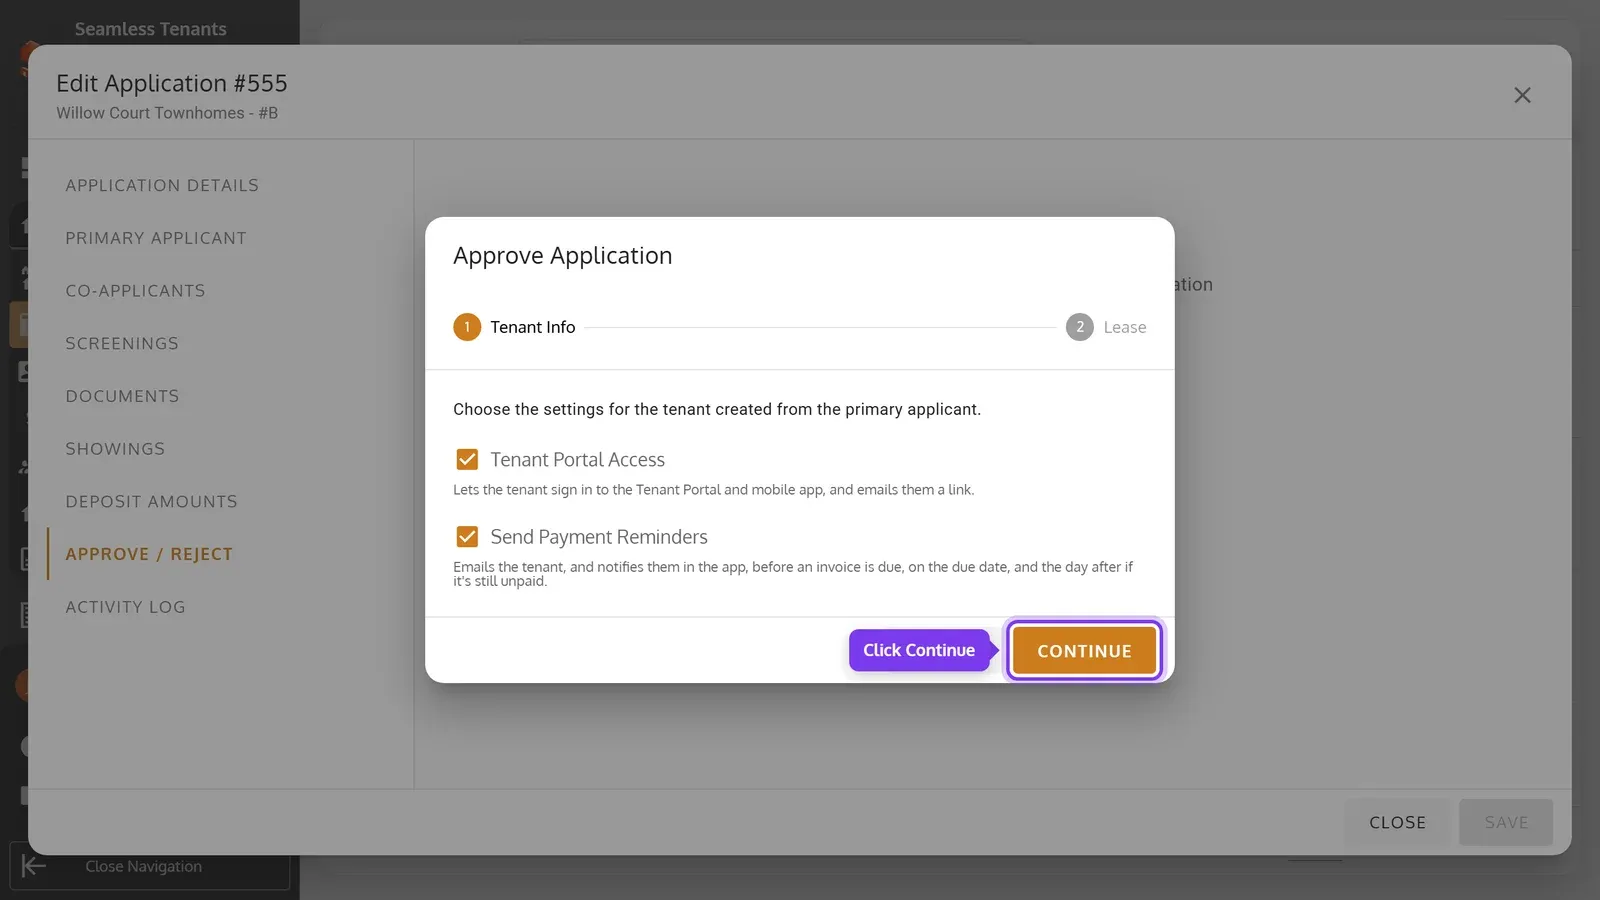
On Tenant Info, choose the new tenant’s settings, then click Continue.
-
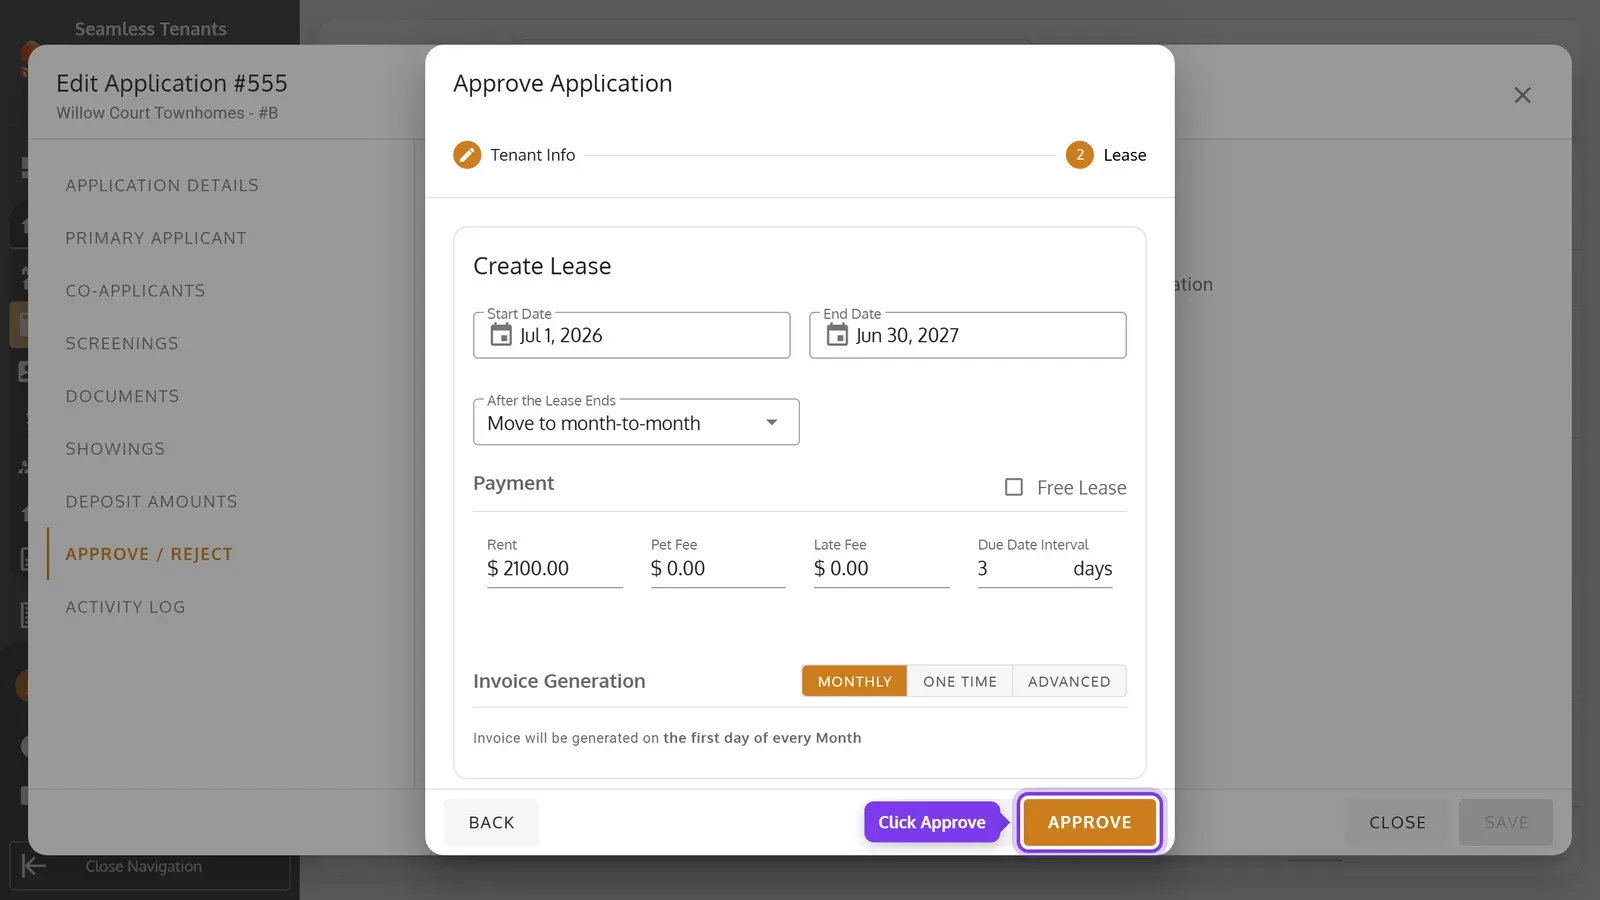
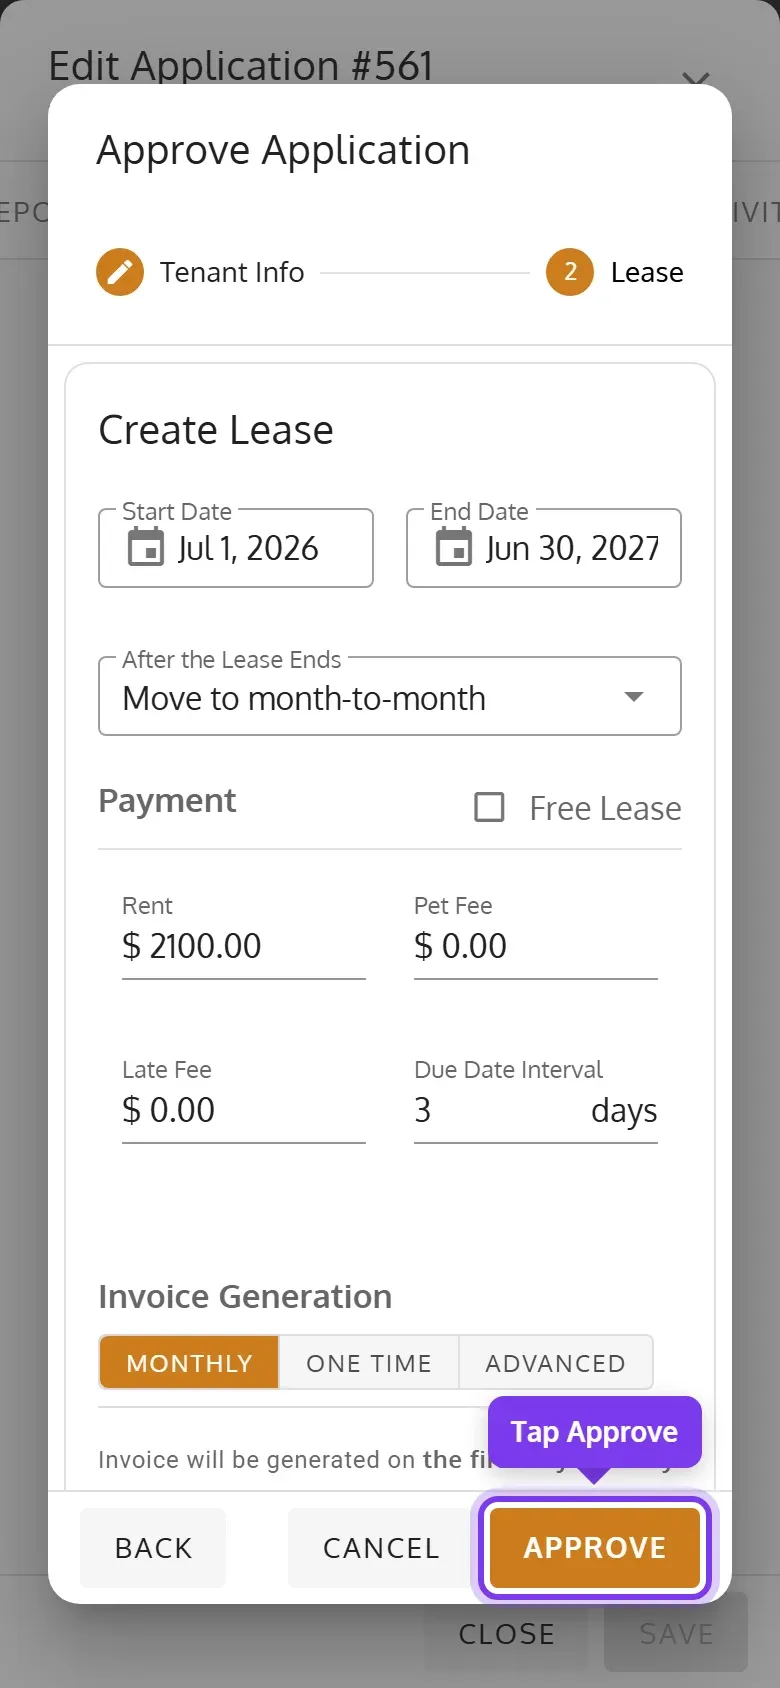
On Lease, check the lease’s dates, rent and fees, then click Approve.
-
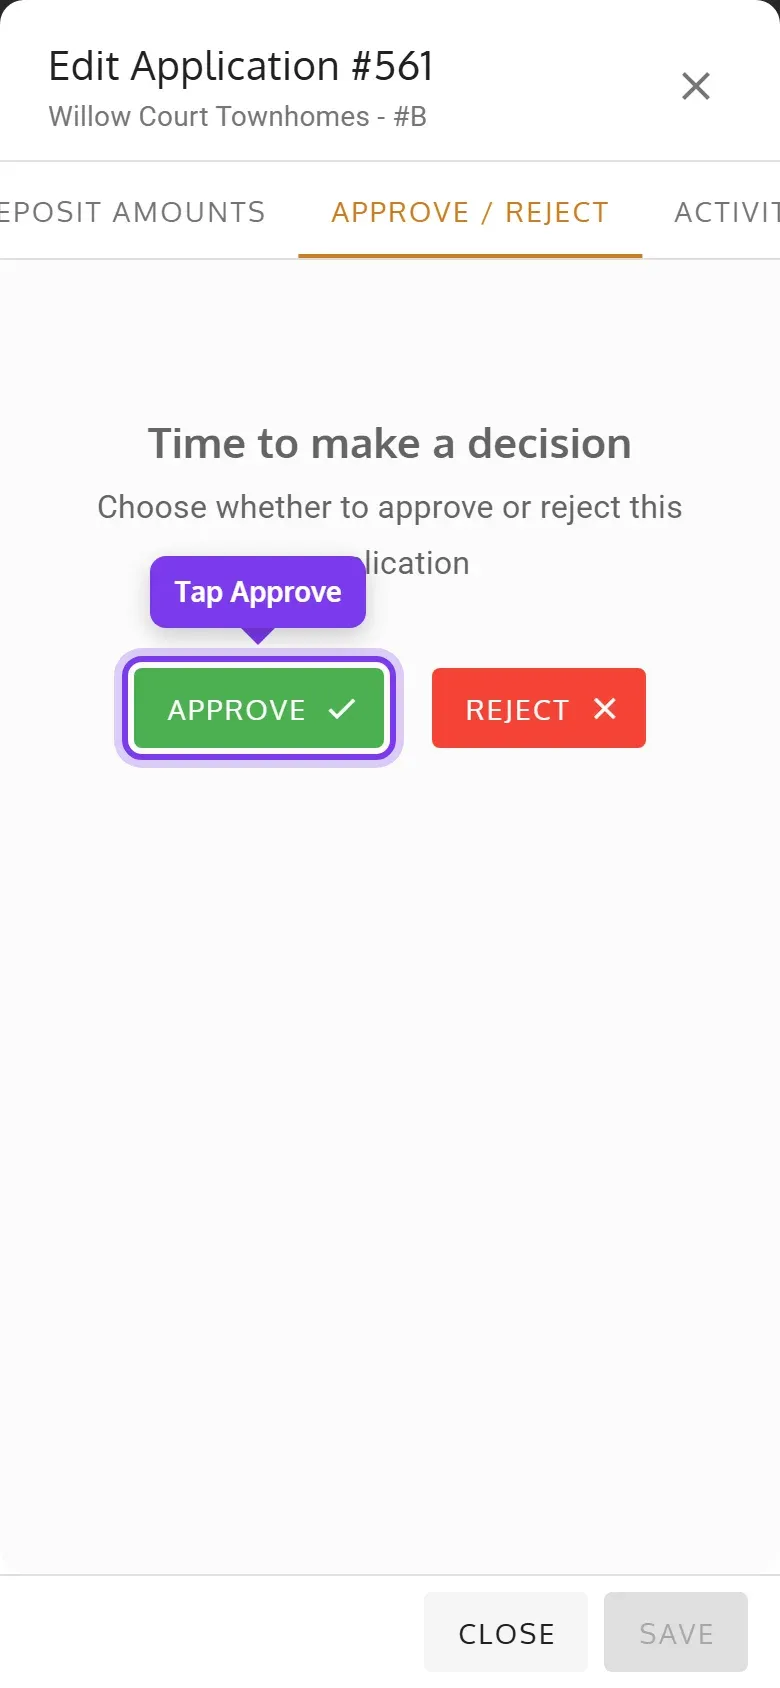
Open the application, swipe its tabs and tap Approve / Reject, then Approve.
-
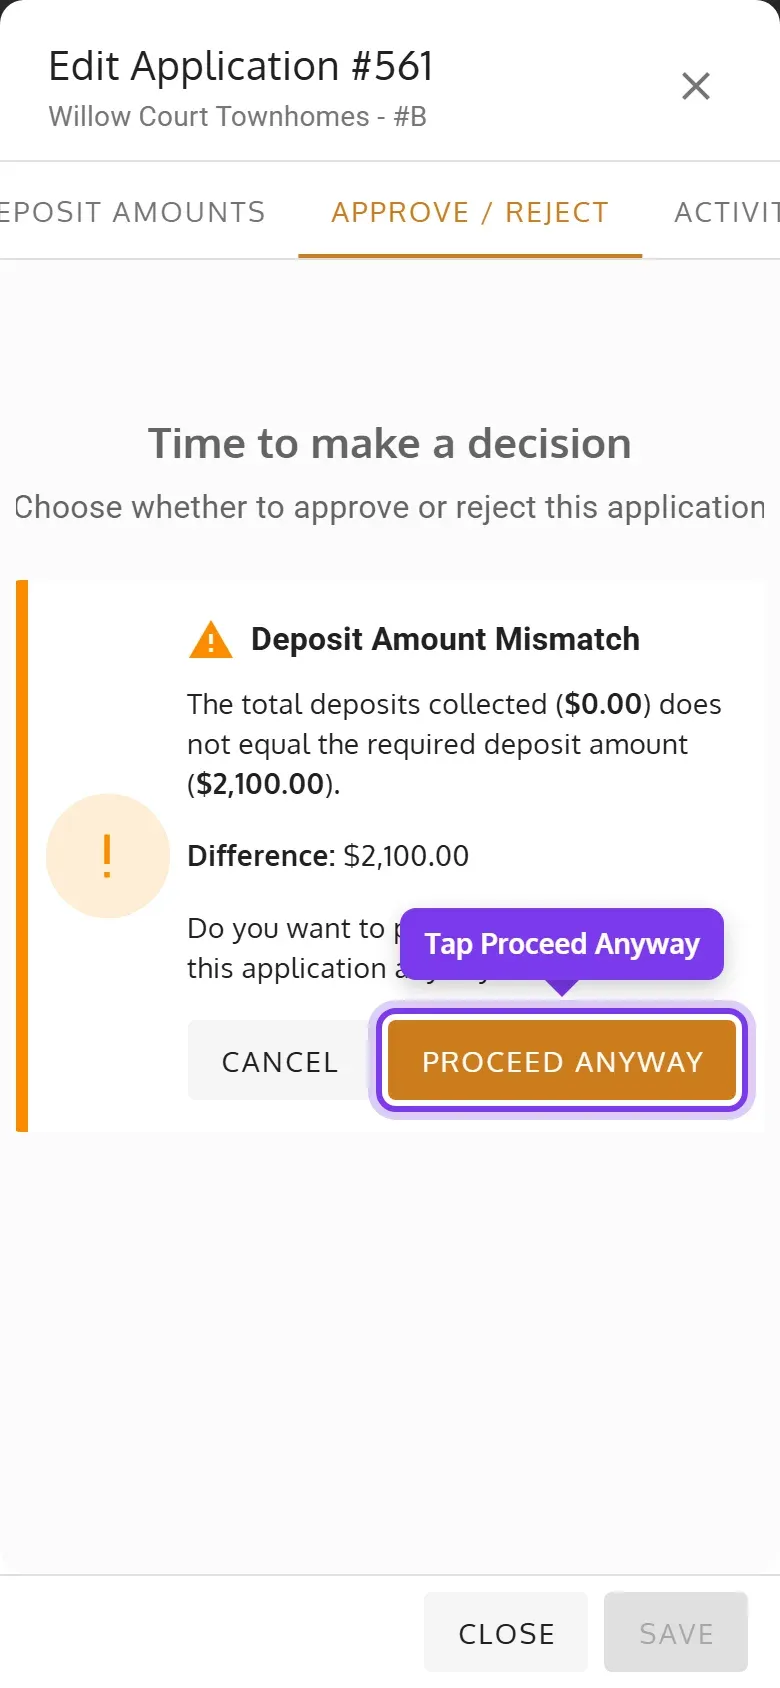
If the deposits recorded on Deposit Amounts don’t add up to the Required Deposit Amount, you’re told the difference. Tap Proceed Anyway to go on, or Cancel to record them first.
-
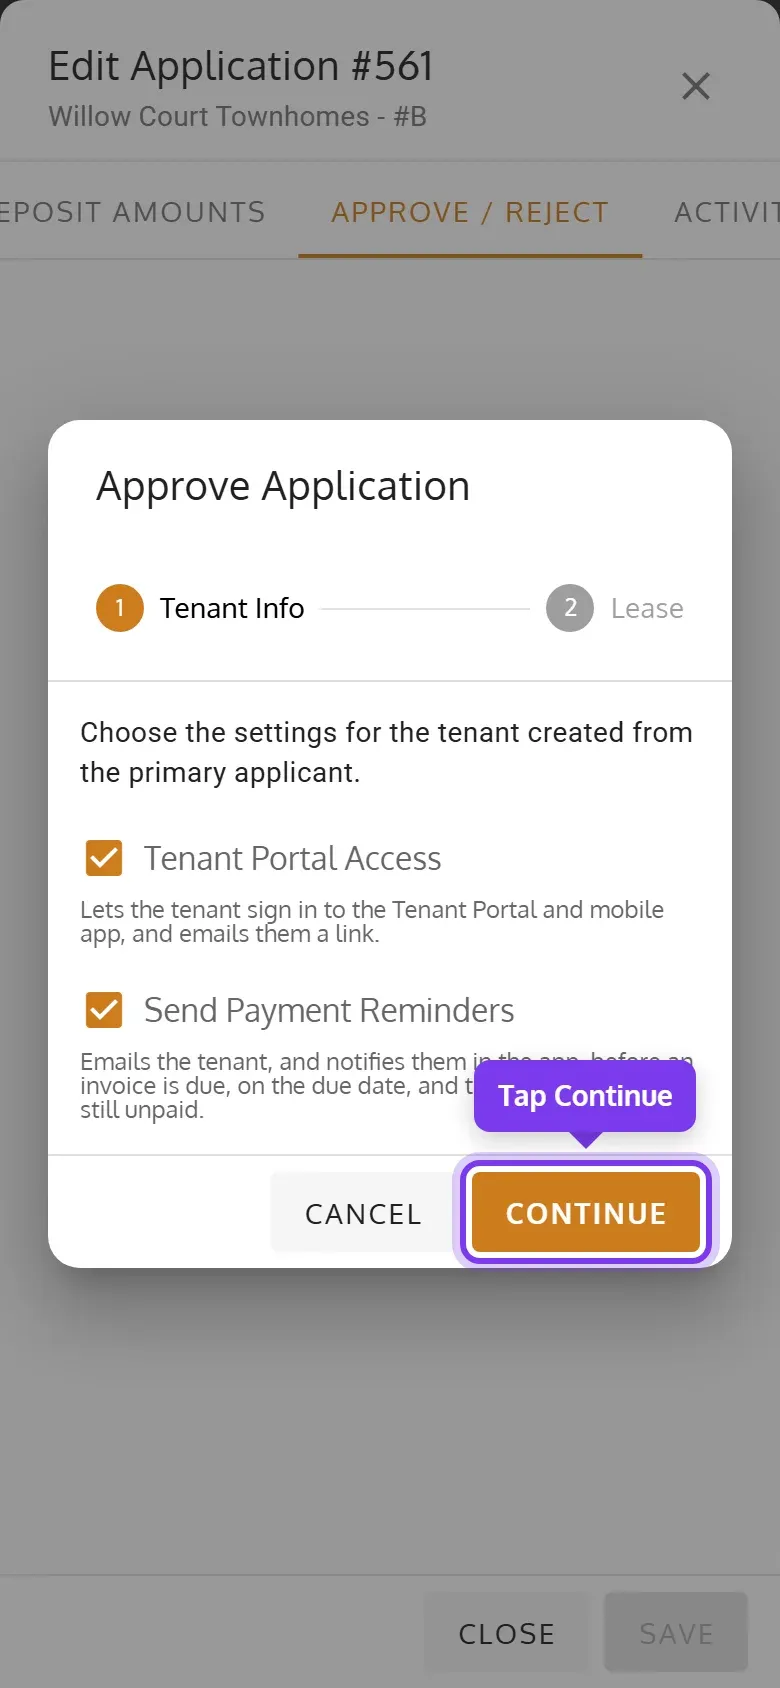
On Tenant Info, choose the new tenant’s settings, then tap Continue.
-
On Lease, check the lease’s dates, rent and fees, then tap Approve.
Tenant Info
- Tenant Portal Access shows when your organization has the Tenant Portal on. It starts checked when the applicant has an email, and the tenant then gets an email to sign in.
- Send Payment Reminders starts checked. It and Send Payment Link are explained in How a Lease Bills.
Lease
- Start Date starts as the expected move-in date, and End Date comes from the Lease Period.
- Rent starts as the unit’s rent, and Late Fee and Due Date Interval as the property’s defaults.
- The rest is explained in How a Lease Bills.
If the lease’s dates overlap another lease on the unit, the application isn’t approved.
If Approve is greyed out
Section titled “If Approve is greyed out”The tab says why Approve is greyed out: the application has no primary applicant yet, or the unit is occupied, including when its tenant has a planned move-out. Once an application is approved, the tab says Application approved, with no buttons: it can’t be rejected.
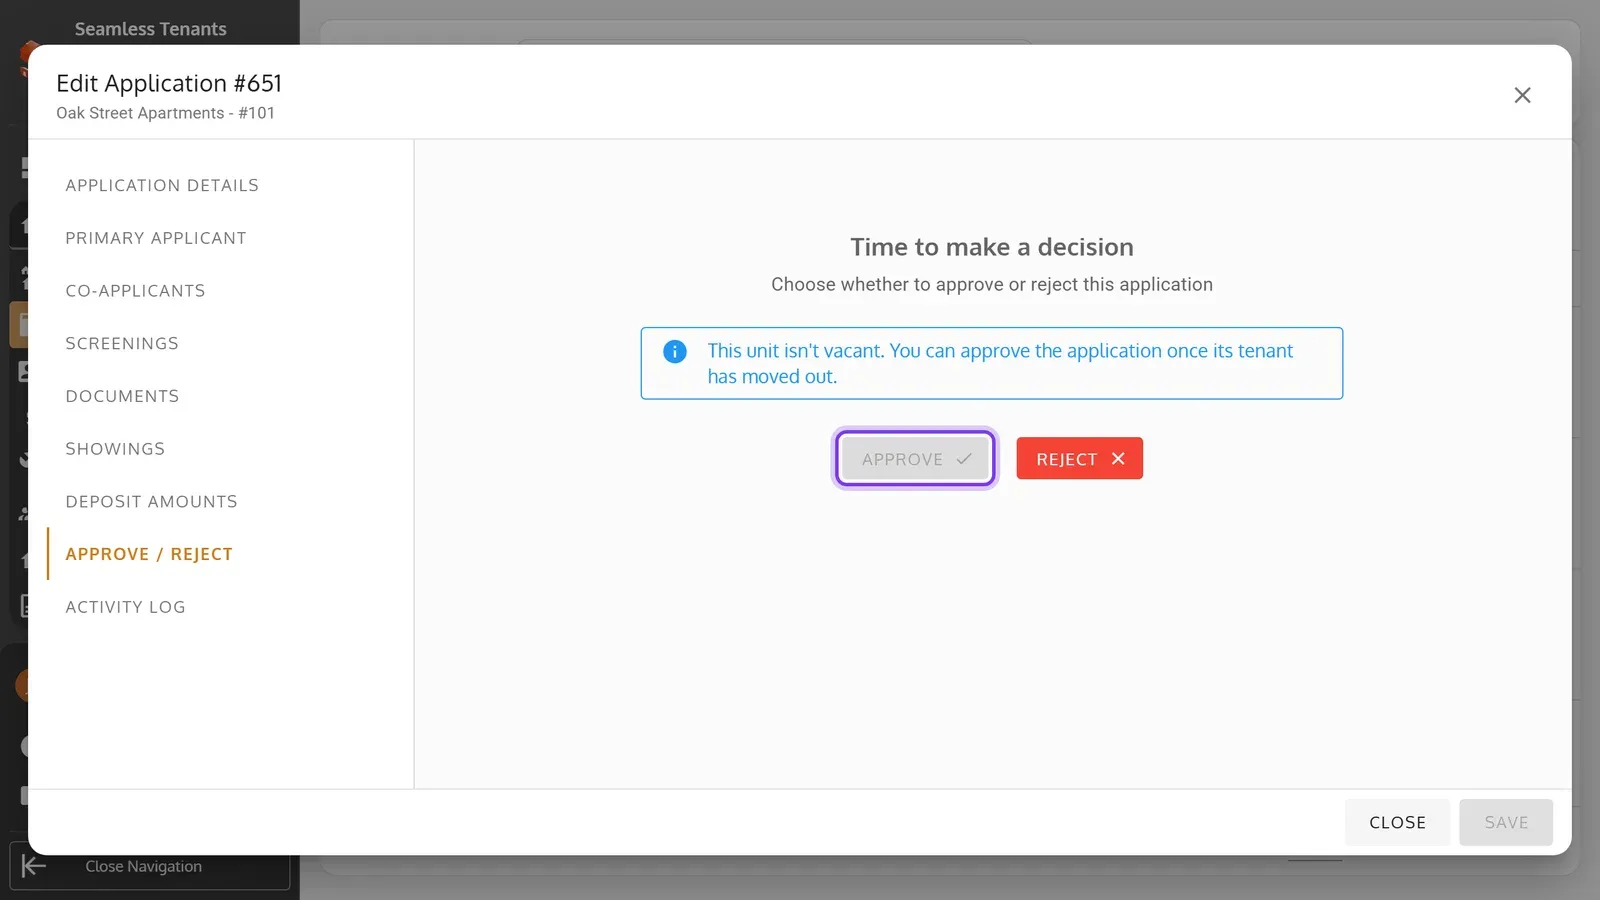
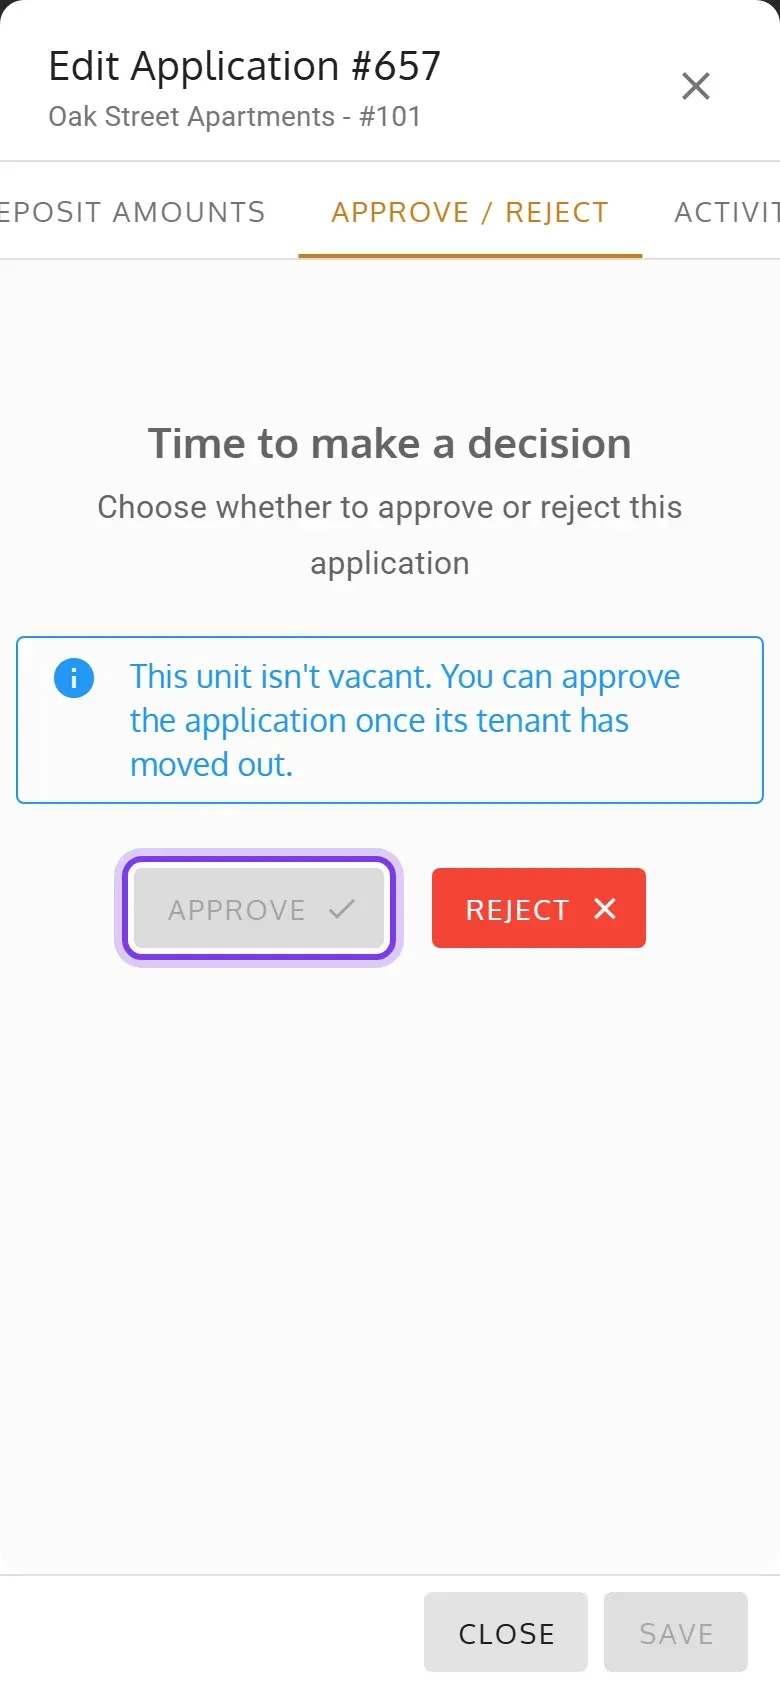
Once the current tenant has moved out, the unit is Vacant and the application can be approved. See Move a Tenant Out.
If a similar tenant already exists
Section titled “If a similar tenant already exists”When a tenant who owes you money has the same SSN, ID, name, phone or email as the primary applicant, the Approve / Reject tab warns you. Approve then lists them under Existing tenant profiles found. Click or tap Approve anyway to go on, with an optional note for the activity log, or Cancel.
Reject an application
Section titled “Reject an application”-
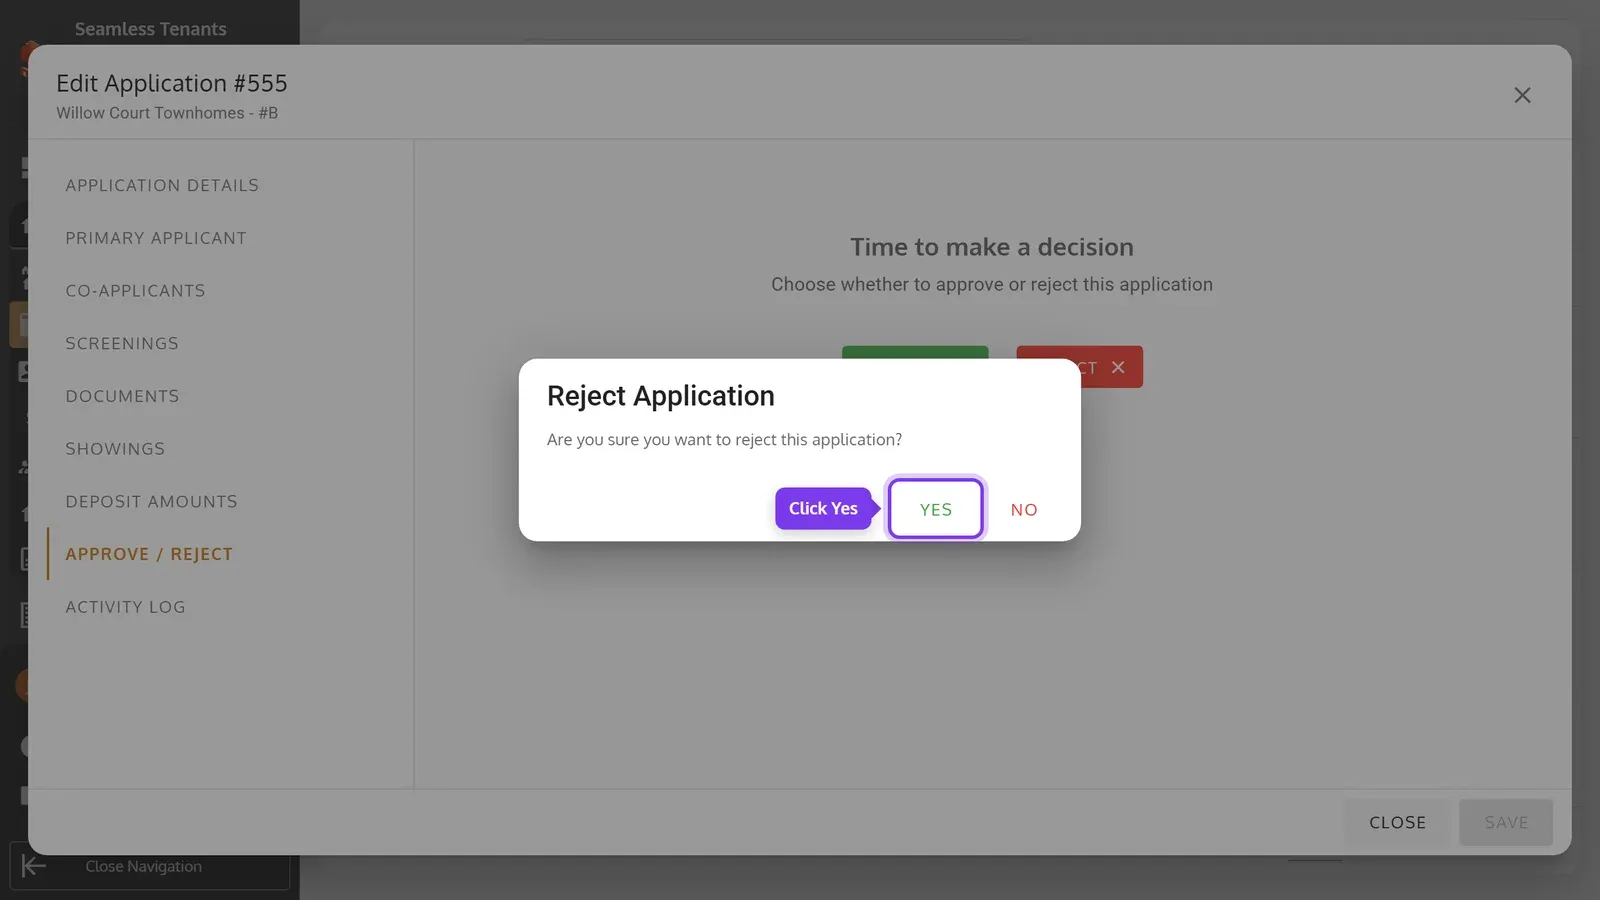
Open the application, click Approve / Reject, then Reject, then Yes.
-
Open the application, swipe its tabs and tap Approve / Reject, then Reject, then Yes.
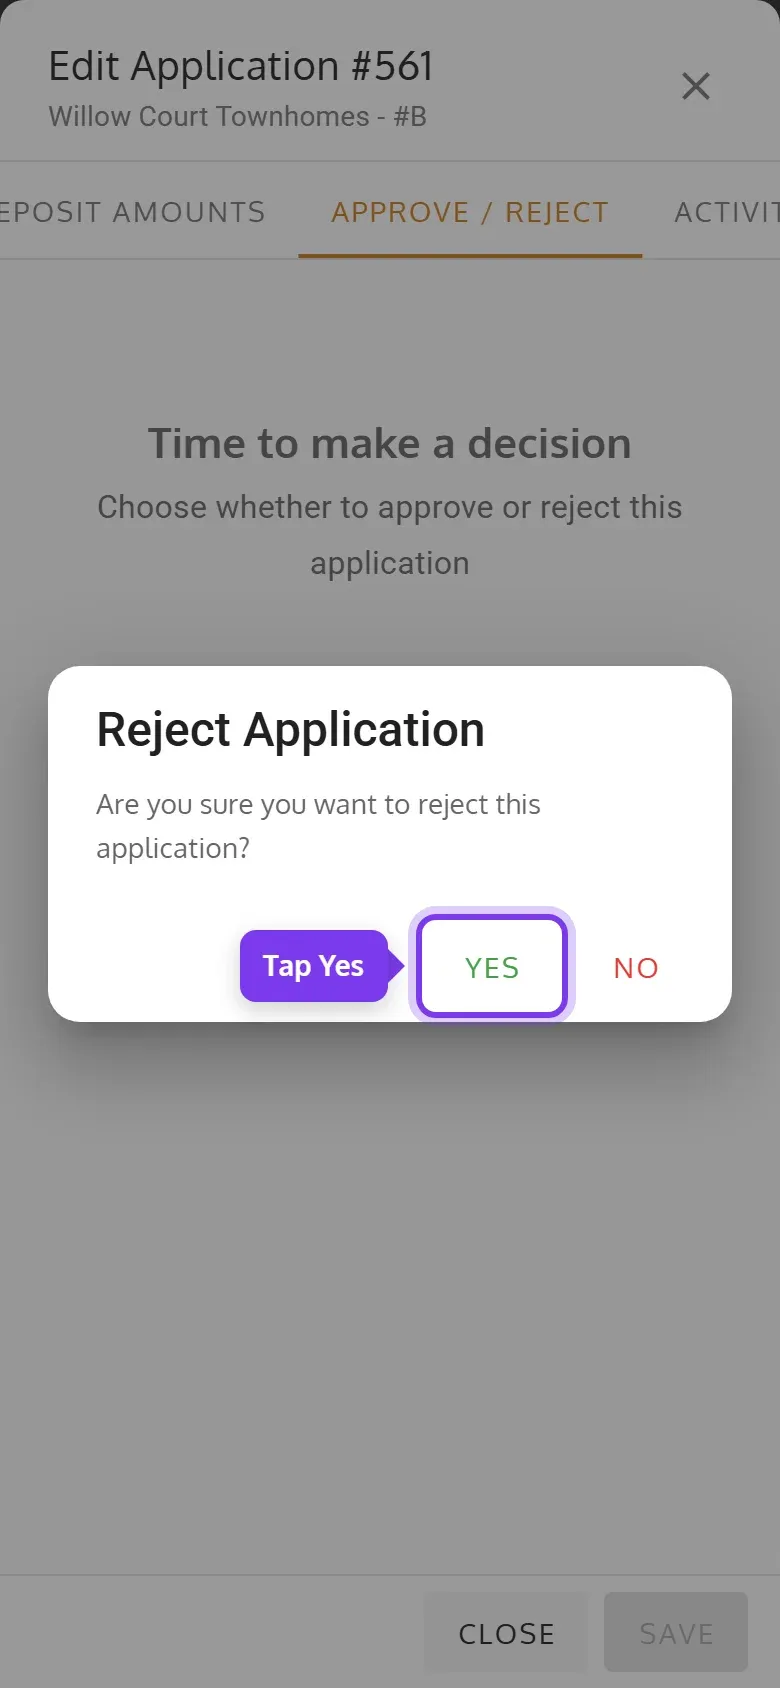
The application becomes Rejected, and leaves the list until you filter for it. You aren’t asked for a reason, and the applicant isn’t told.
Reactivate a rejected application
Section titled “Reactivate a rejected application”-
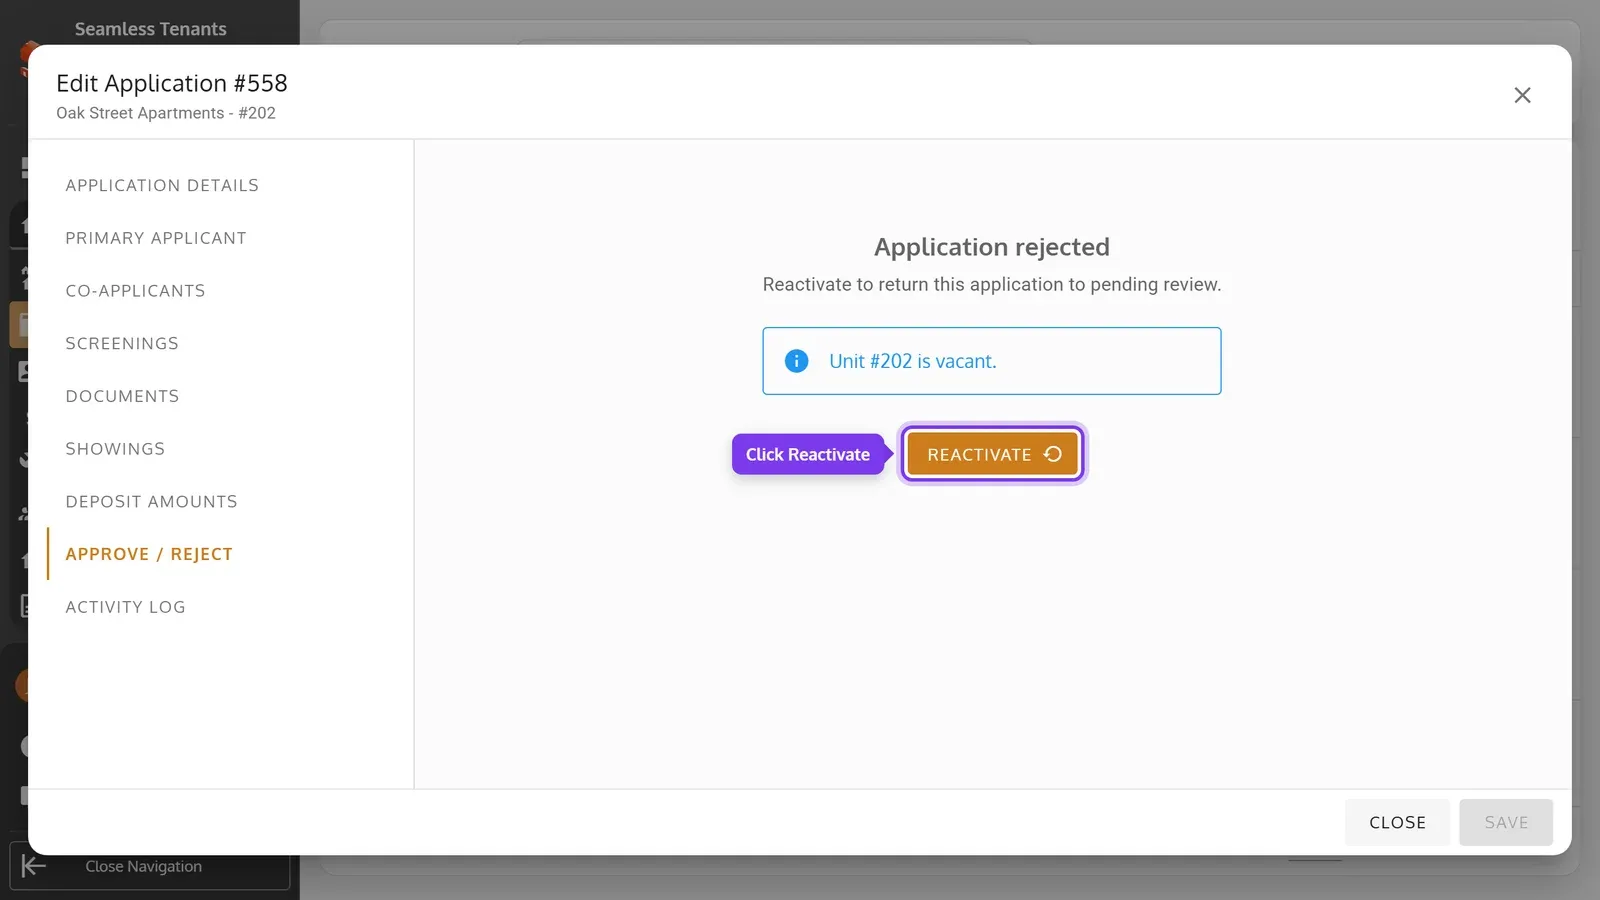
Open the application, click Approve / Reject, then Reactivate, then Yes. It says whether the unit is vacant now.
-
Open the application, swipe its tabs and tap Approve / Reject, then Reactivate, then Yes. It says whether the unit is vacant now.
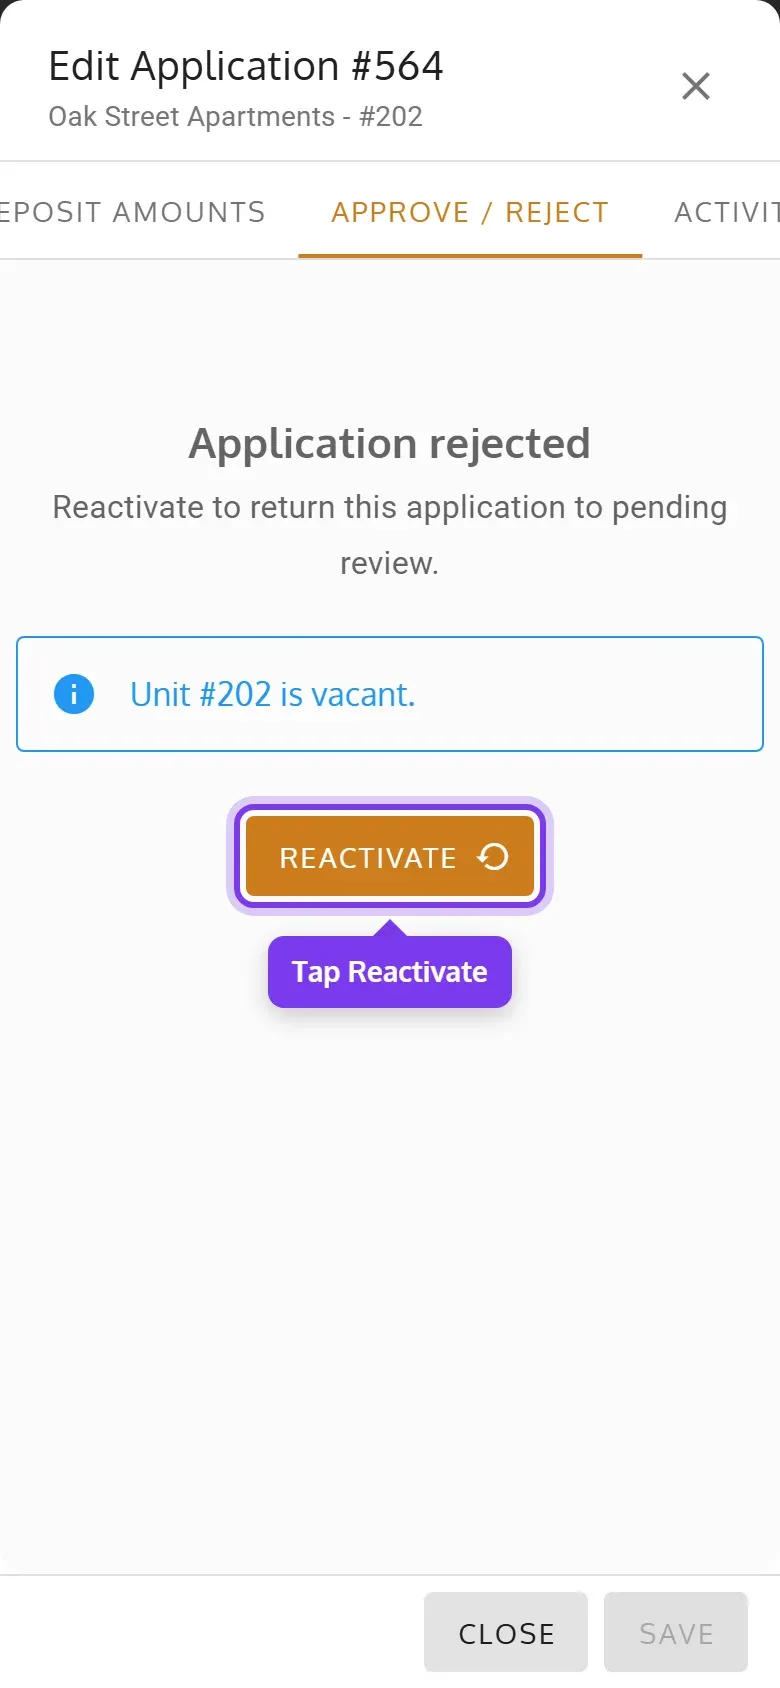
The application is Pending again, and the applicant isn’t told. If it has no primary applicant yet, you can then email the form again or add them.
Delete an application
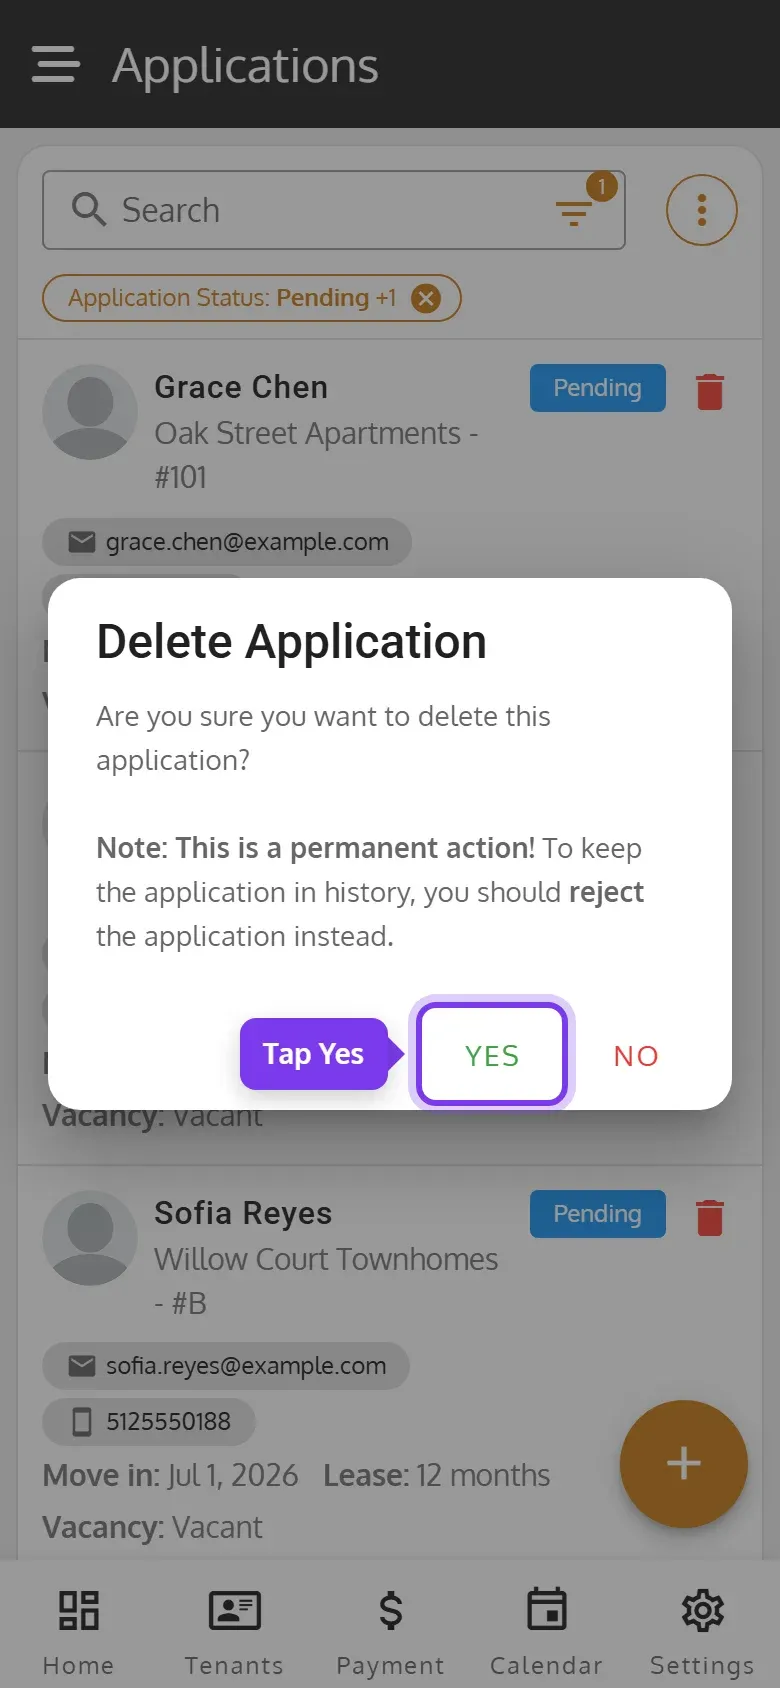
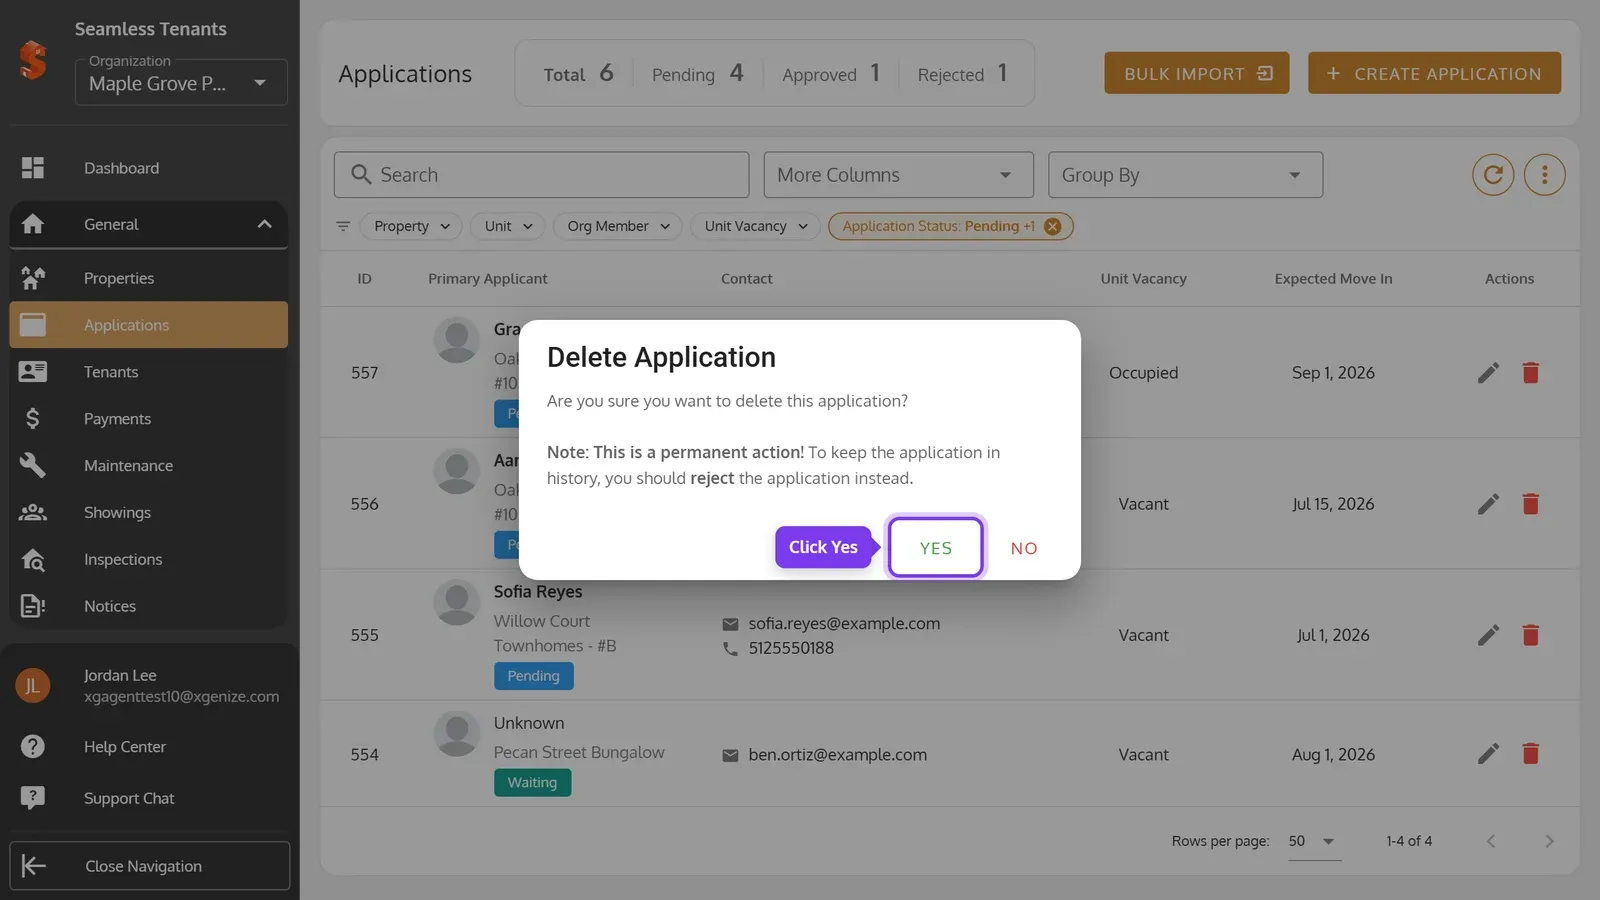
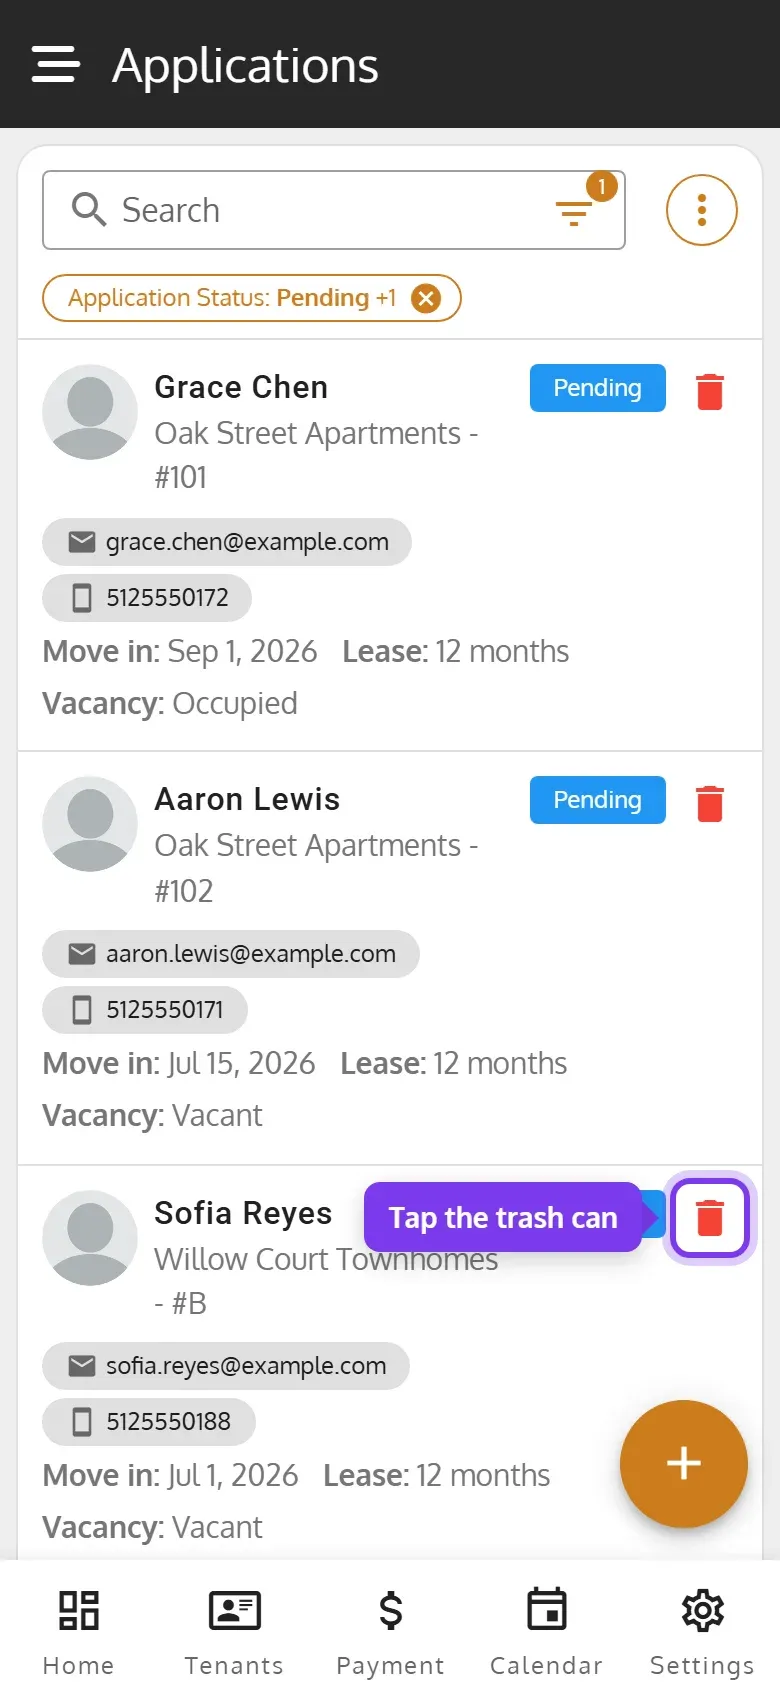
Section titled “Delete an application”Deleting an application takes it off the app for good. To keep it in your history, reject it instead. A tenant made from the application isn’t affected.
-
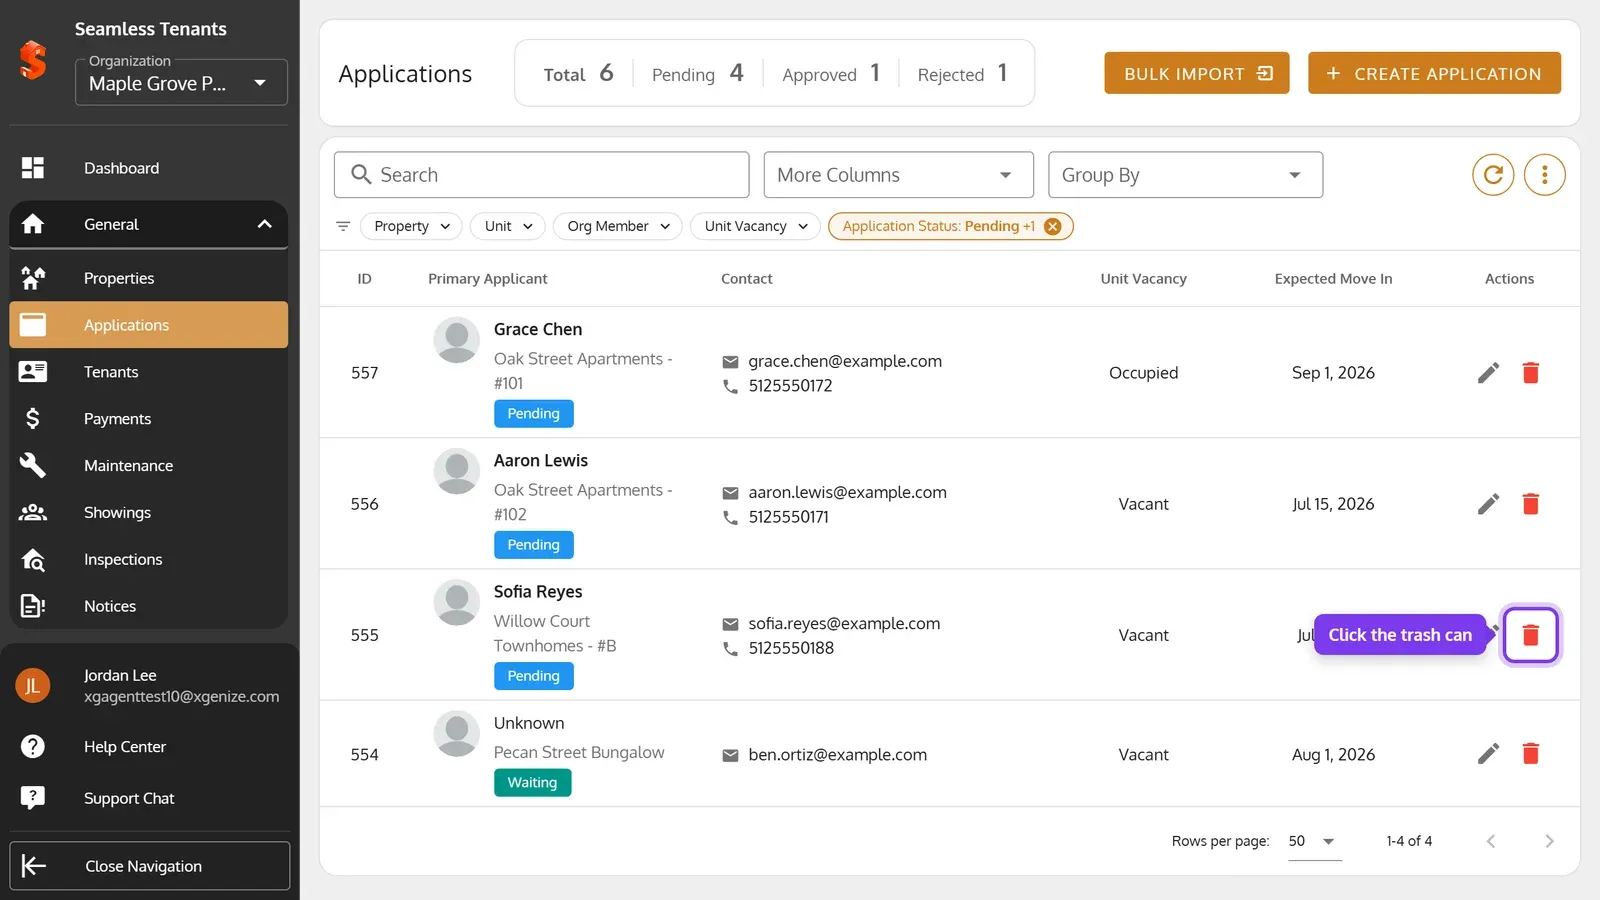
On the Applications page, click the application’s trash can.
-
Click Yes.
-
On the Applications page, tap the trash can on the application’s card.
-
Tap Yes.