Review an Application
Open an application and save changes
Section titled “Open an application and save changes”-
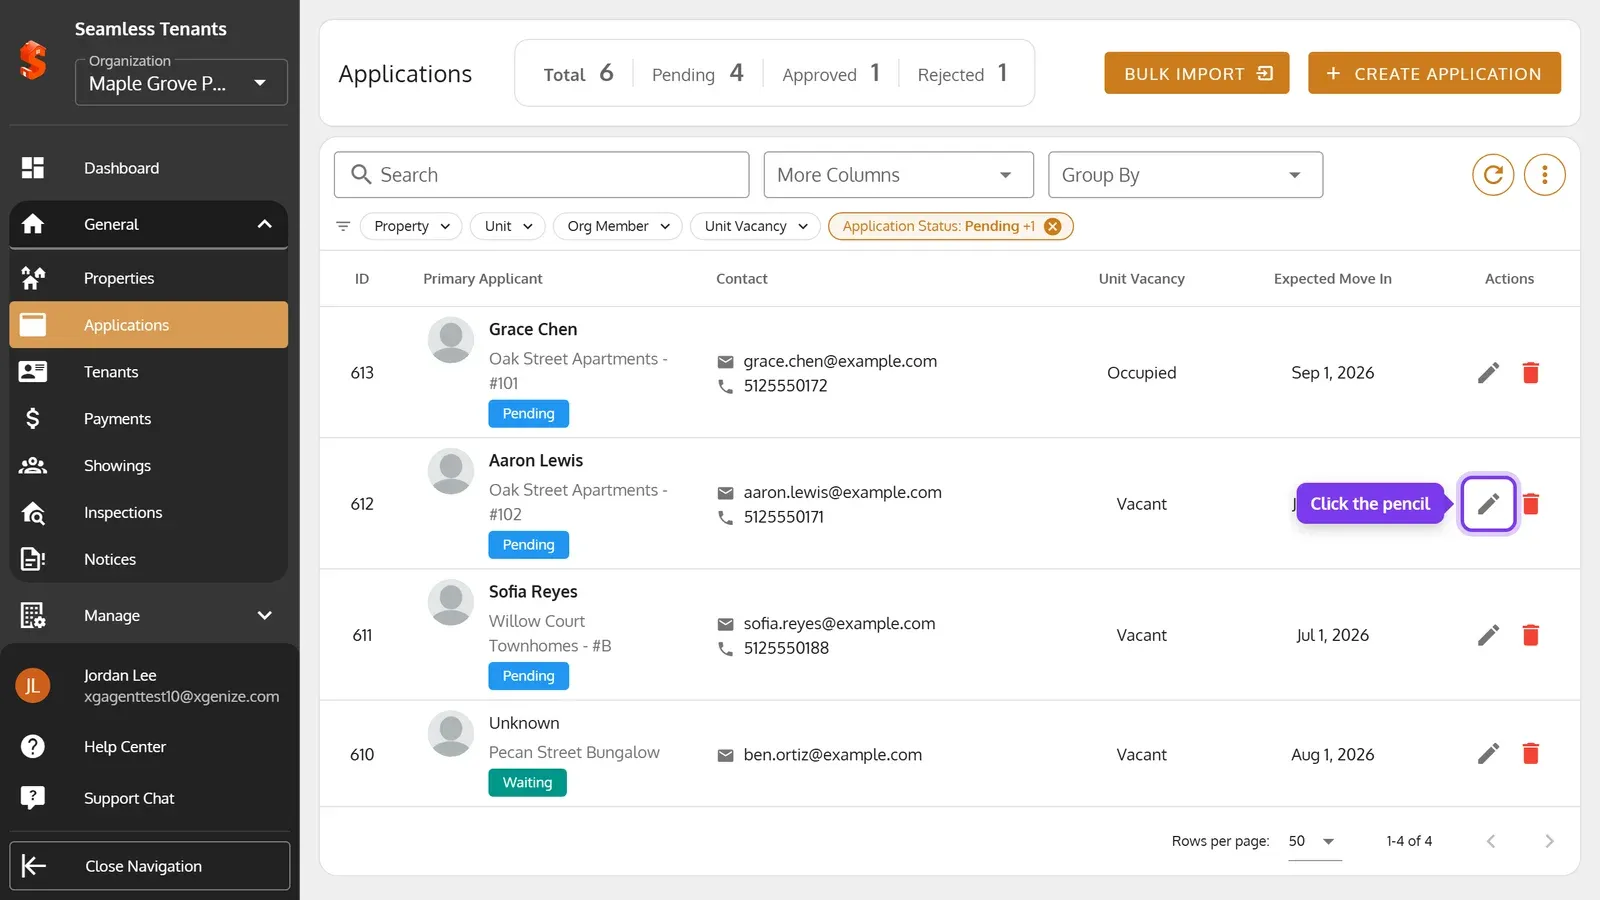
On the Applications page, click the application’s pencil.
-
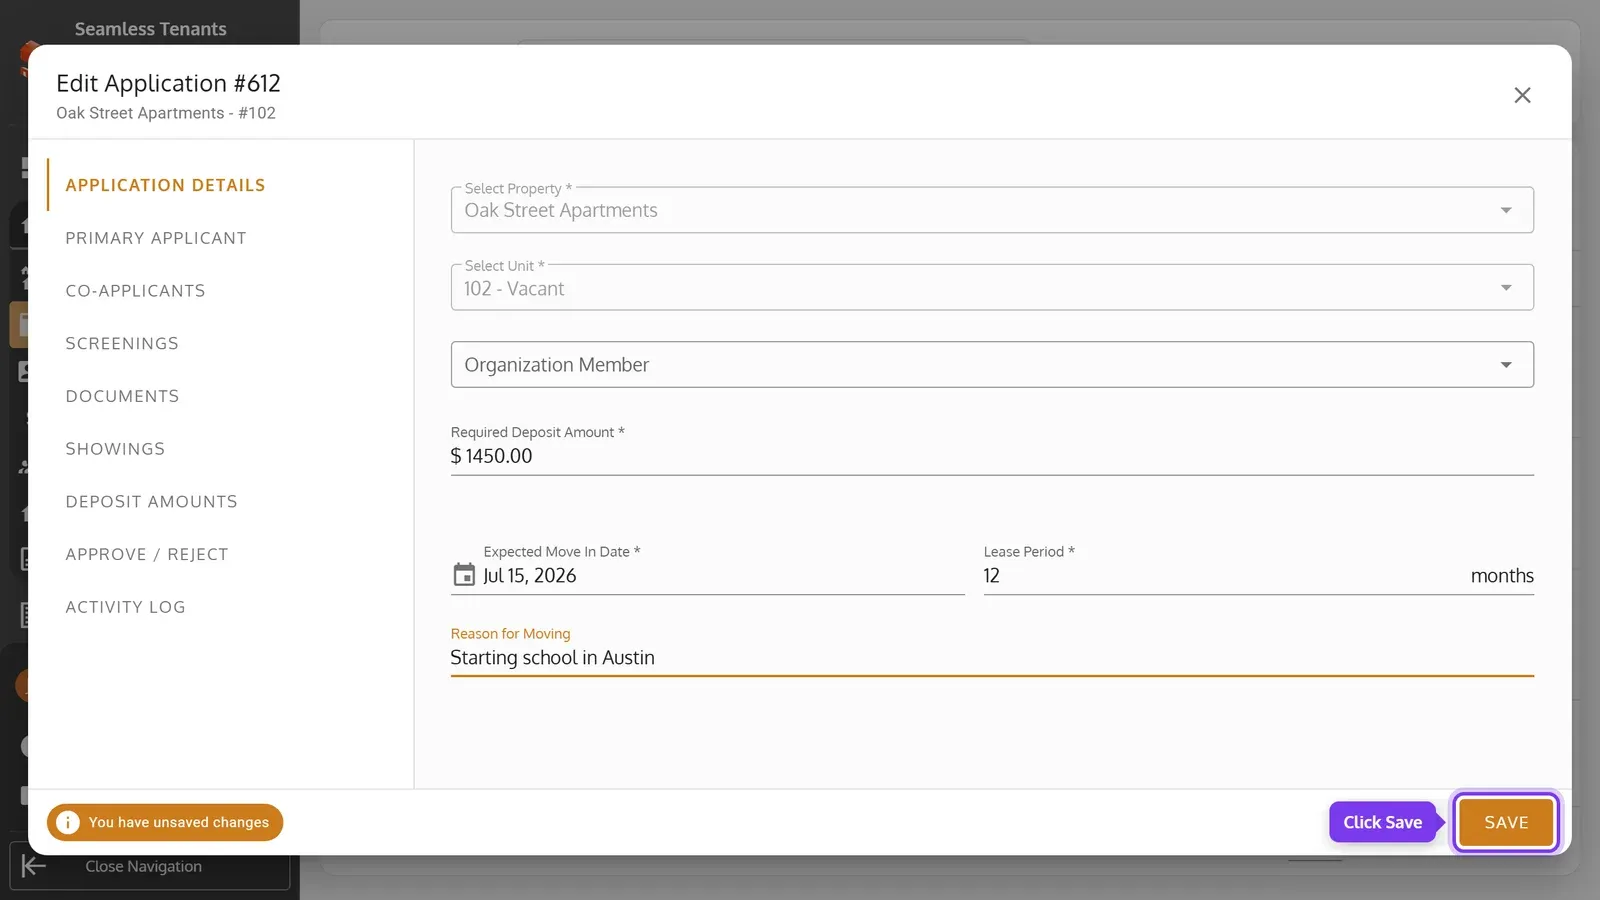
Change what you need on Application Details or Primary Applicant, then click Save.
-
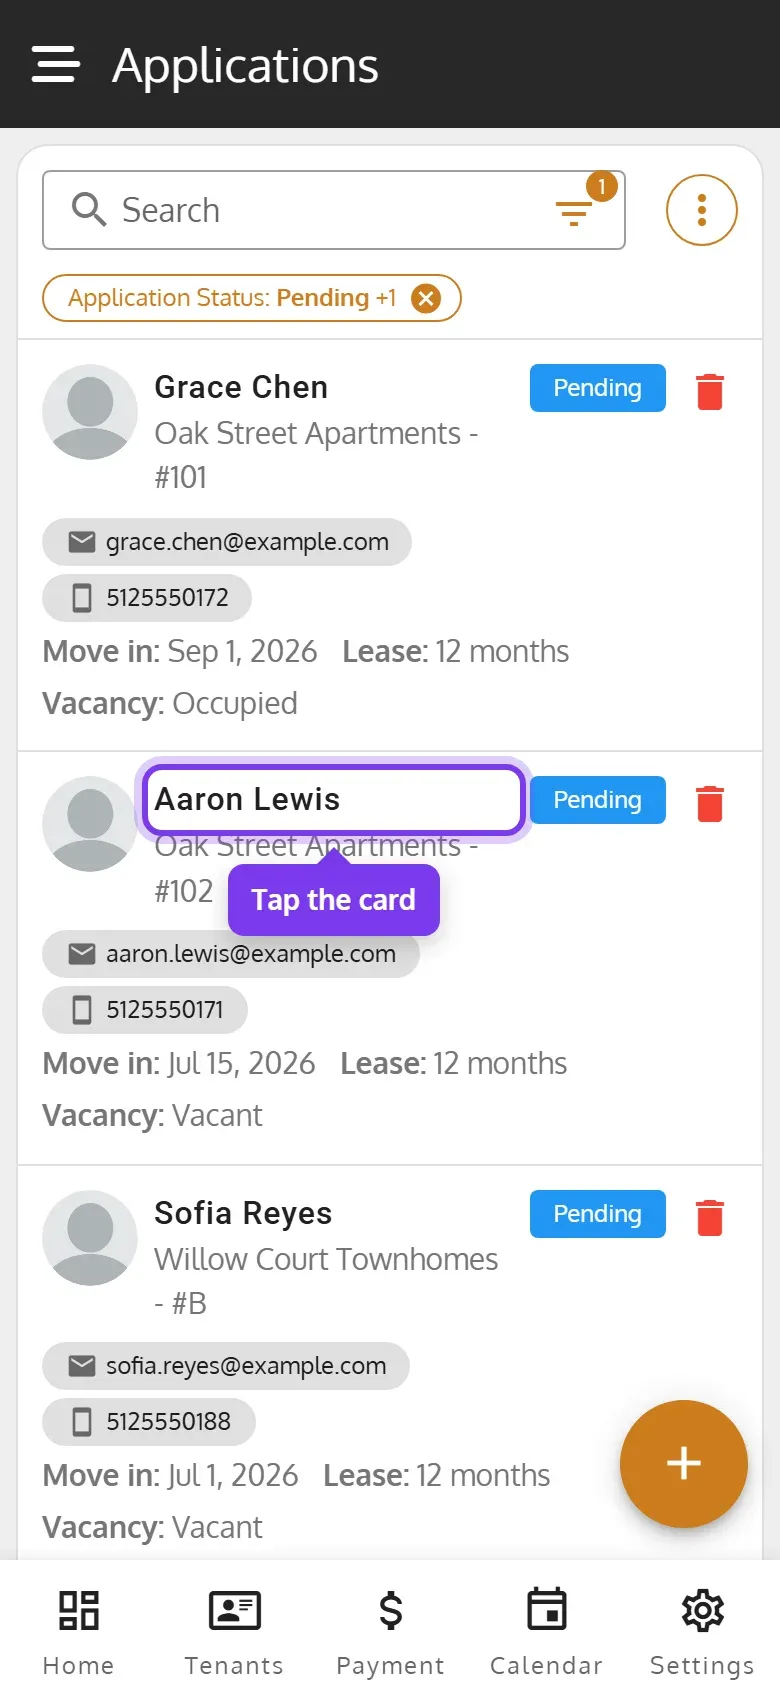
On the Applications page, tap the application’s card.
-
Change what you need on Application Details or Primary Applicant, then tap Save.
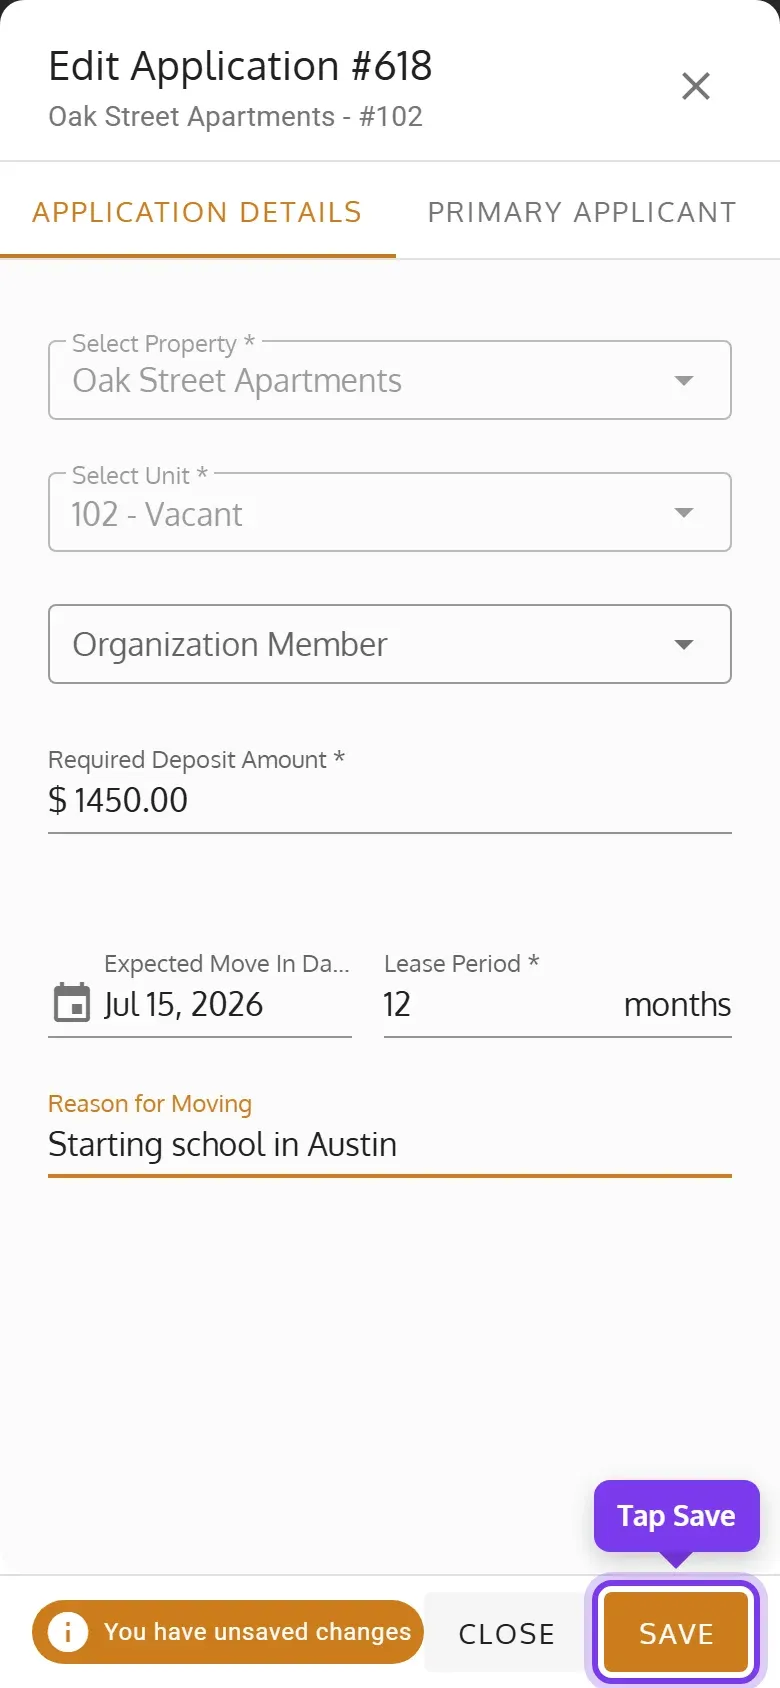
Save is greyed out until something changes. The application’s other tabs save on their own.
Primary Applicant
Section titled “Primary Applicant”-
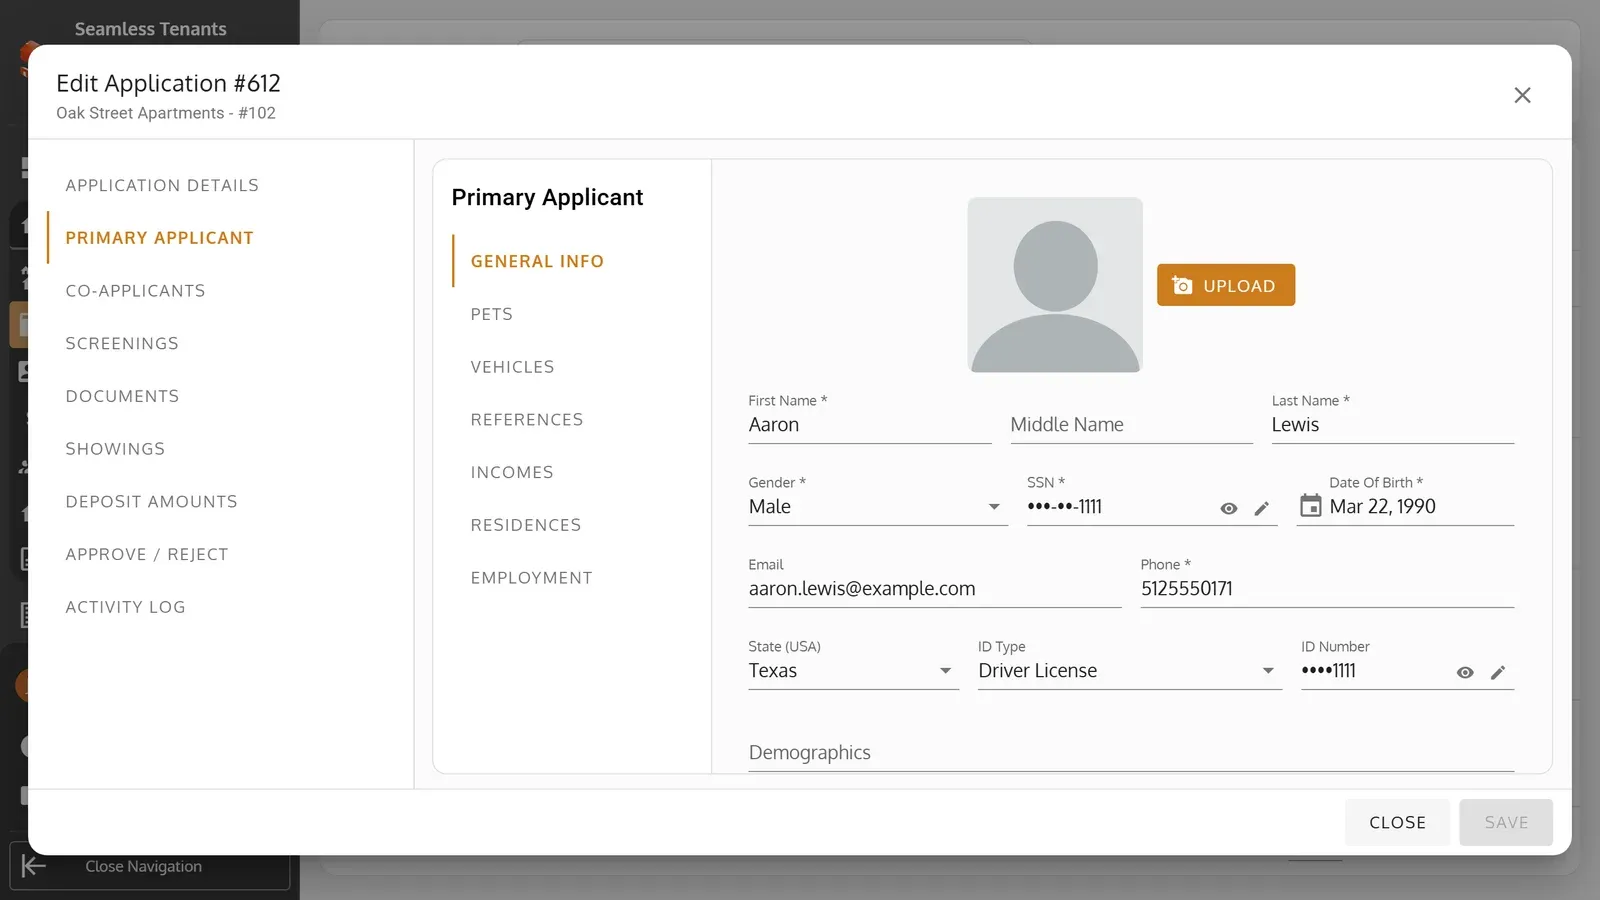
Click Primary Applicant. General Info has their details, and the tabs beside it have their pets, vehicles, references, incomes, residences and employment.
-
Tap Primary Applicant. General Info has their details, and the tabs beside it have their pets, vehicles, references, incomes, residences and employment.
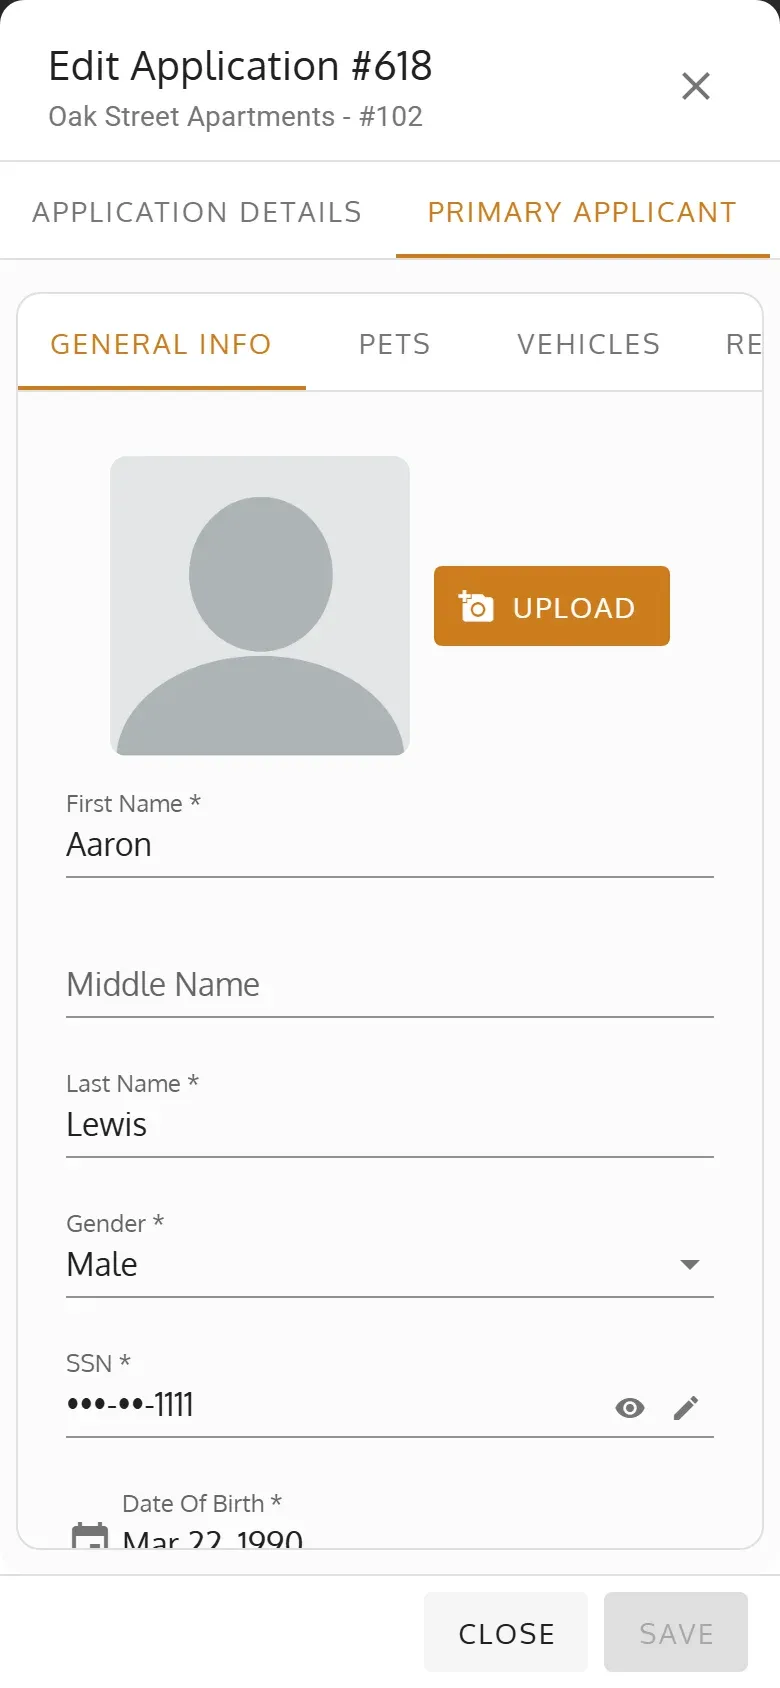
- A saved SSN and ID number show only their last digits. To replace one, click or tap the pencil beside it. If your role allows it, the eye beside it shows the whole number for 30 seconds, and that’s noted in the activity log.
- To add or change the applicant’s photo, click or tap Upload above their details, choose a picture, then Upload. Remove takes it off.
- Rows you add on these tabs are saved with the application’s Save.
An application waiting for its applicant shows Email Application Form and Add Primary Applicant here instead. See Send the Application Form.
Co-Applicants
Section titled “Co-Applicants”-
Click Co-Applicants, then Add Co-Applicant. Enter their details and click Save. To change or remove a co-applicant, use their pencil or trash can.
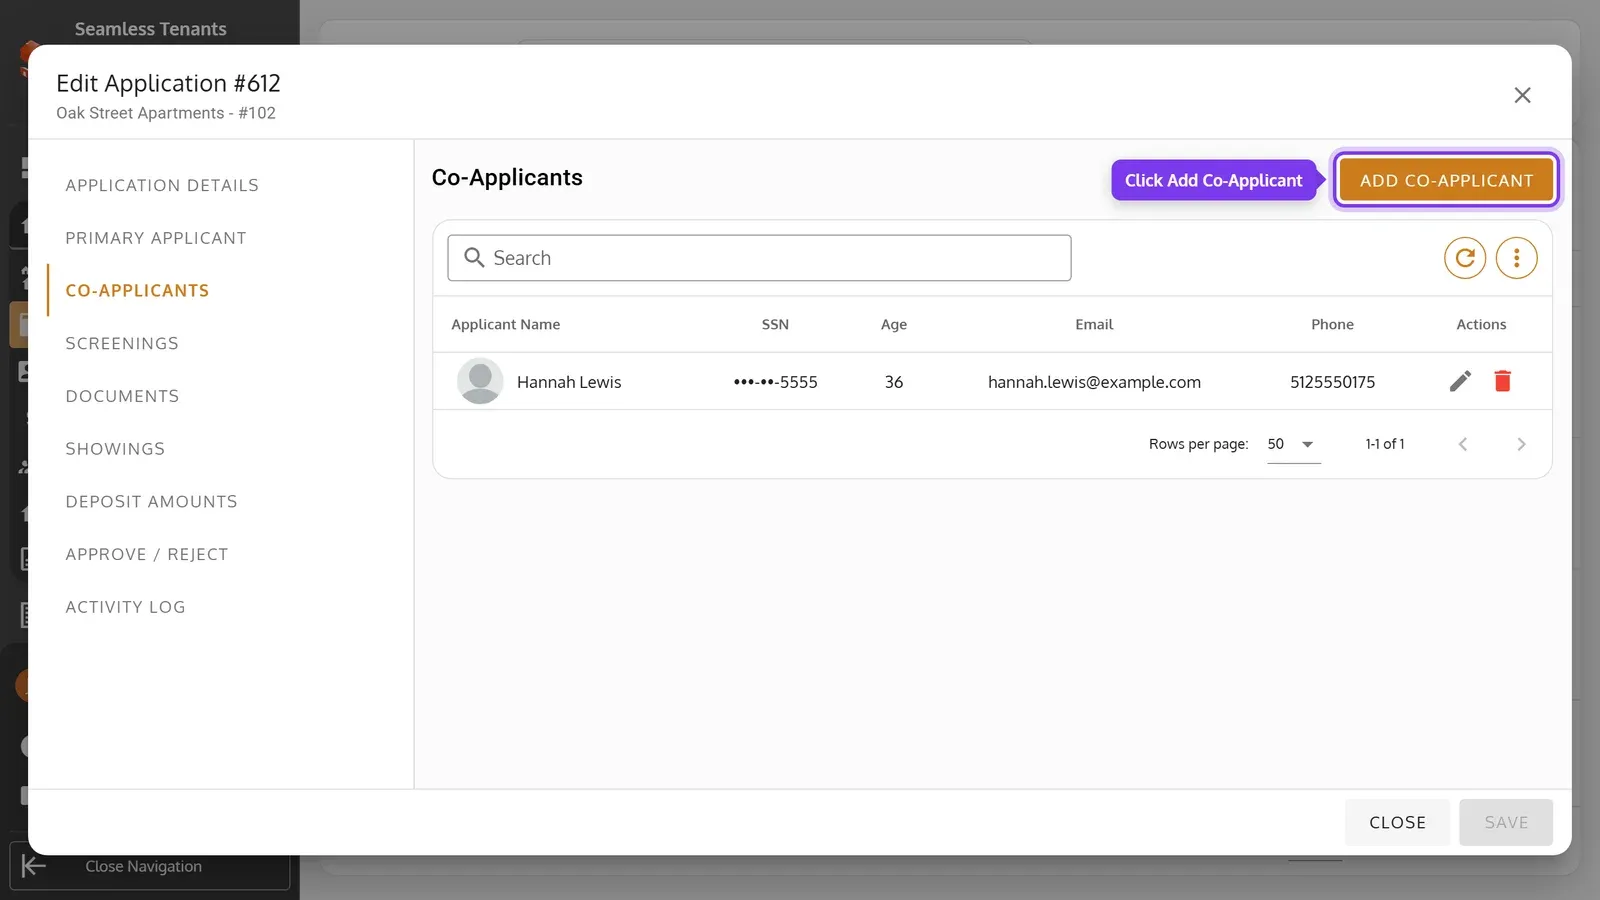
-
Swipe the application’s tabs and tap Co-Applicants, then Add Co-Applicant. Enter their details and tap Save. To change a co-applicant, tap their card. To remove them, tap its trash can.
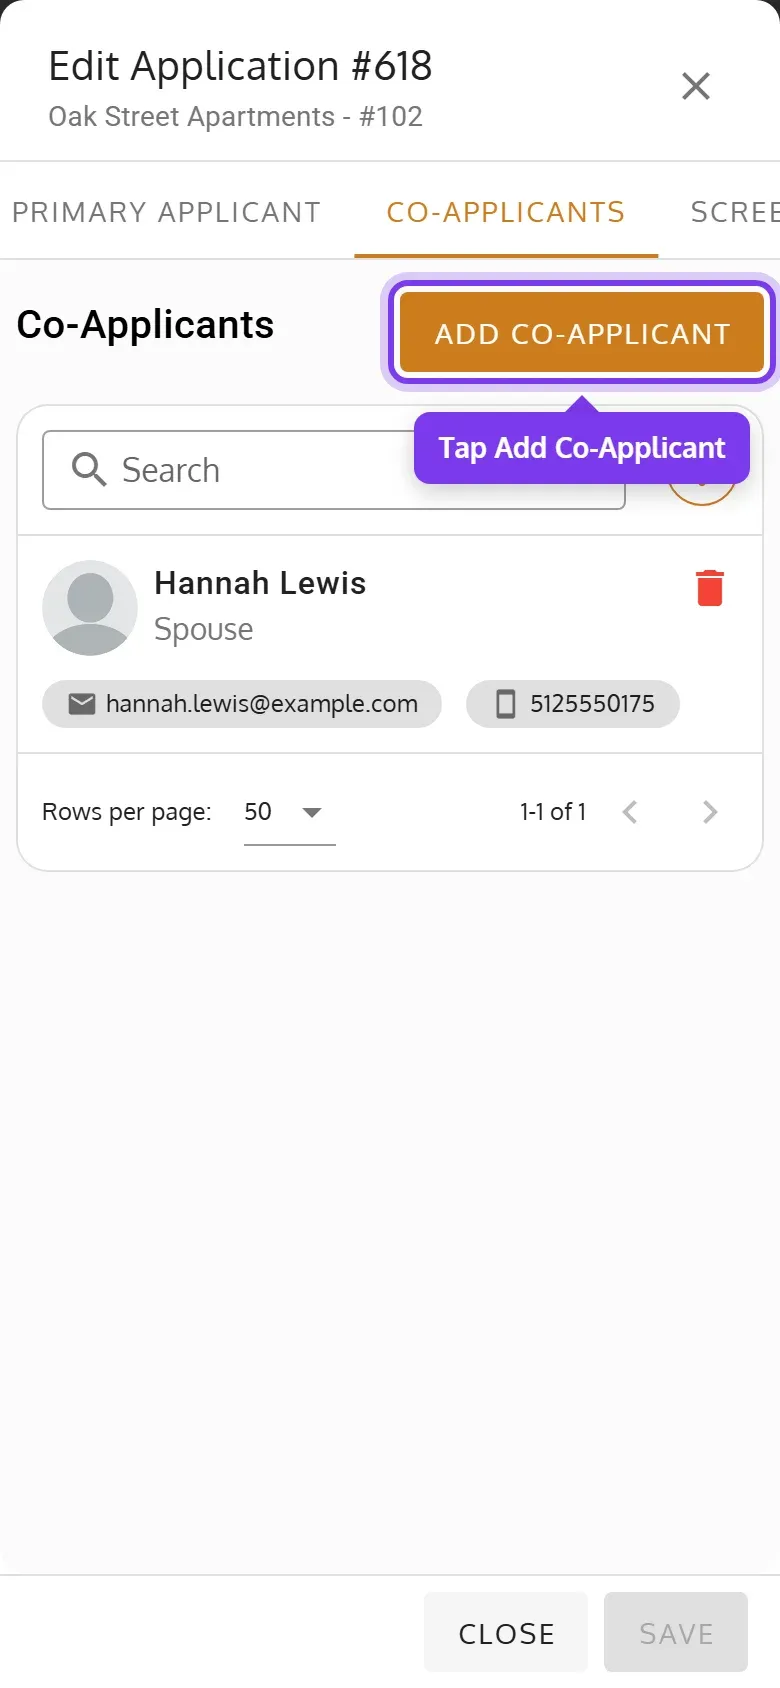
Adding a co-applicant emails them and the primary applicant, if they have an email.
Screenings
Section titled “Screenings”Screenings are your own record of each applicant’s checks. Seamless Tenants doesn’t run them for you.
-
Click Screenings, then Add Screening. Pick the applicant, enter the Screener Name, and click Create.
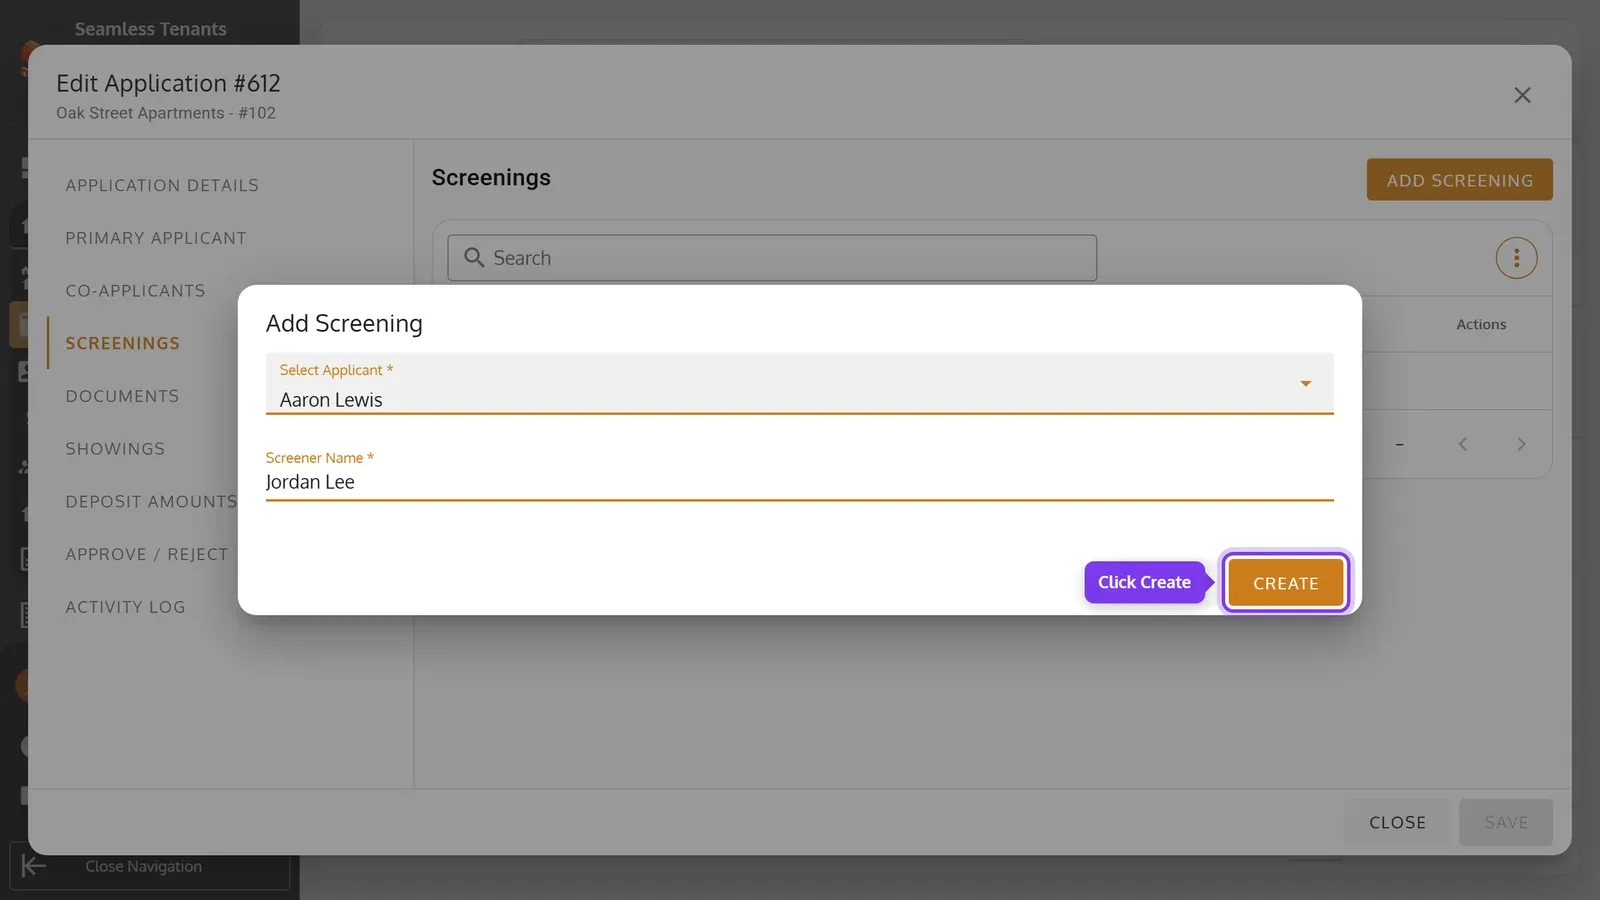
-
Enter the Screening Rating as a number, and the Screening Report. You can also add documents here. Then click Save.
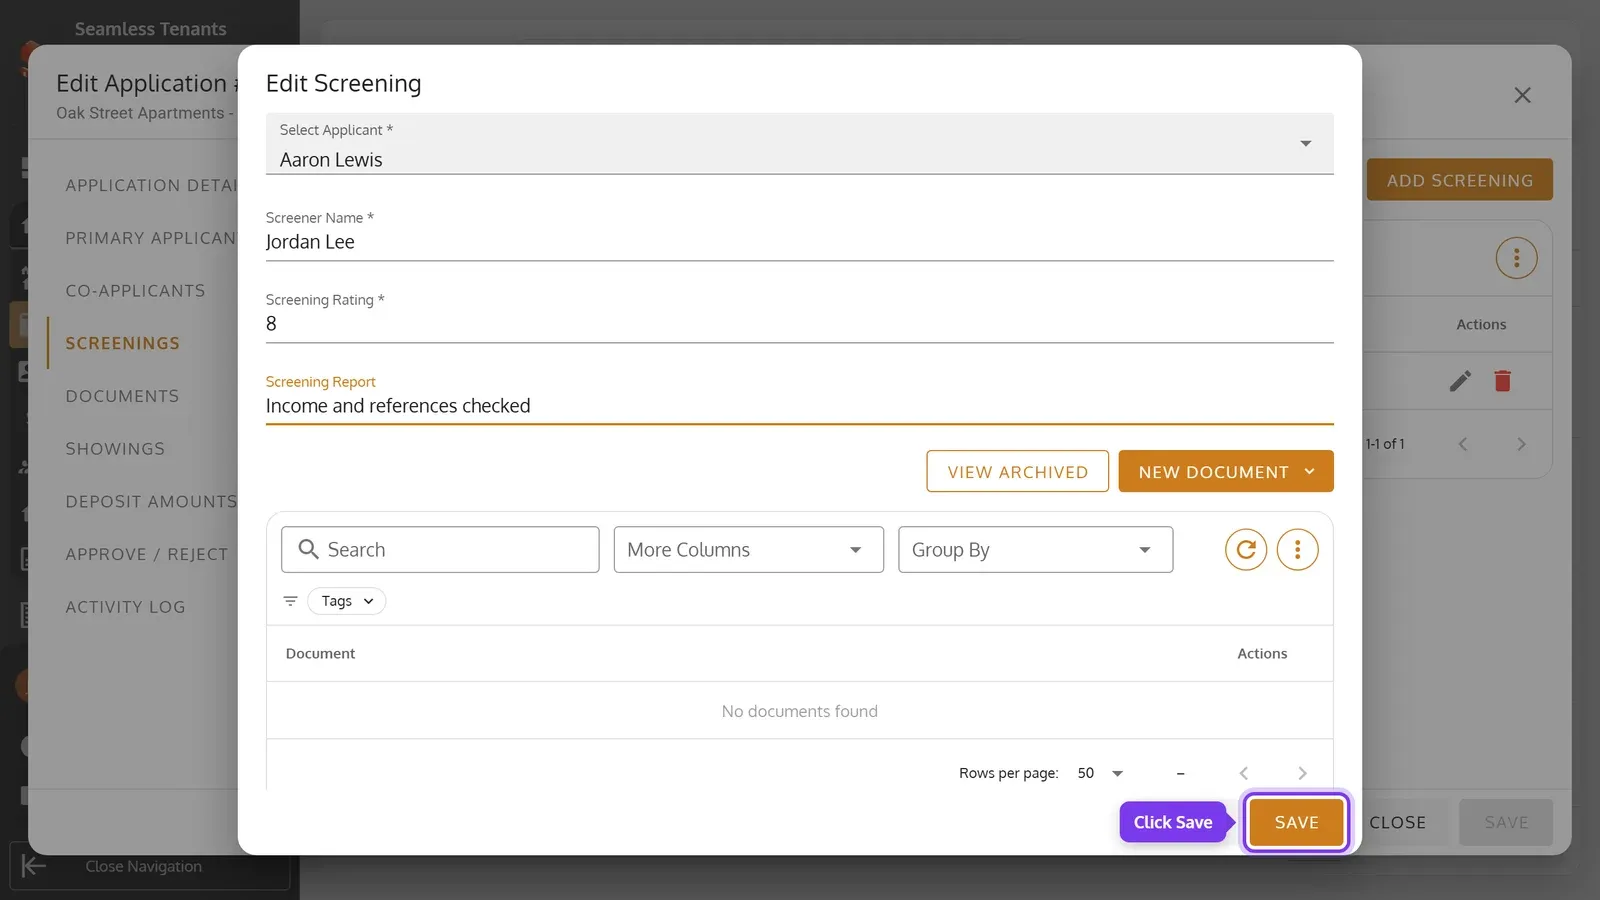
-
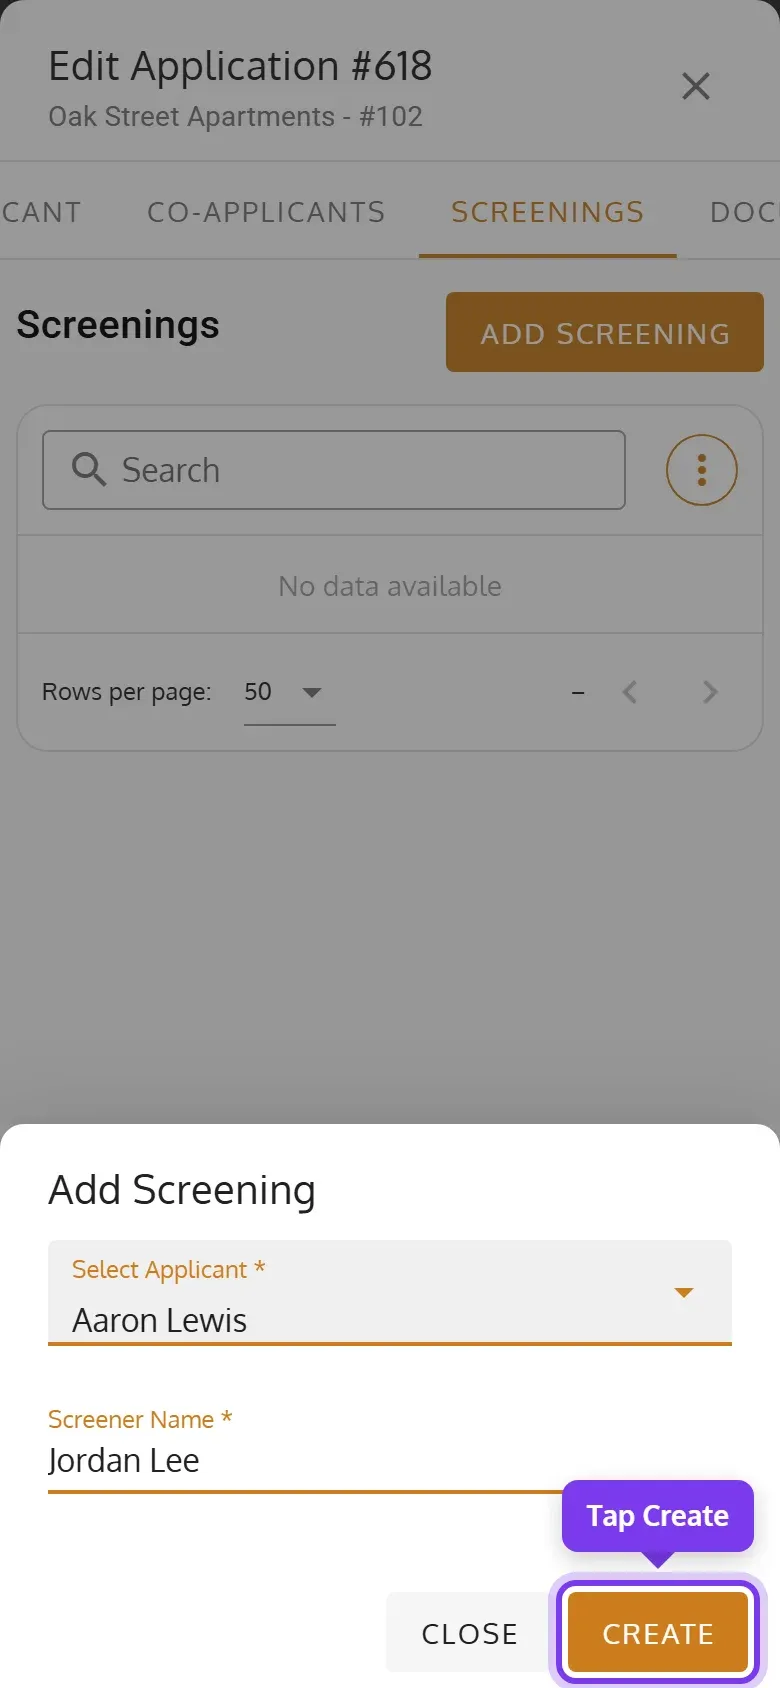
Swipe the application’s tabs and tap Screenings, then Add Screening. Pick the applicant, enter the Screener Name, and tap Create.
-
Enter the Screening Rating as a number, and the Screening Report. You can also add documents here. Then tap Save.
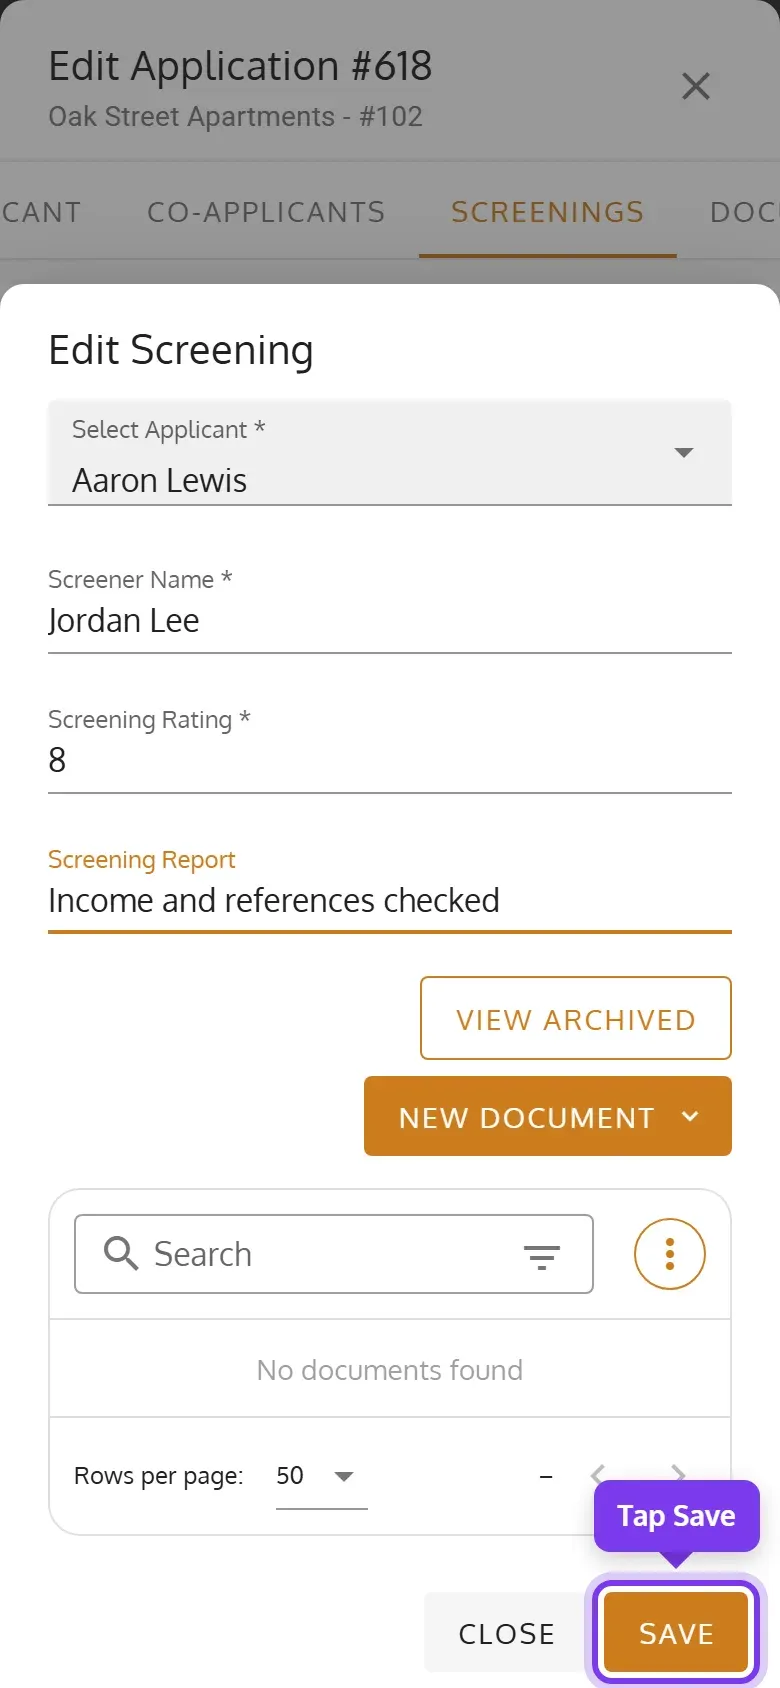
A new screening’s rating starts at 0. To change or remove a screening, use its pencil or trash can.
Documents
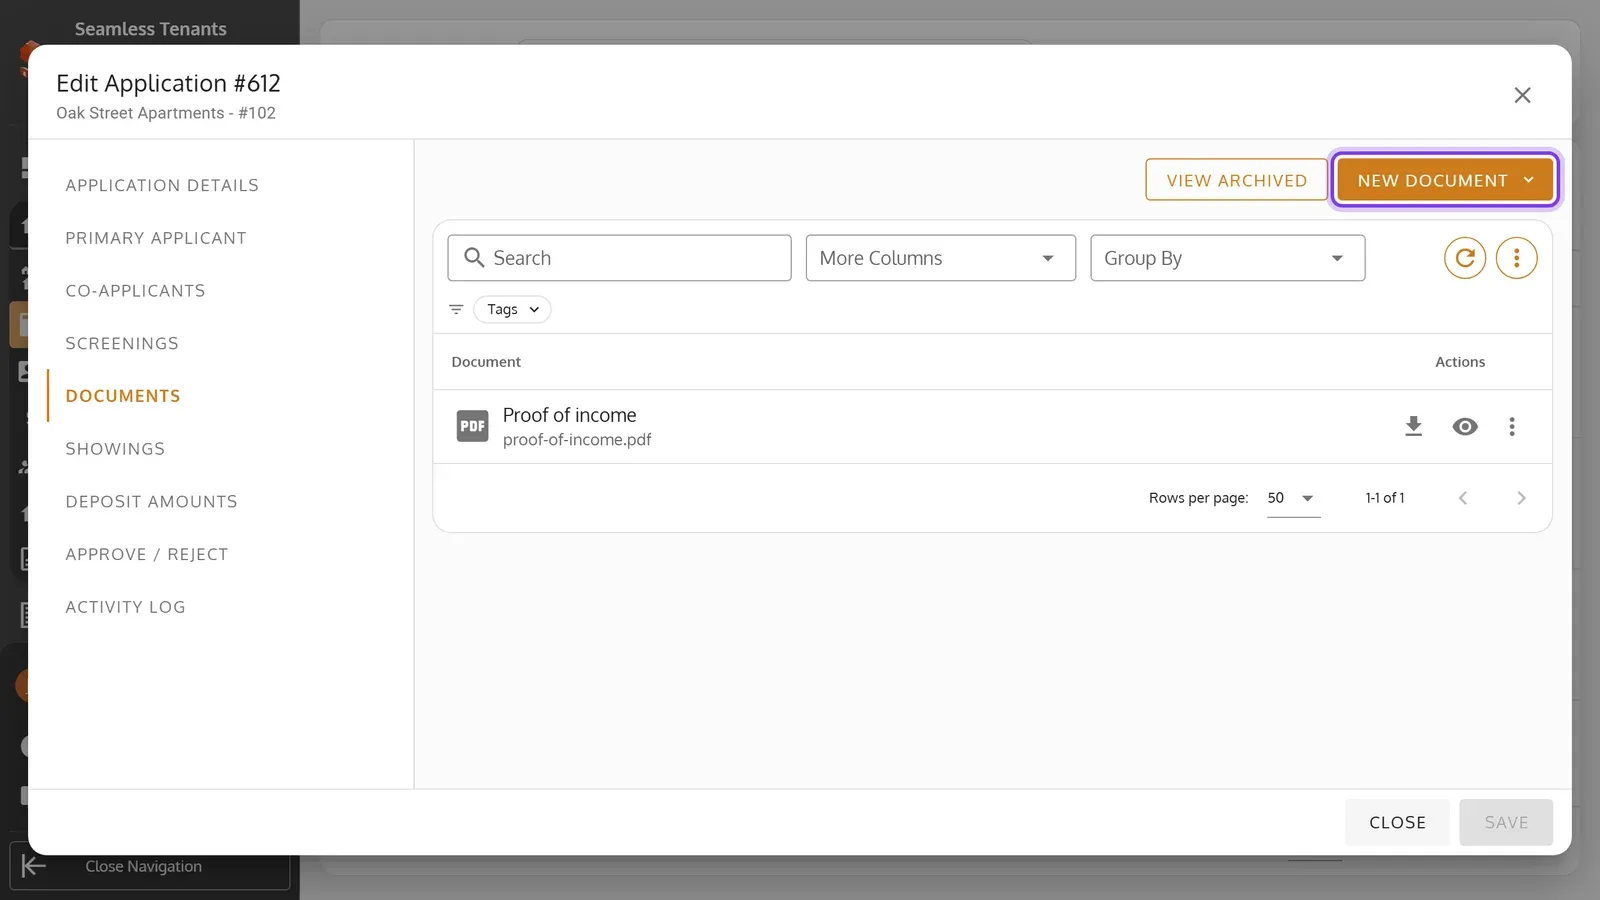
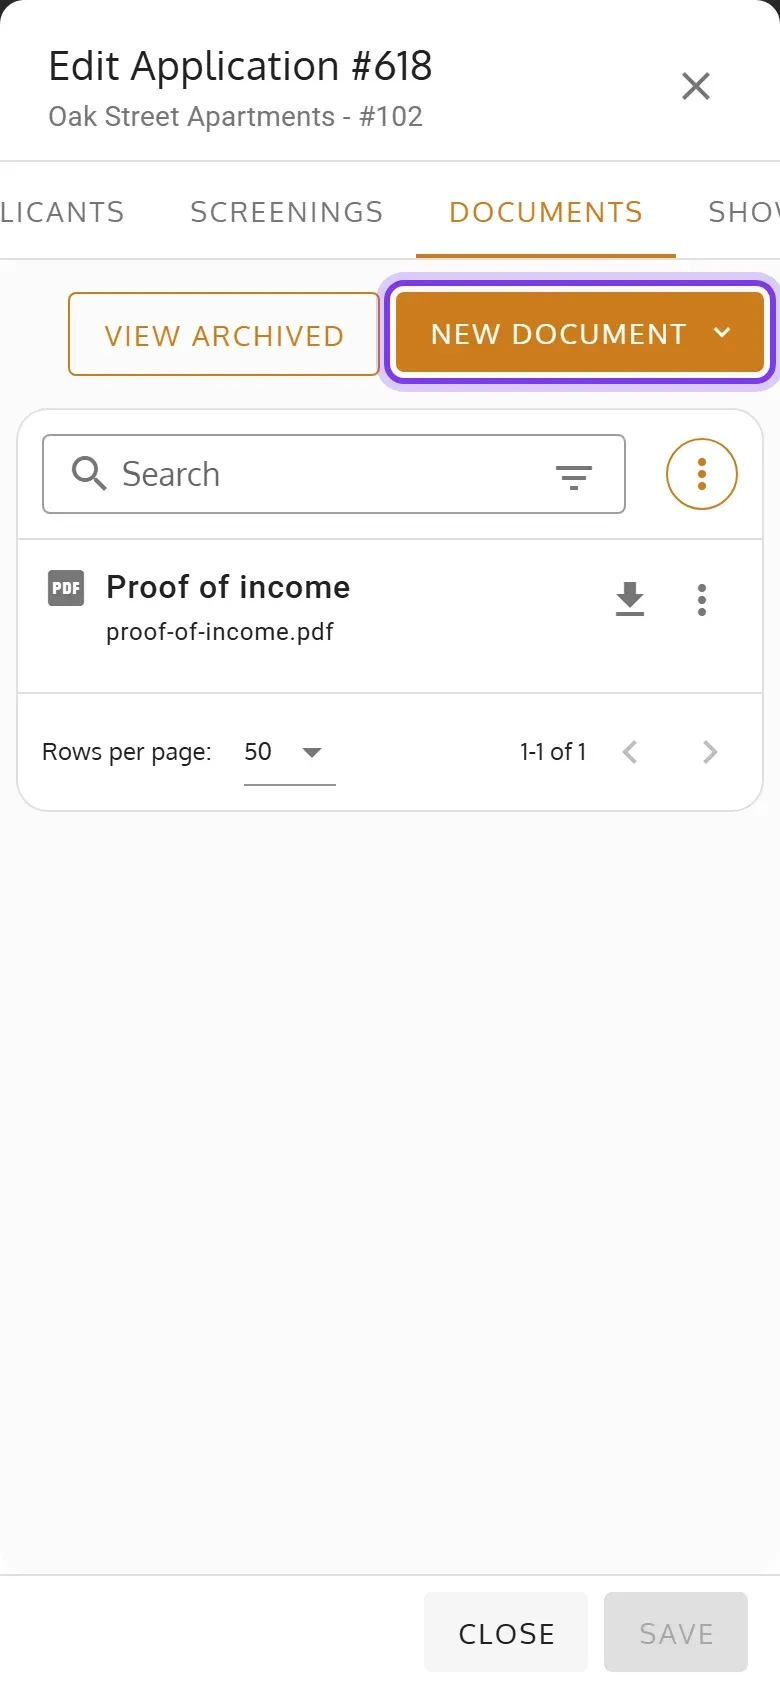
Section titled “Documents”Documents holds the application’s files. New Document adds one, with Upload Document or Fill & Sign Document. When the application is approved, its documents also show on the tenant’s Documents tab.
Showings
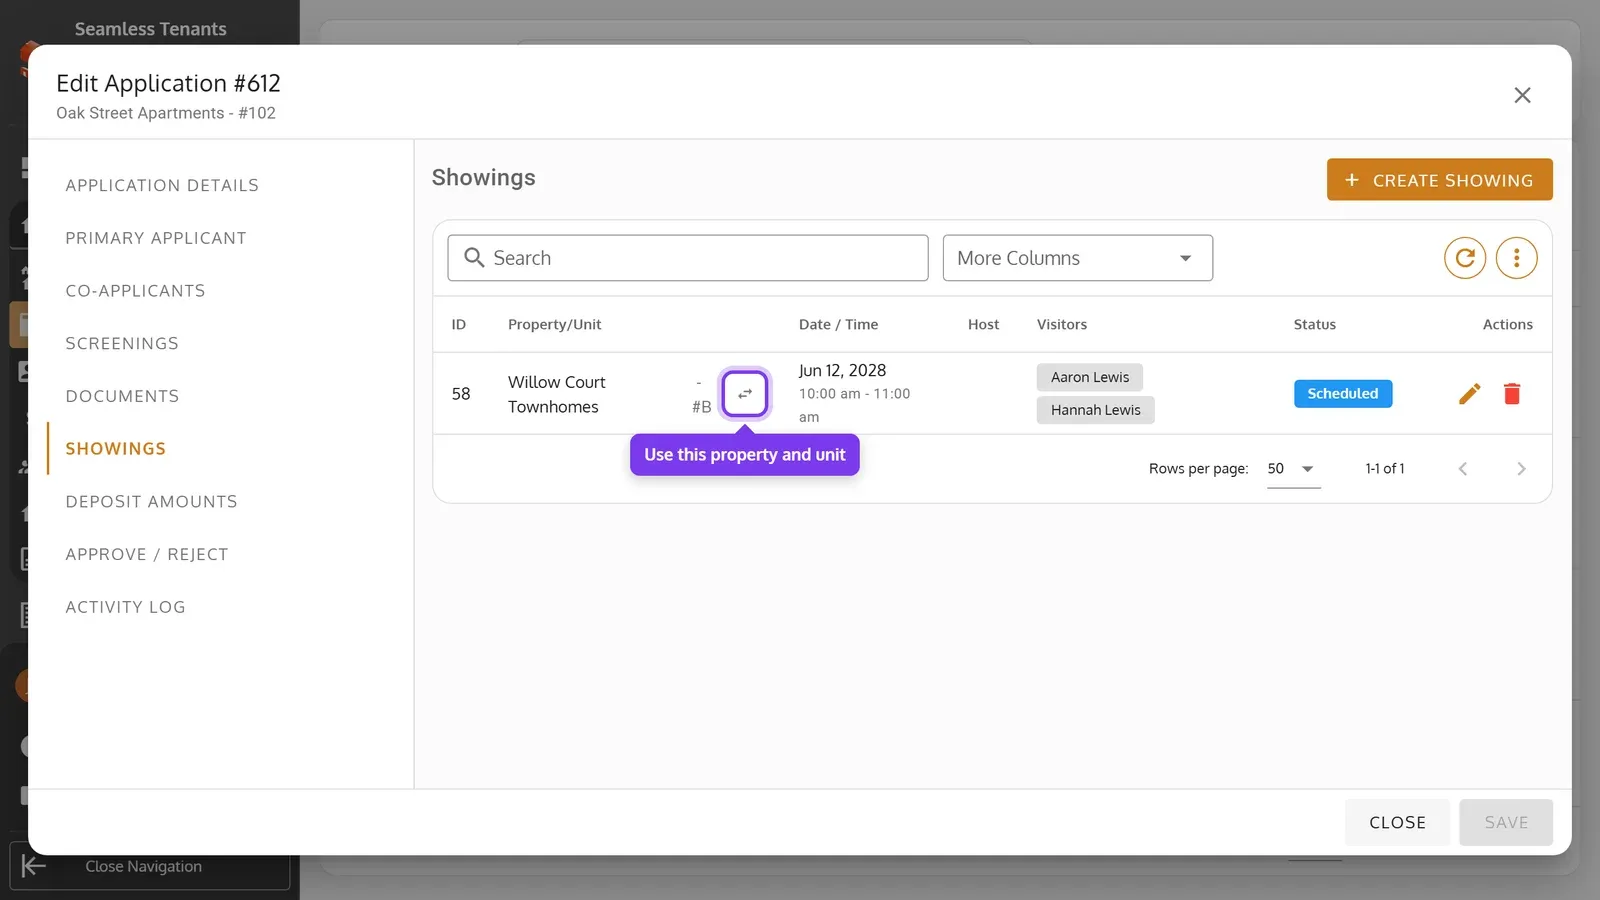
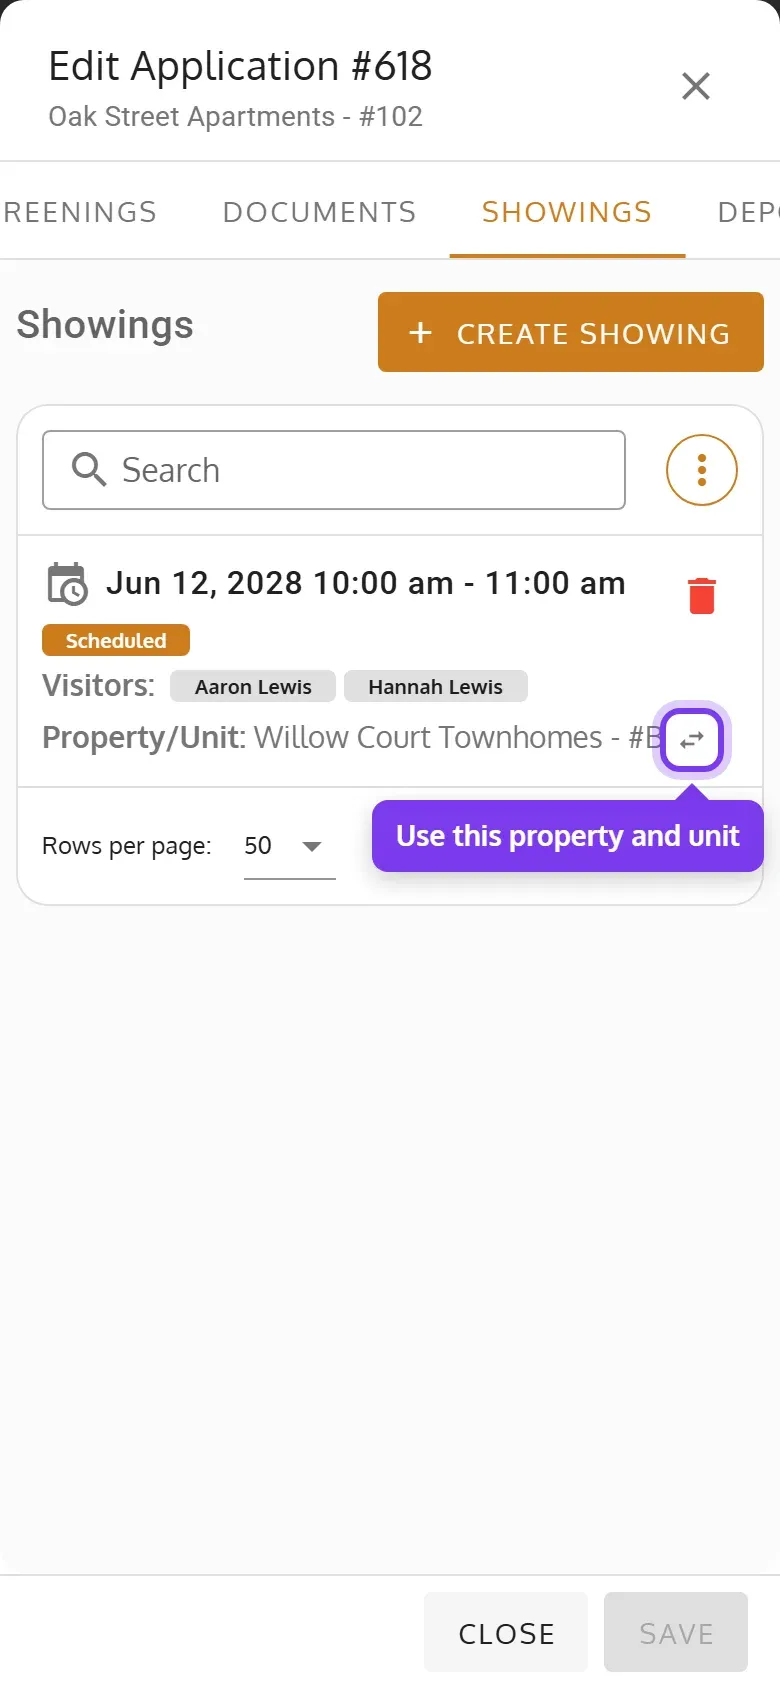
Section titled “Showings”Showings lists the showings linked to the application, and Create Showing adds one for its unit. Create Showings has the details.
If a linked showing is moved to another unit, it gets a button with two arrows, Use this property and unit for the application. It’s the only way to change an application’s property and unit. Click or tap it, then Yes.
Deposit Amounts
Section titled “Deposit Amounts”Deposit Amounts is your record of what the applicant has paid. Nothing is charged here, and the applicant can’t pay it online.
-
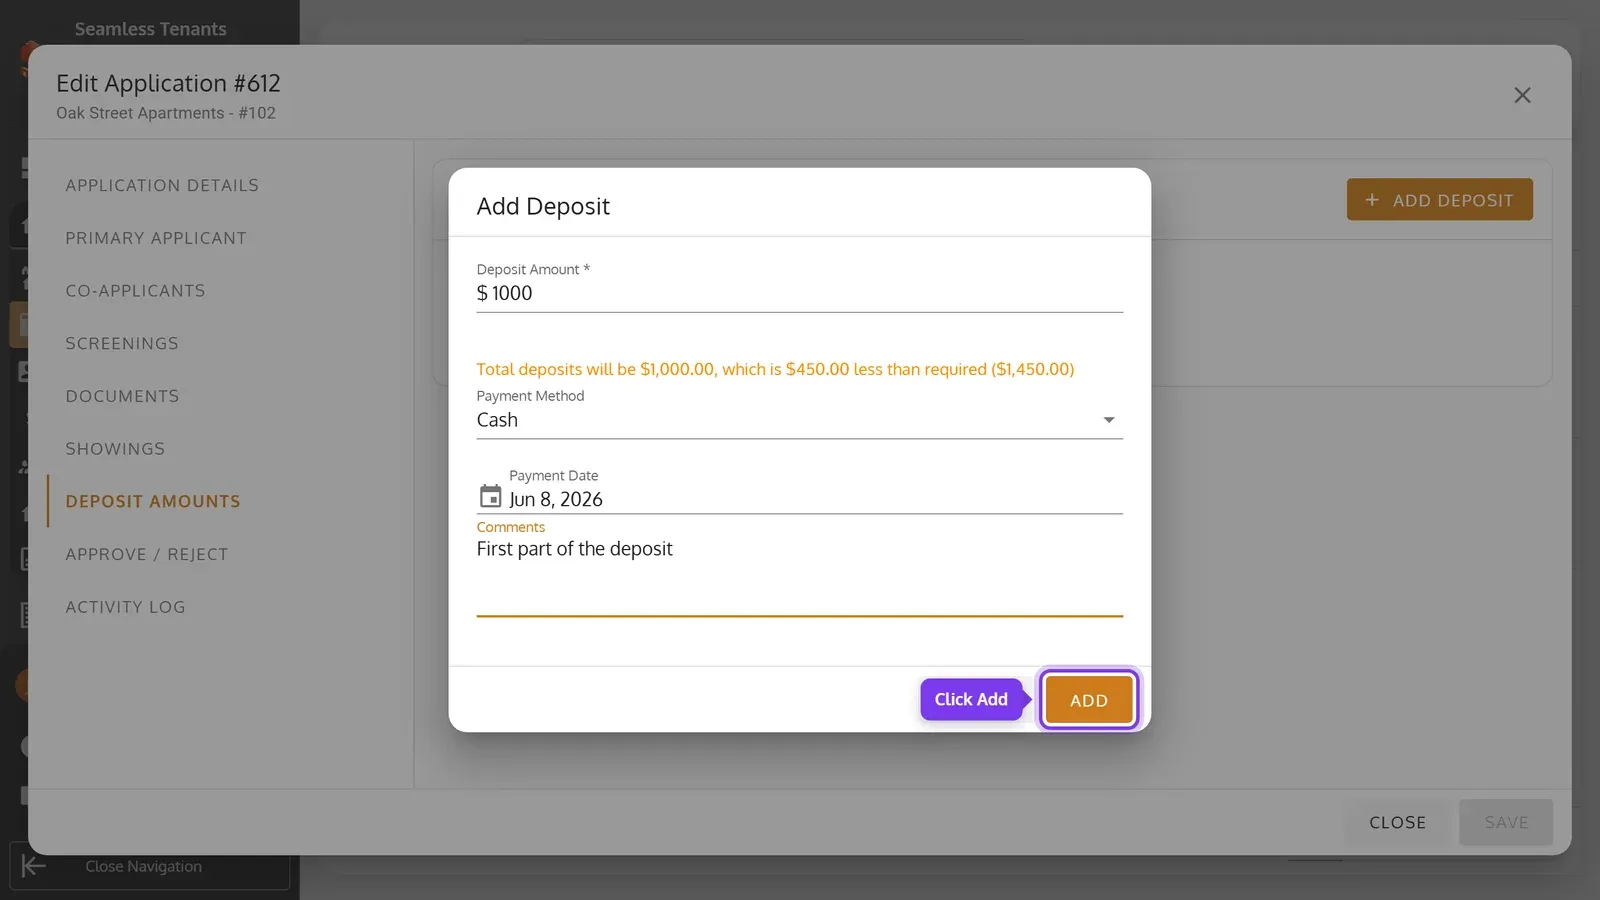
Click Deposit Amounts, then Add Deposit. Enter the Deposit Amount, the Payment Method, the Payment Date and any Comments. It warns you if the total would be less or more than required. Then click Add.
-
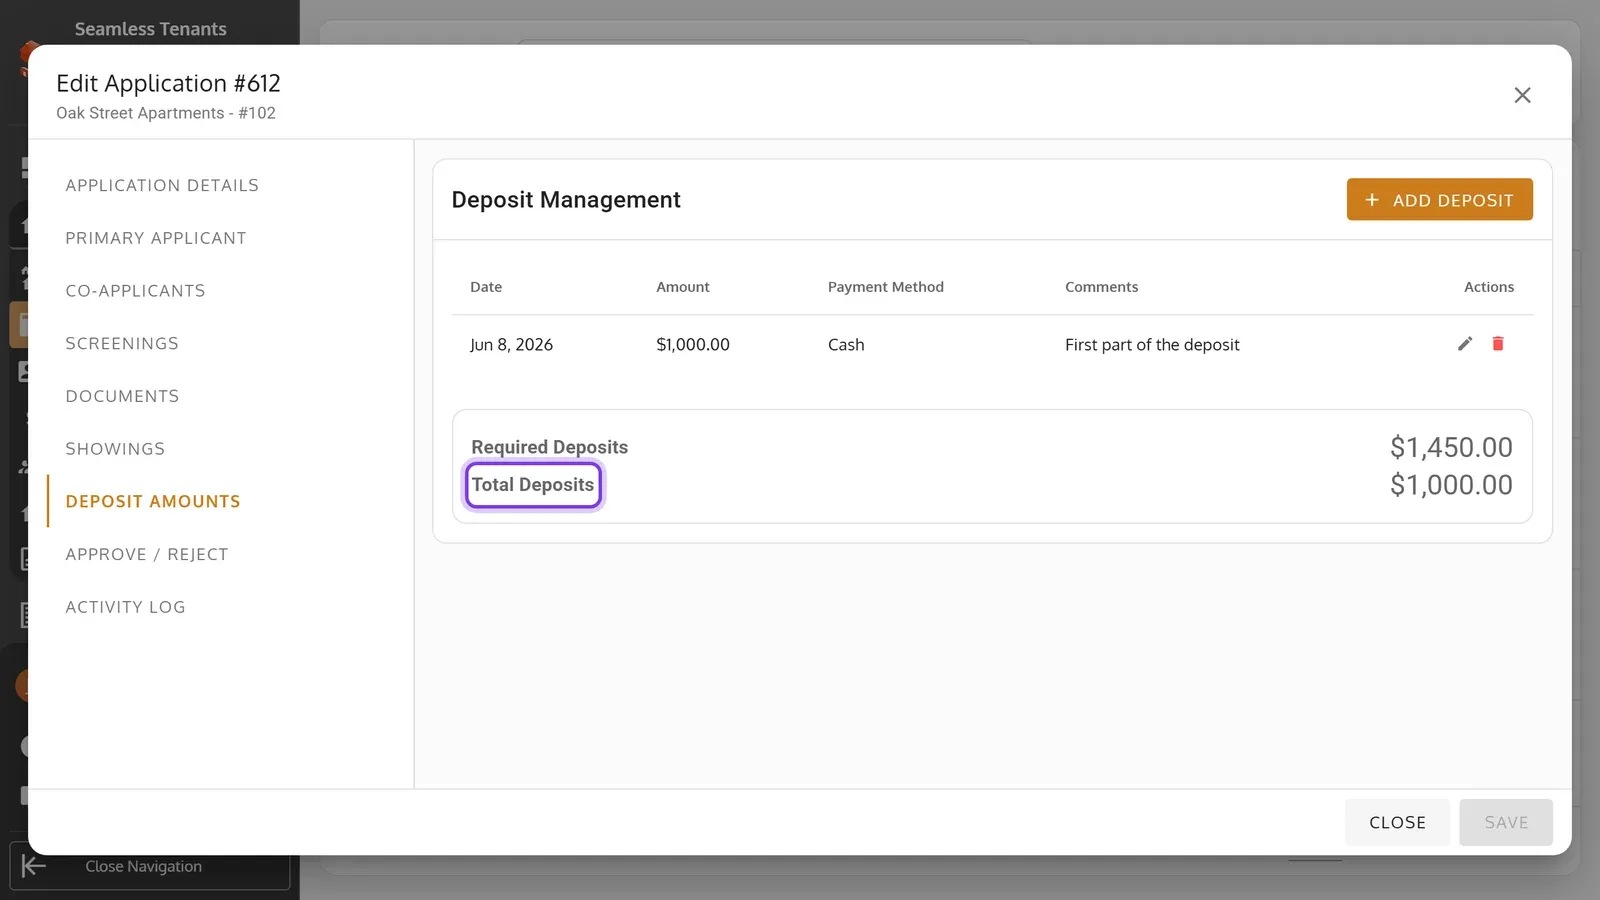
The deposit is listed, with Required Deposits and Total Deposits below. To change or remove one, use its pencil or trash can.
-
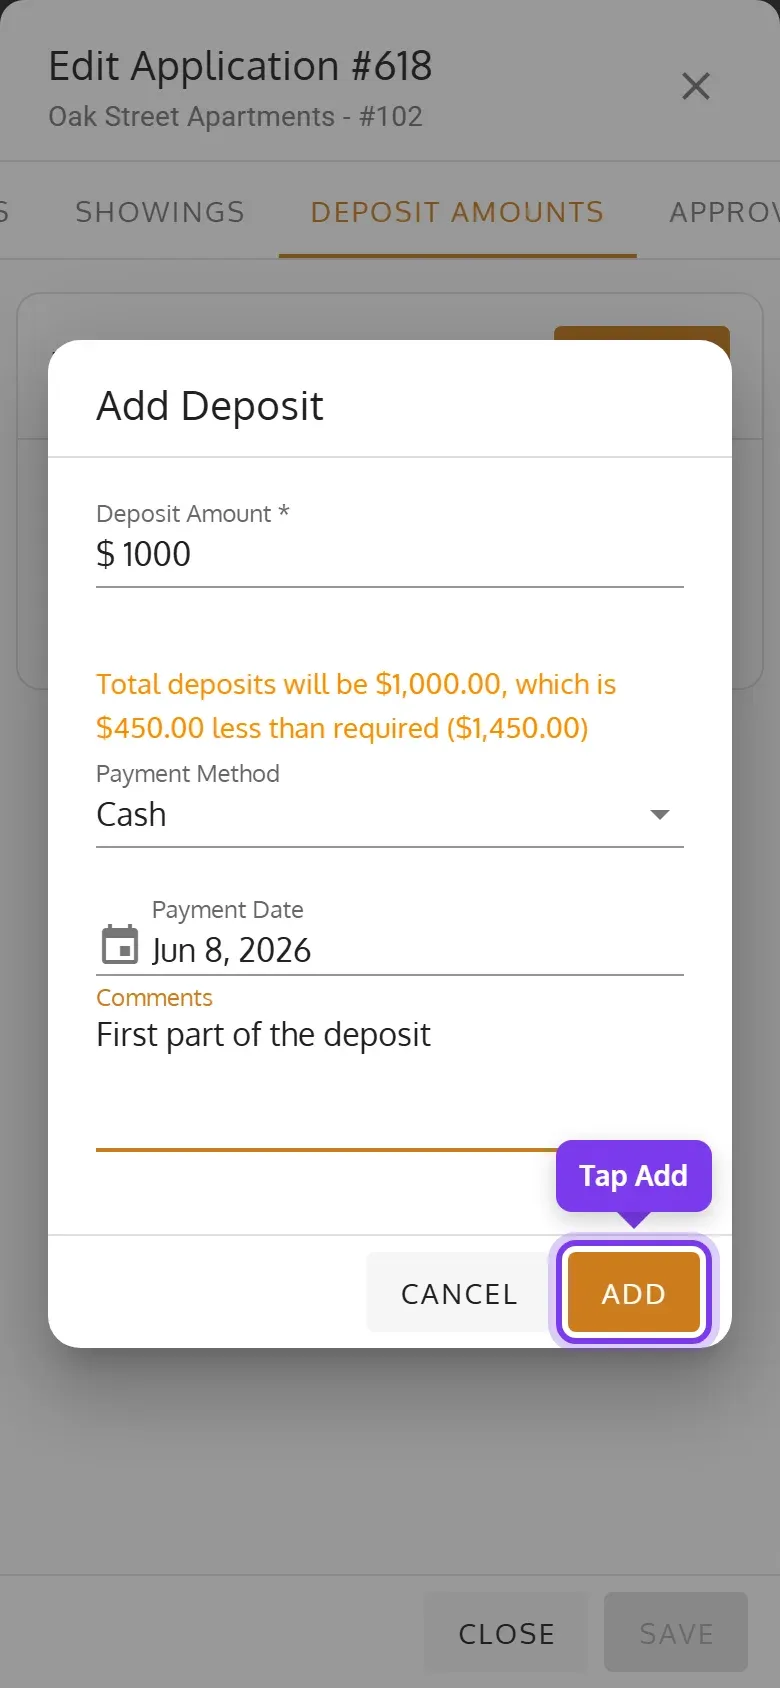
Swipe the application’s tabs and tap Deposit Amounts, then Add. Enter the Deposit Amount, the Payment Method, the Payment Date and any Comments. It warns you if the total would be less or more than required. Then tap Add.
-
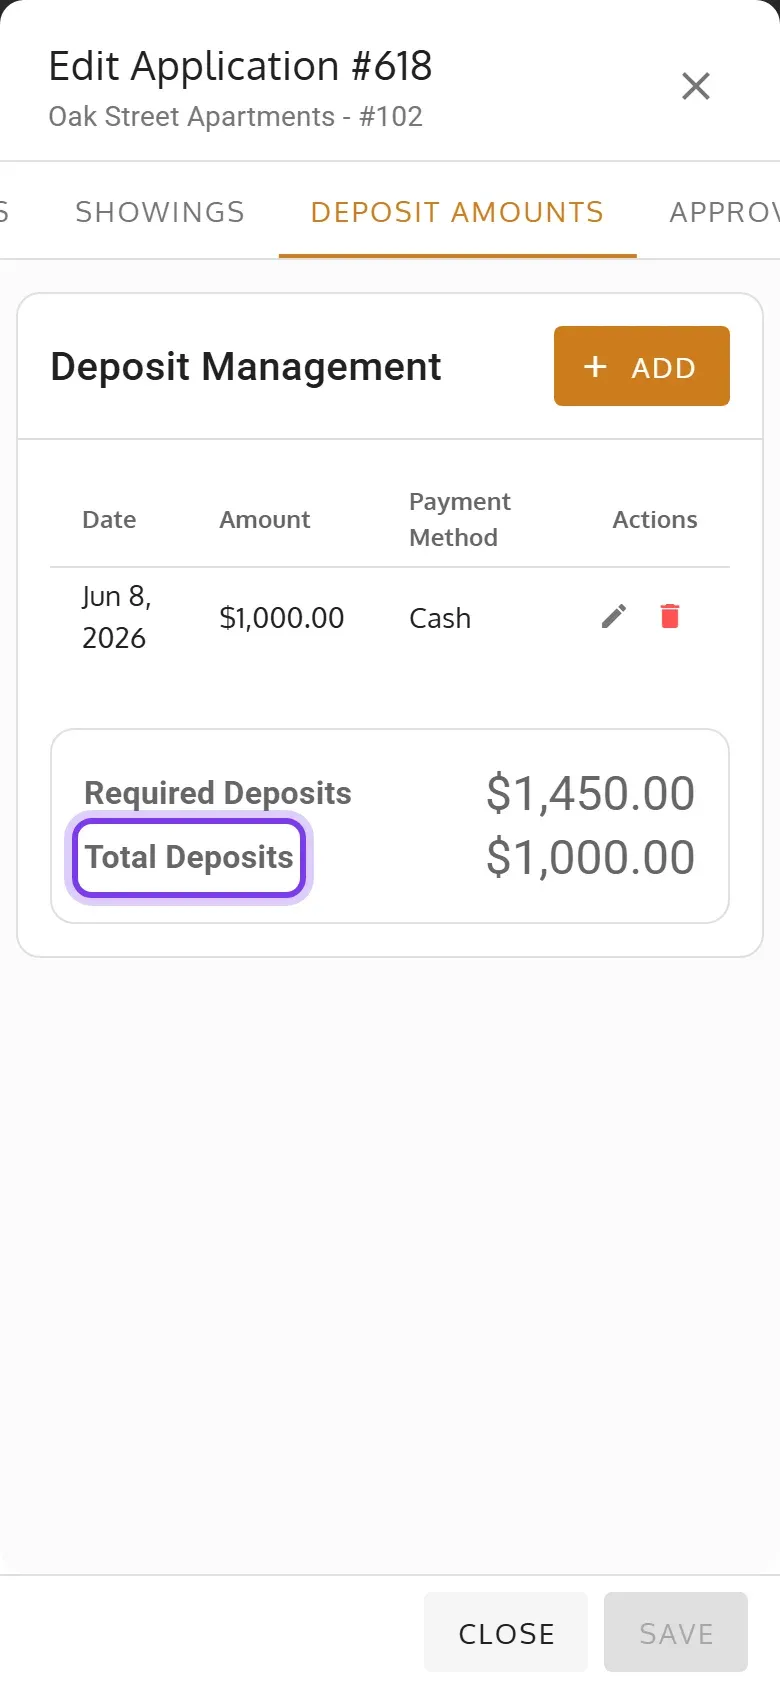
The deposit is listed, with Required Deposits and Total Deposits below. To change or remove one, use its pencil or trash can.
Activity Log
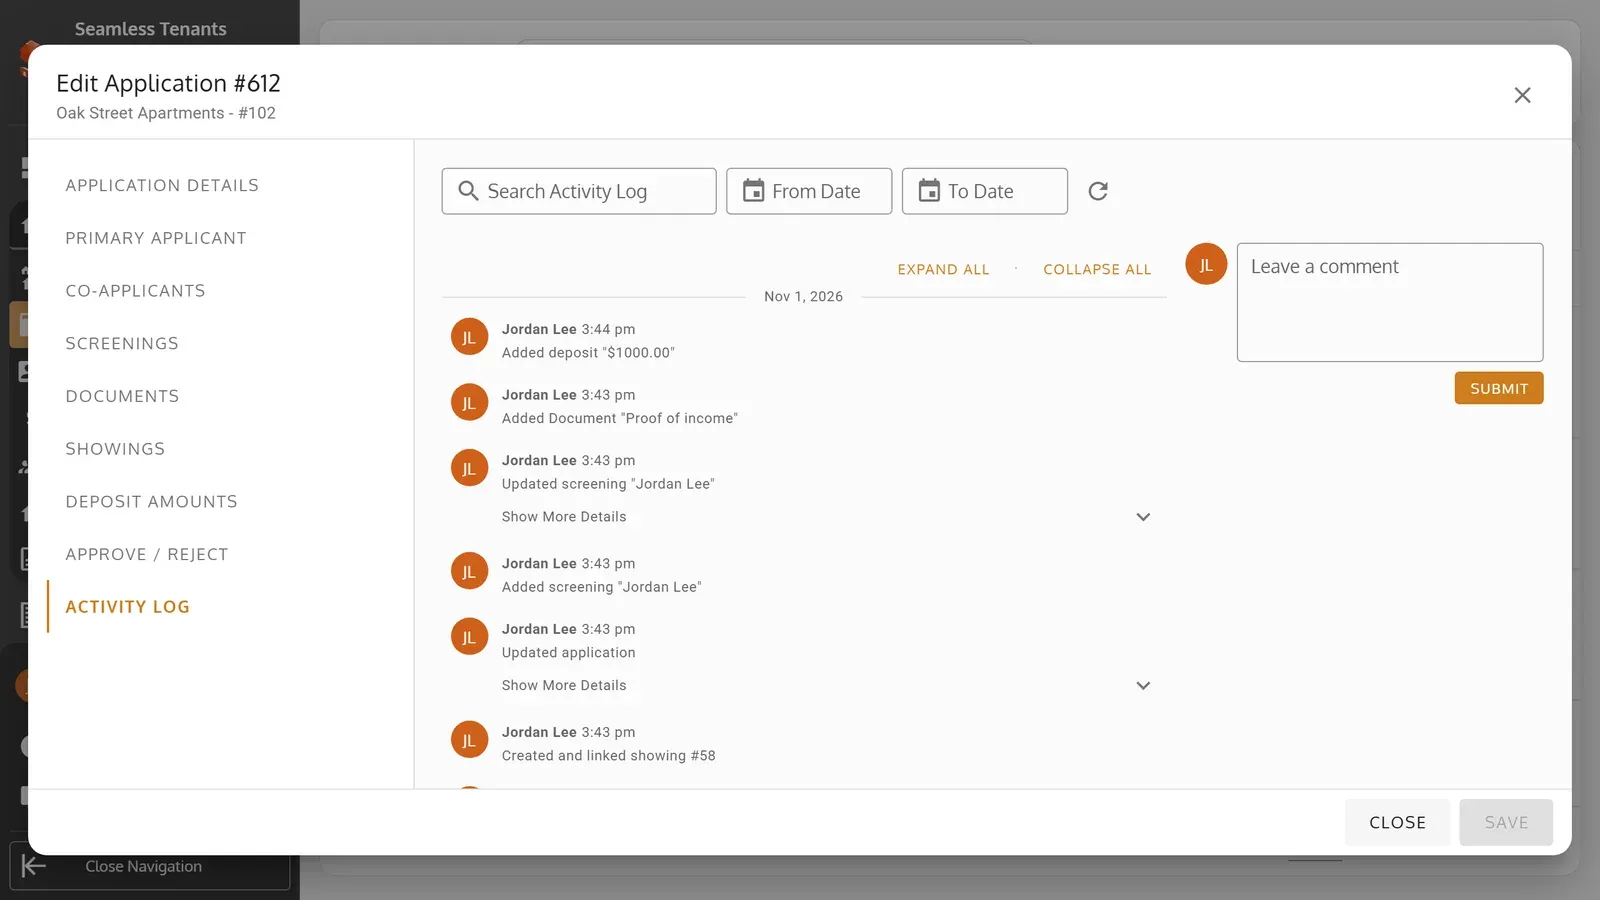
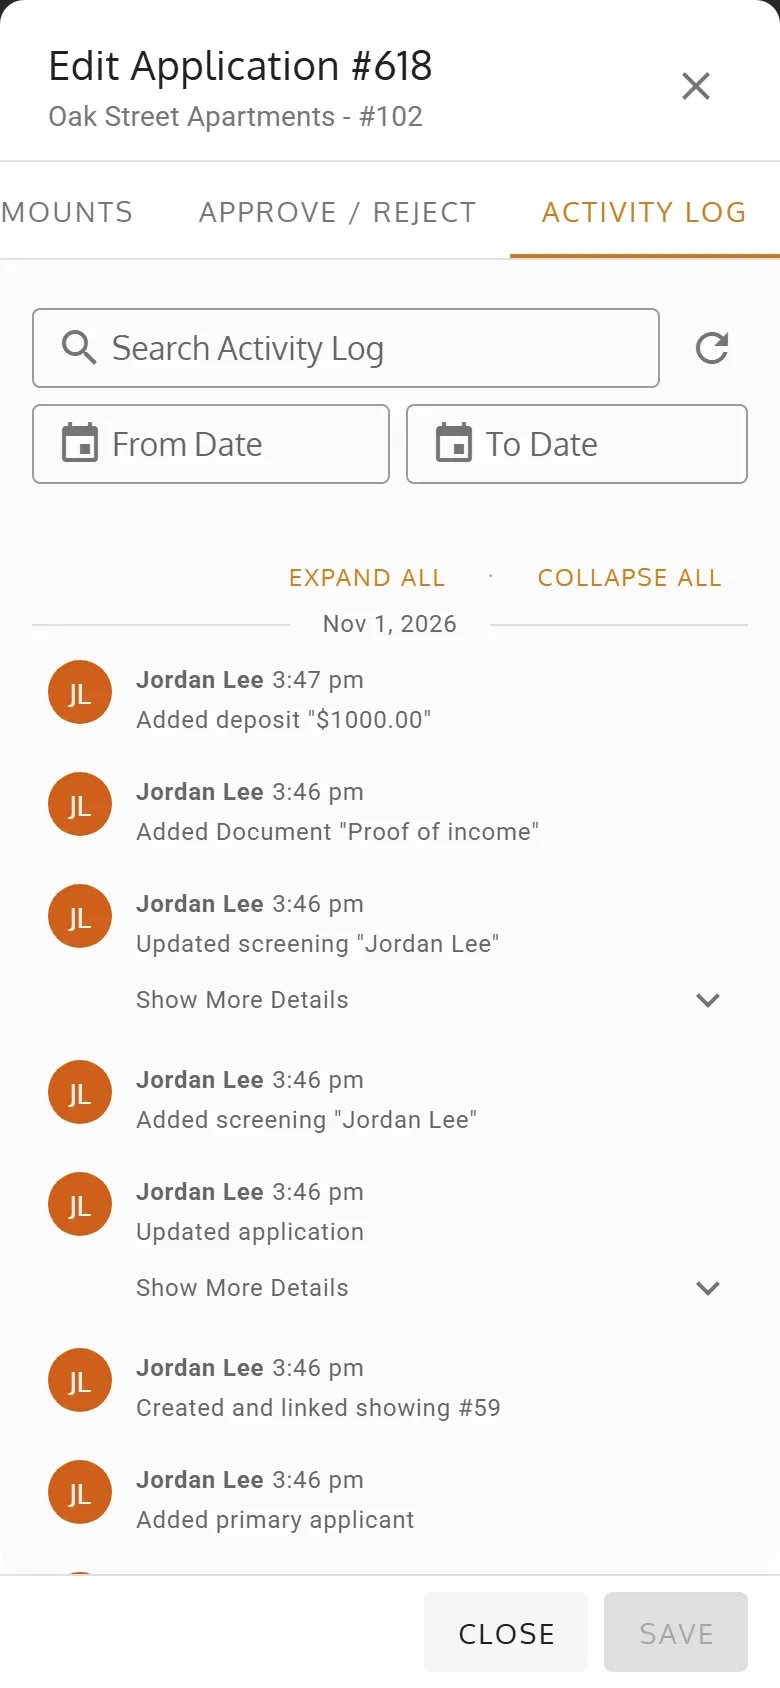
Section titled “Activity Log”If your plan includes it, Activity Log shows what’s changed on the application and when, such as deposits, showings and decisions. You can search it, and leave a comment.