
Property Photos and Documents
A property’s Gallery tab has its photos, and its Documents tab its files, such as the deed or the insurance certificate. Open the property from the Properties page to get to them.
Add photos
Section titled “Add photos”-
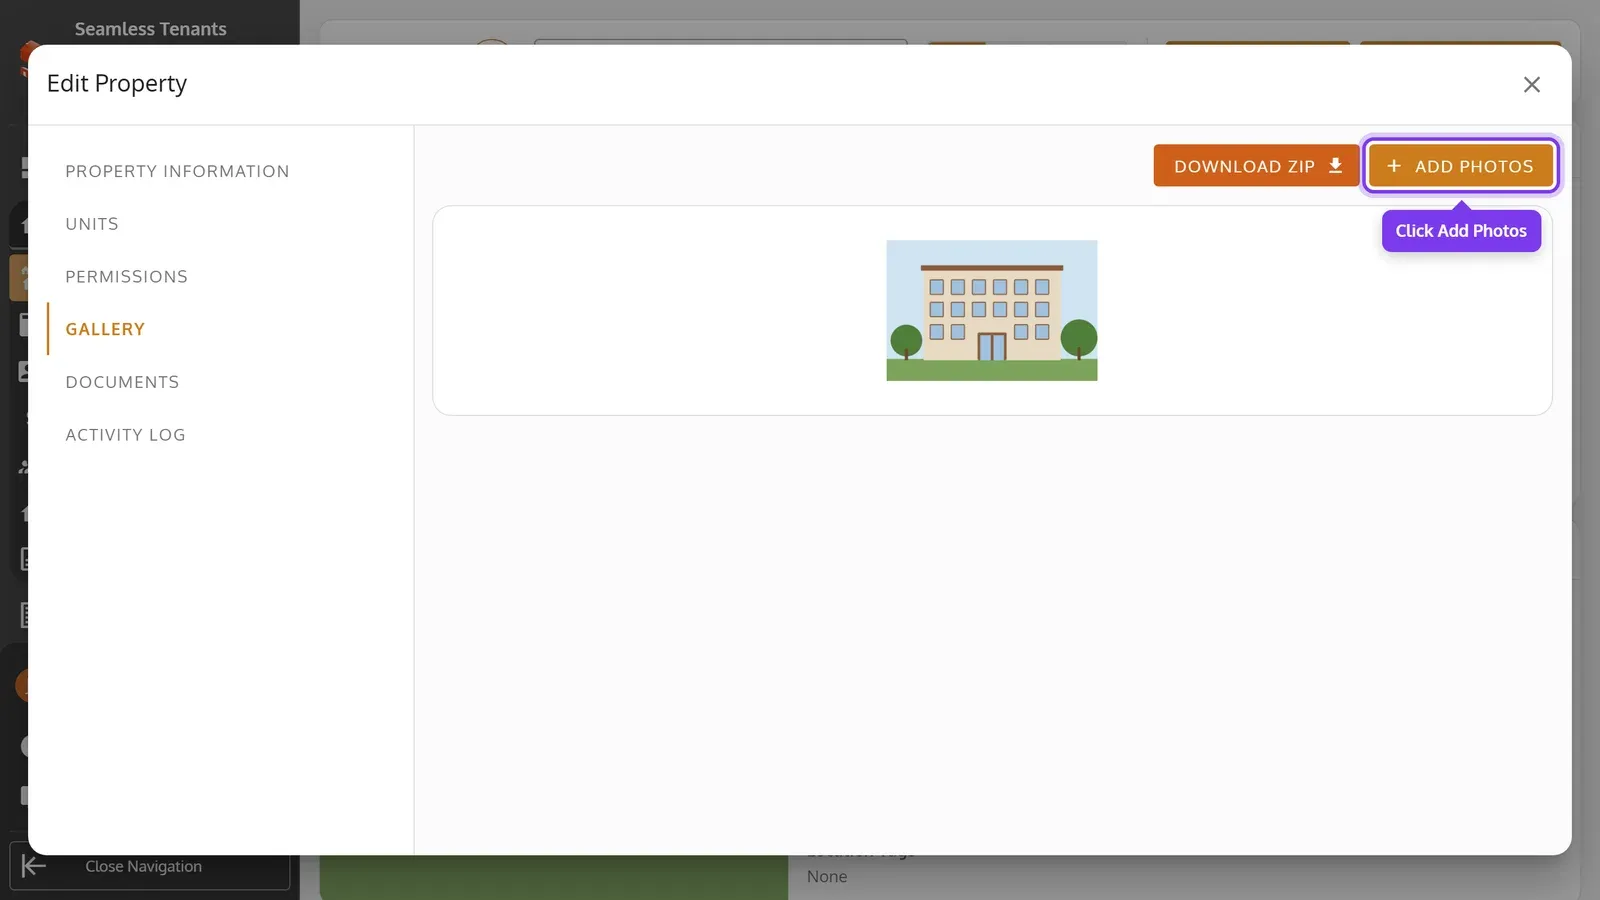
Open the property’s Gallery tab and click Add Photos.
-
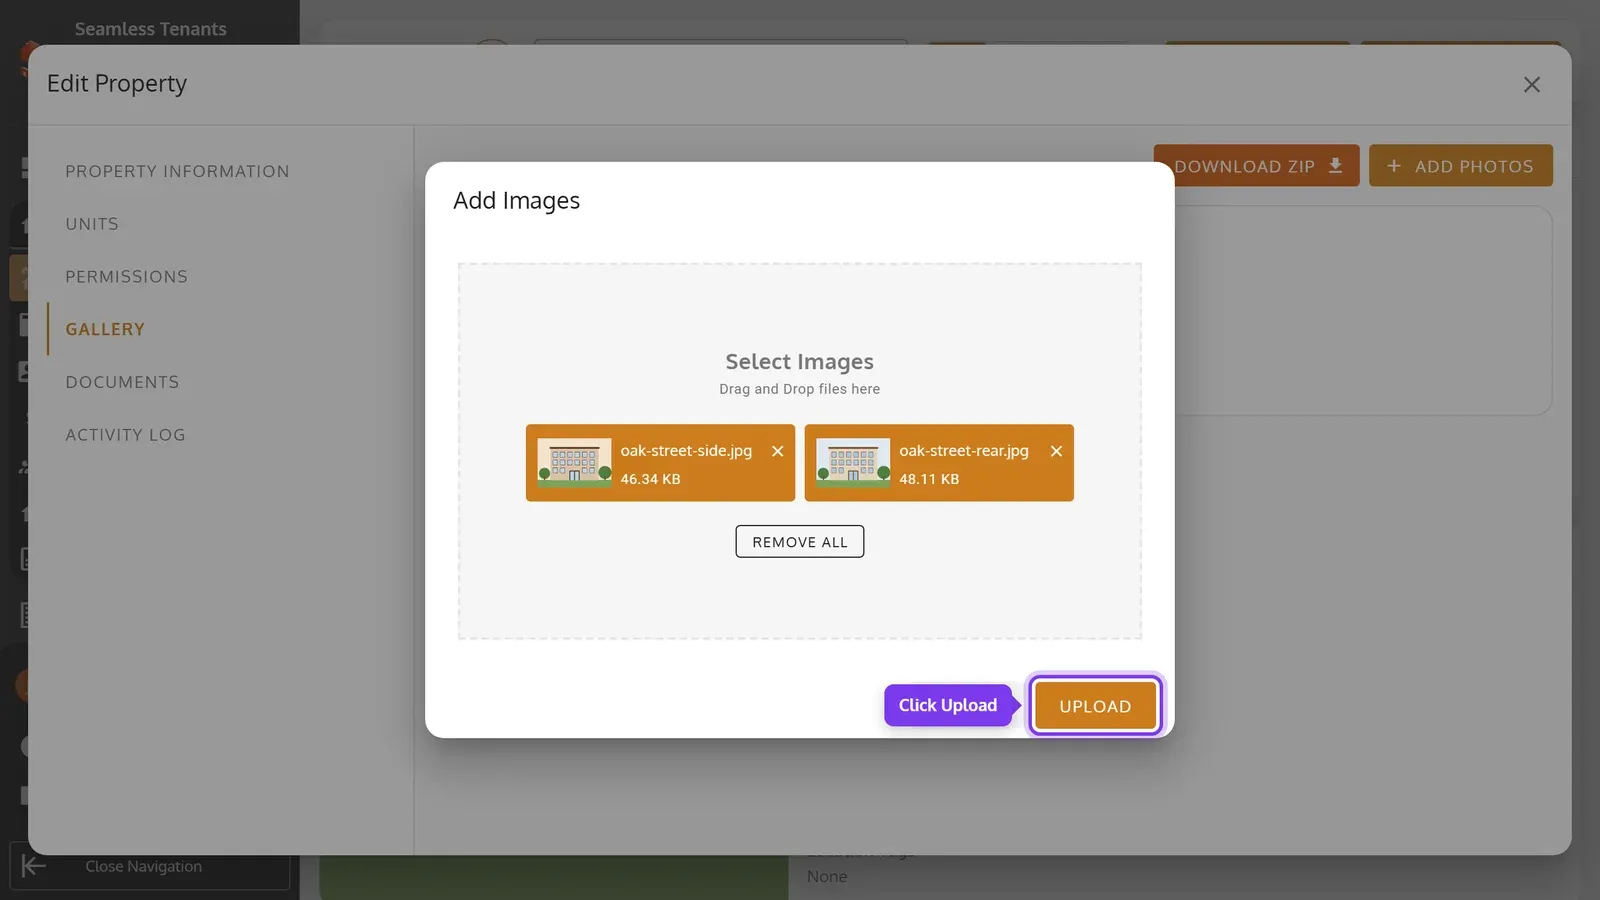
Click Select Images and choose the photos, or drag them onto it. Then click Upload.
-
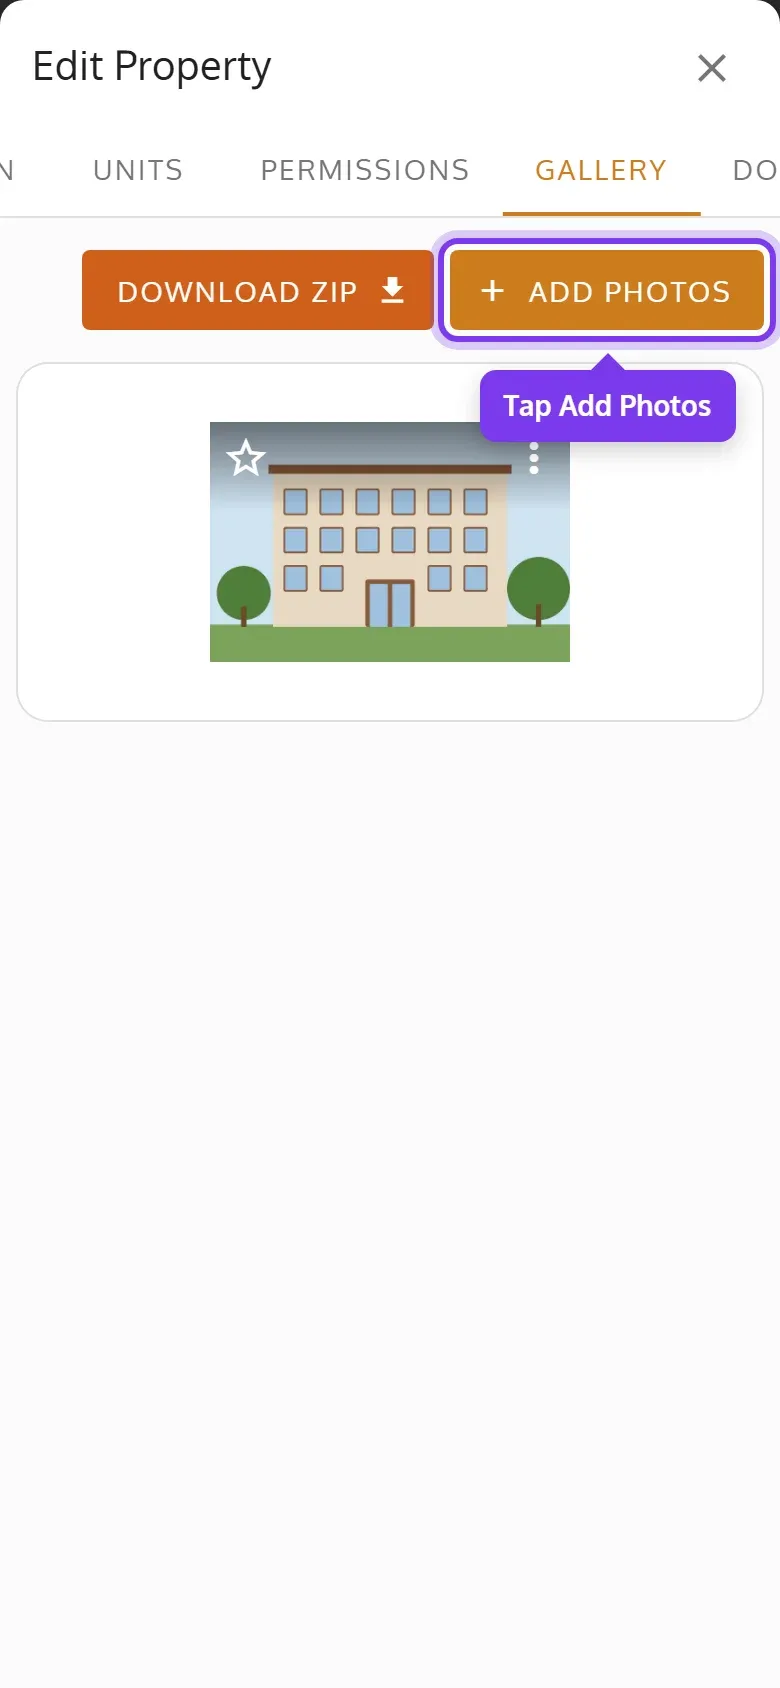
Swipe the property’s tabs and tap Gallery, then Add Photos.
-
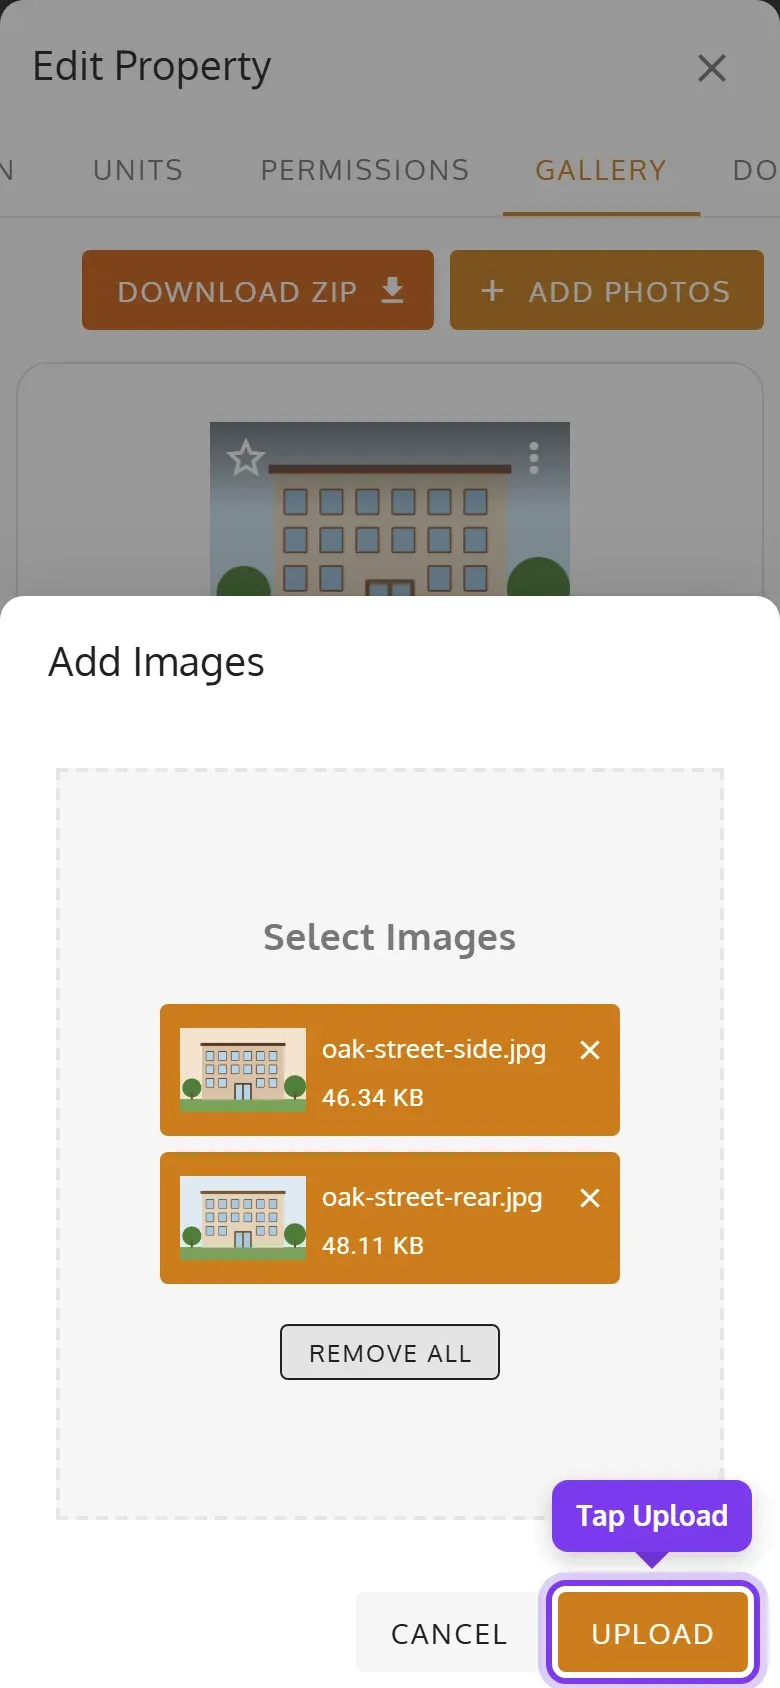
Tap Select Images and choose the photos, then tap Upload.
Pick the photo its card shows
Section titled “Pick the photo its card shows”-
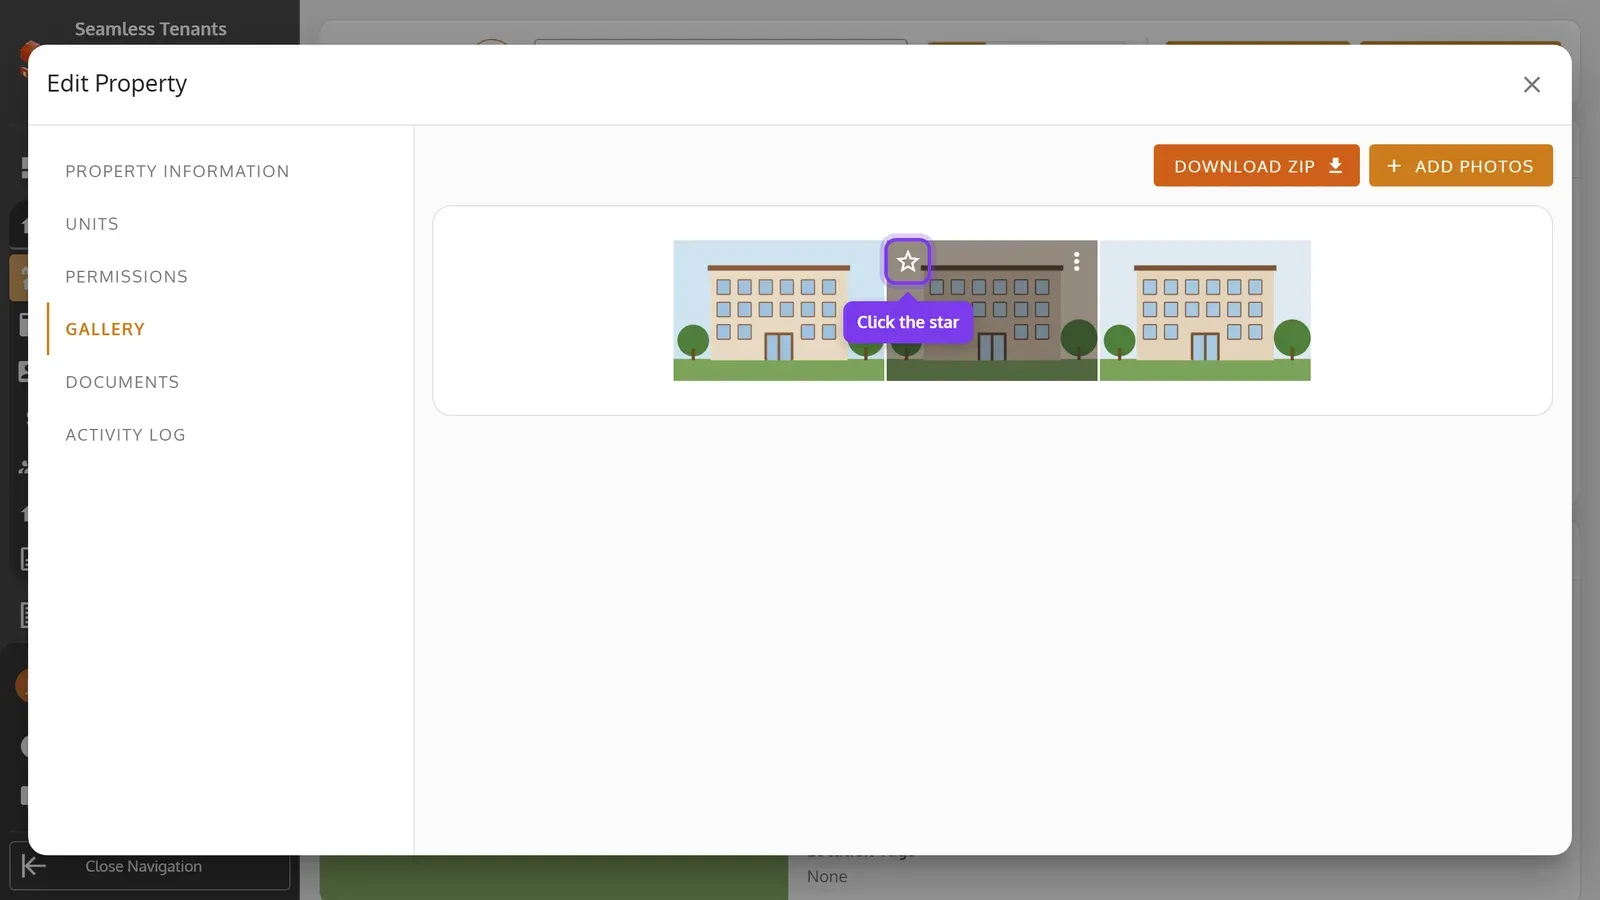
Point to the photo and click its star.
-
Tap the photo’s star.
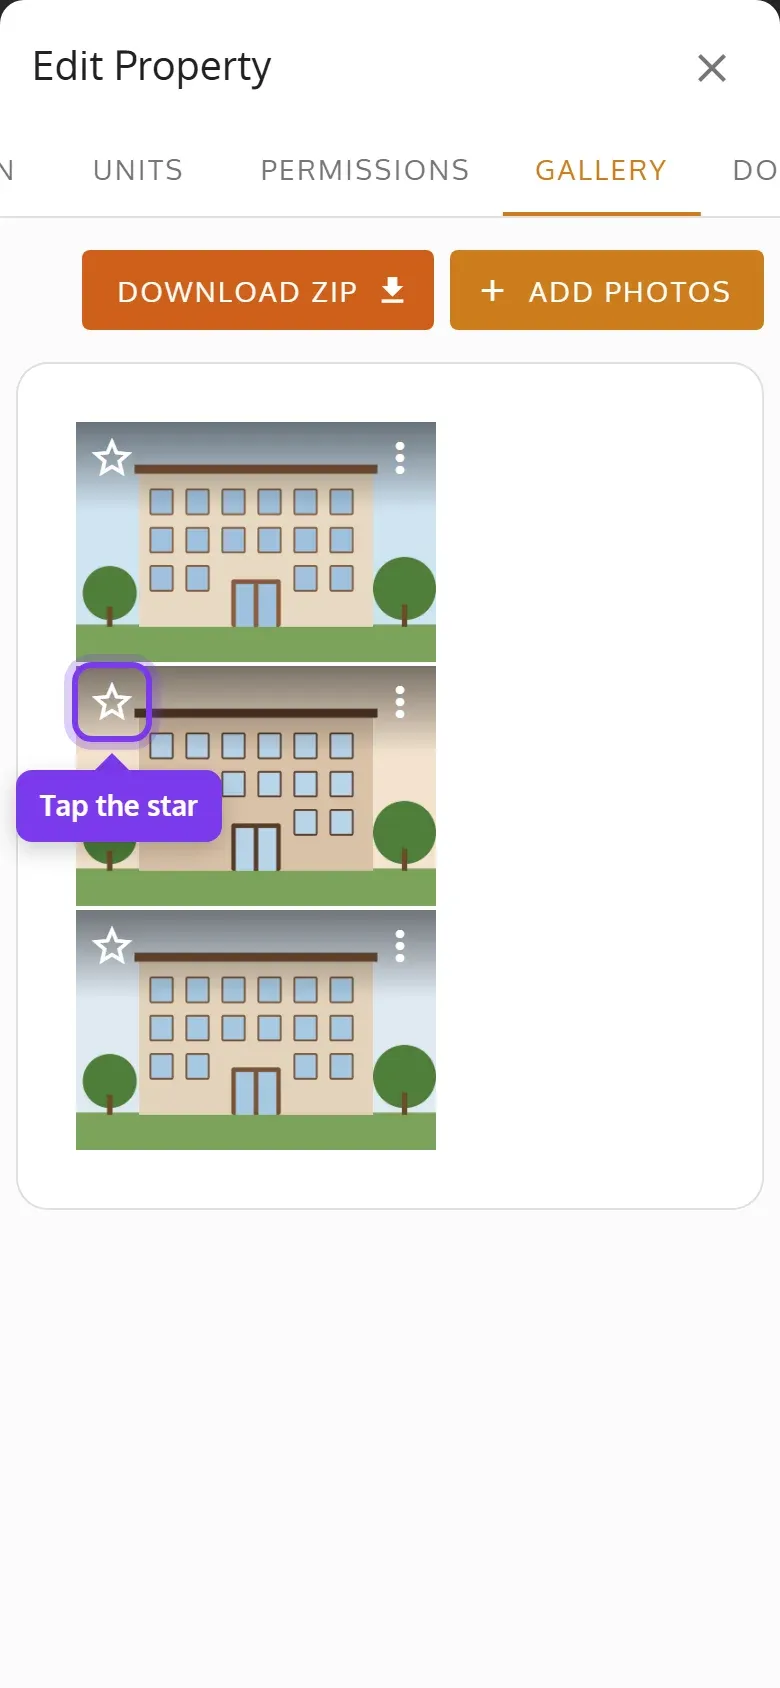
Without a star, the property’s card shows its first photo.
View, download or delete photos
Section titled “View, download or delete photos”-
To see a photo full size, click it.
-
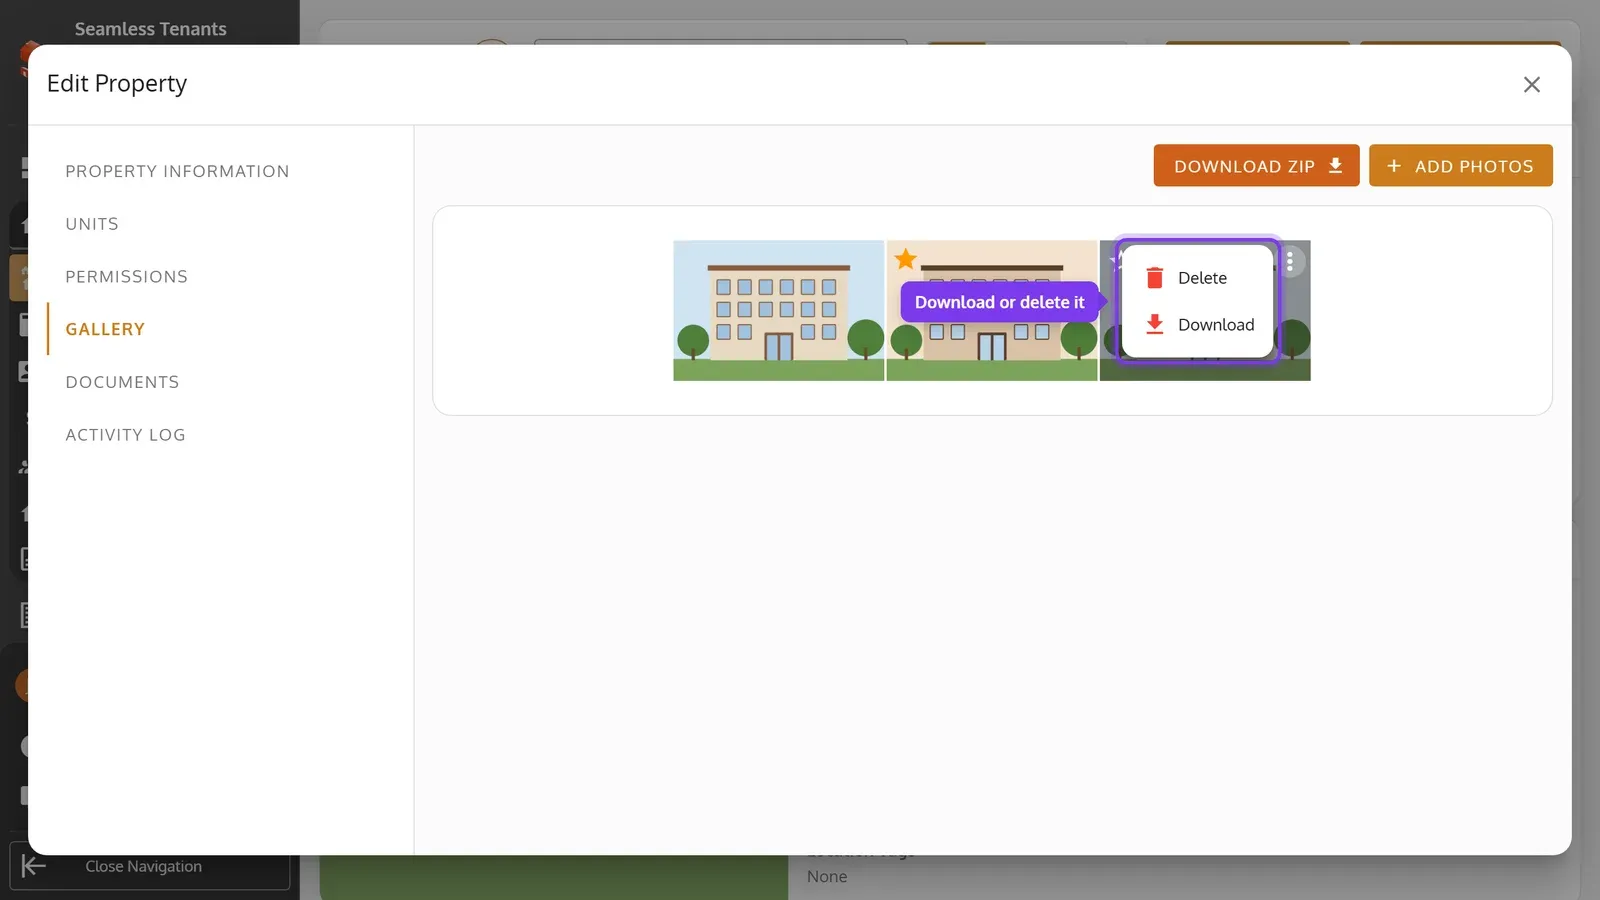
To download or delete a photo, point to it, click its ⋮, then Download or Delete.
-
To download all the photos at once, click Download Zip.
-
To see a photo full size, tap it.
-
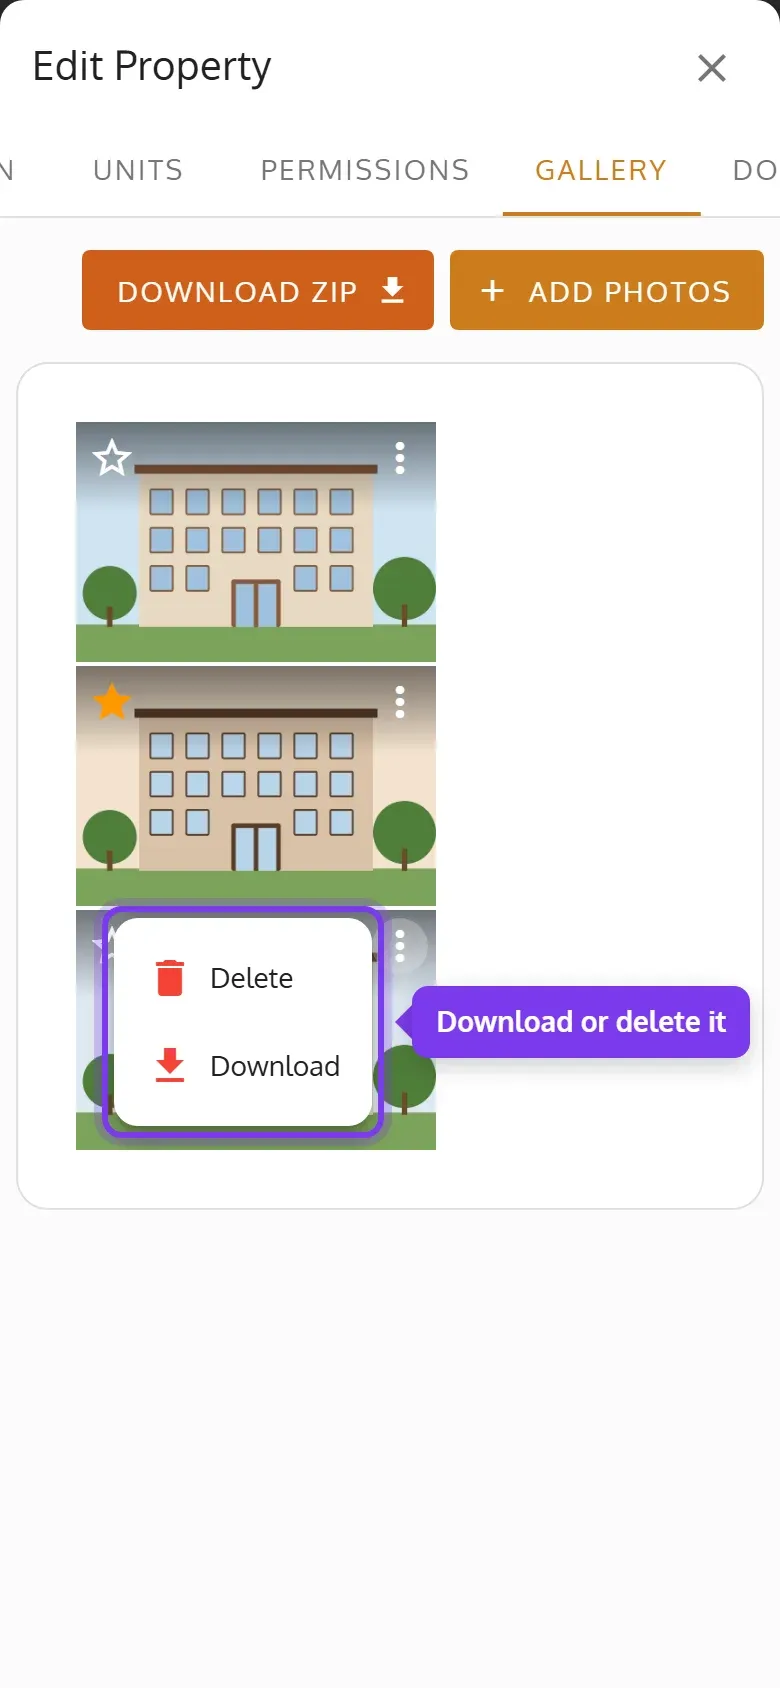
To download or delete a photo, tap its ⋮, then Download or Delete.
-
To download all the photos at once, tap Download Zip.
Add a document
Section titled “Add a document”-
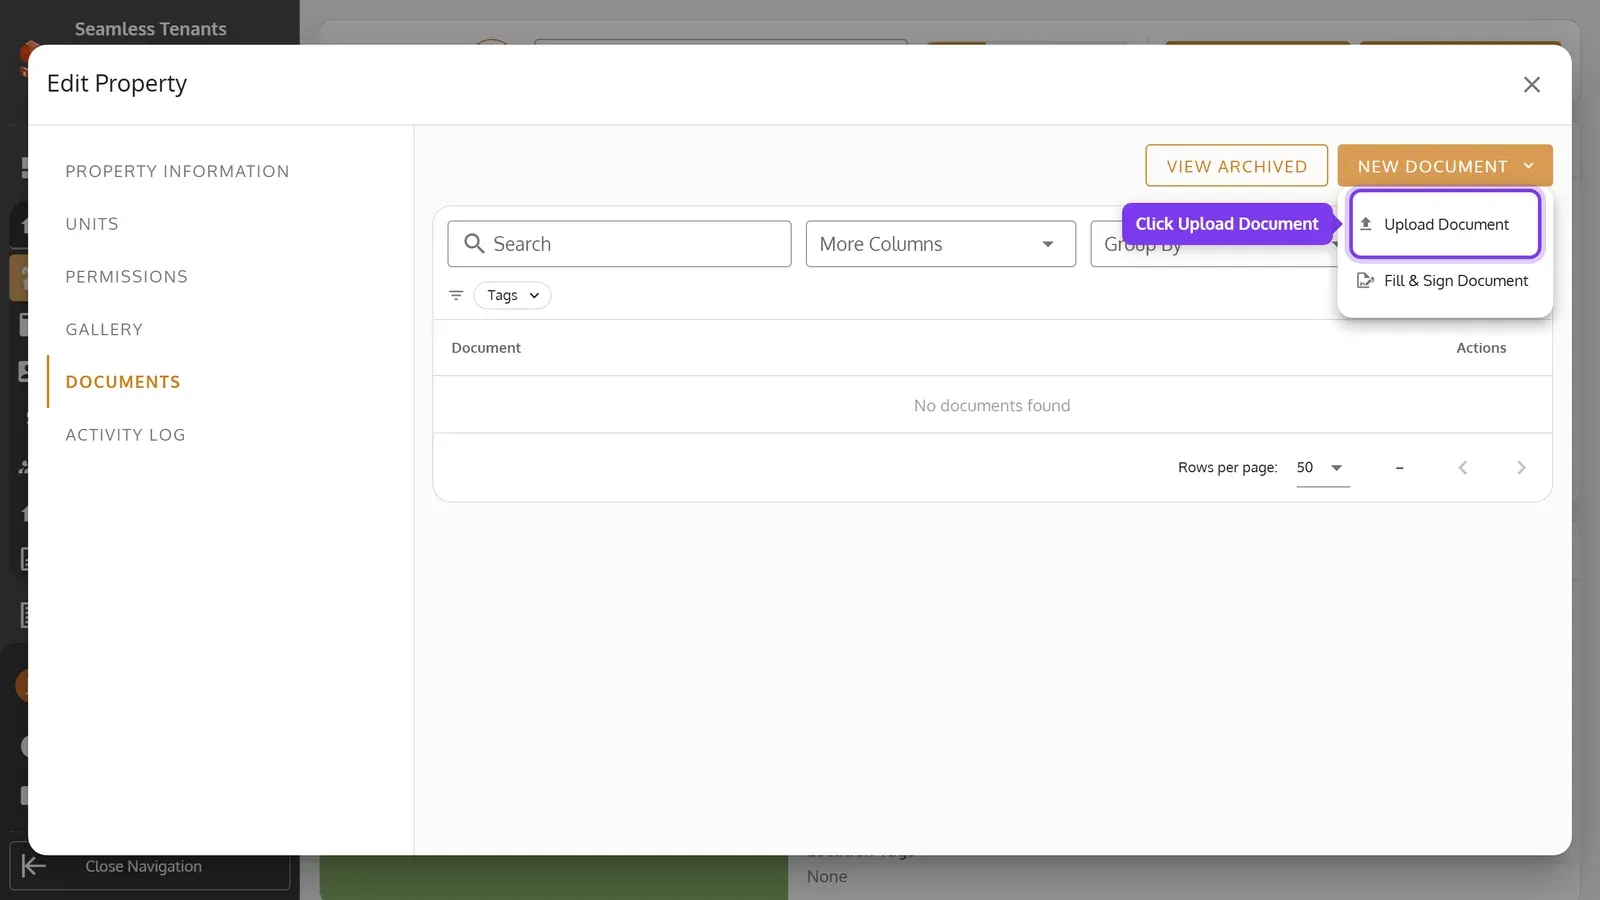
Open the property’s Documents tab, click New Document, then Upload Document.
-
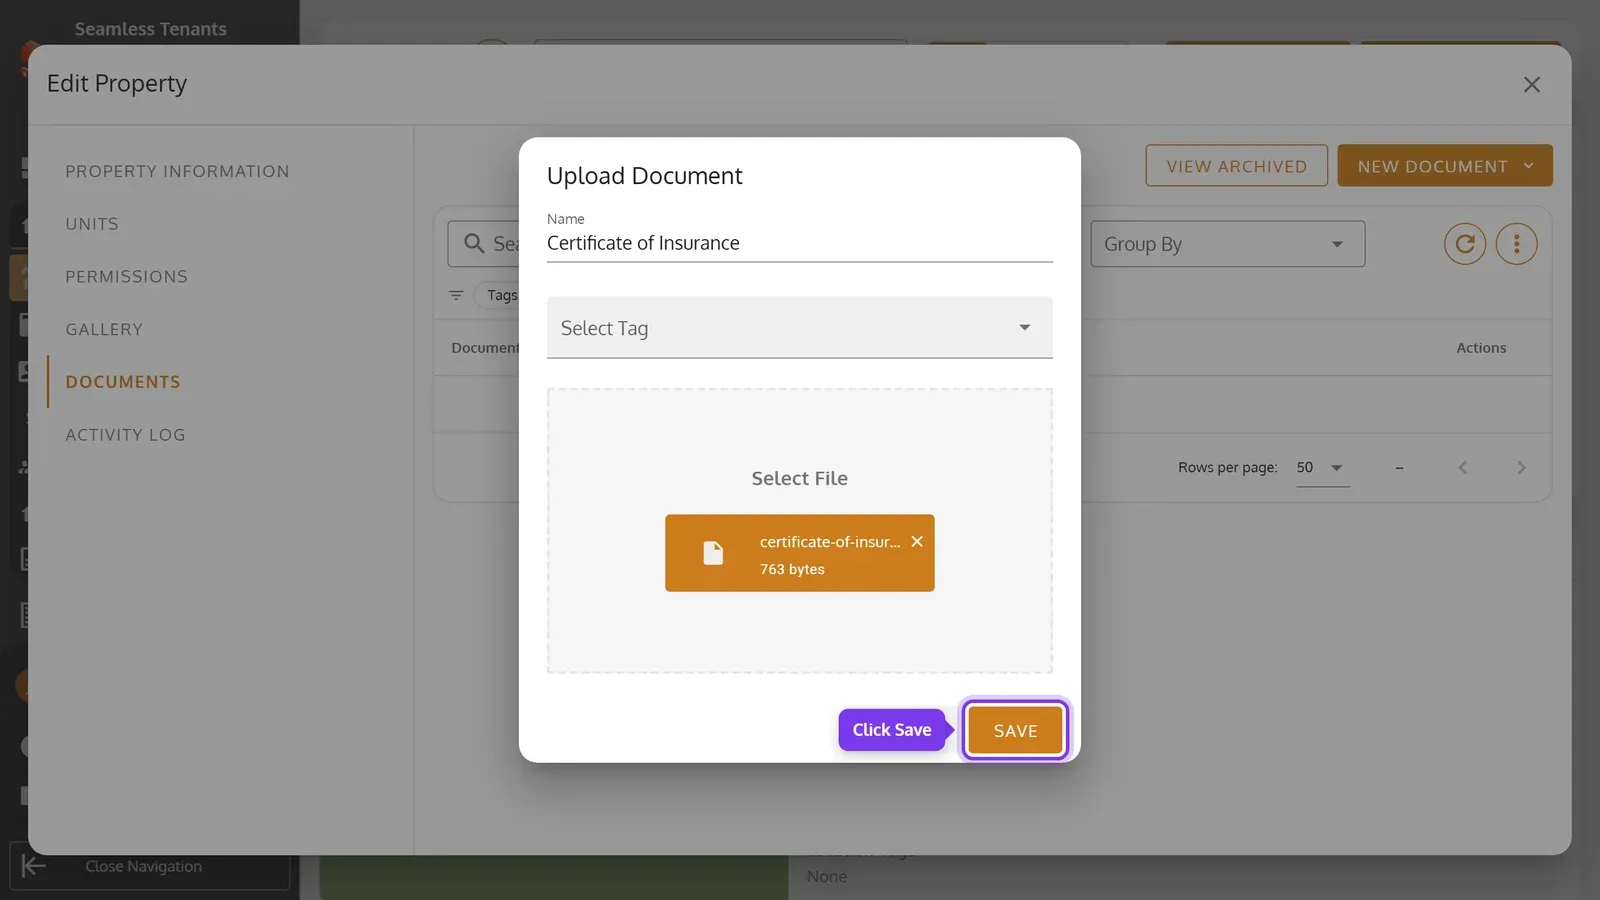
Enter a Name, and pick tags in Select Tag if you like. Click Select File and choose the file, or drag it onto it. Then click Save.
-
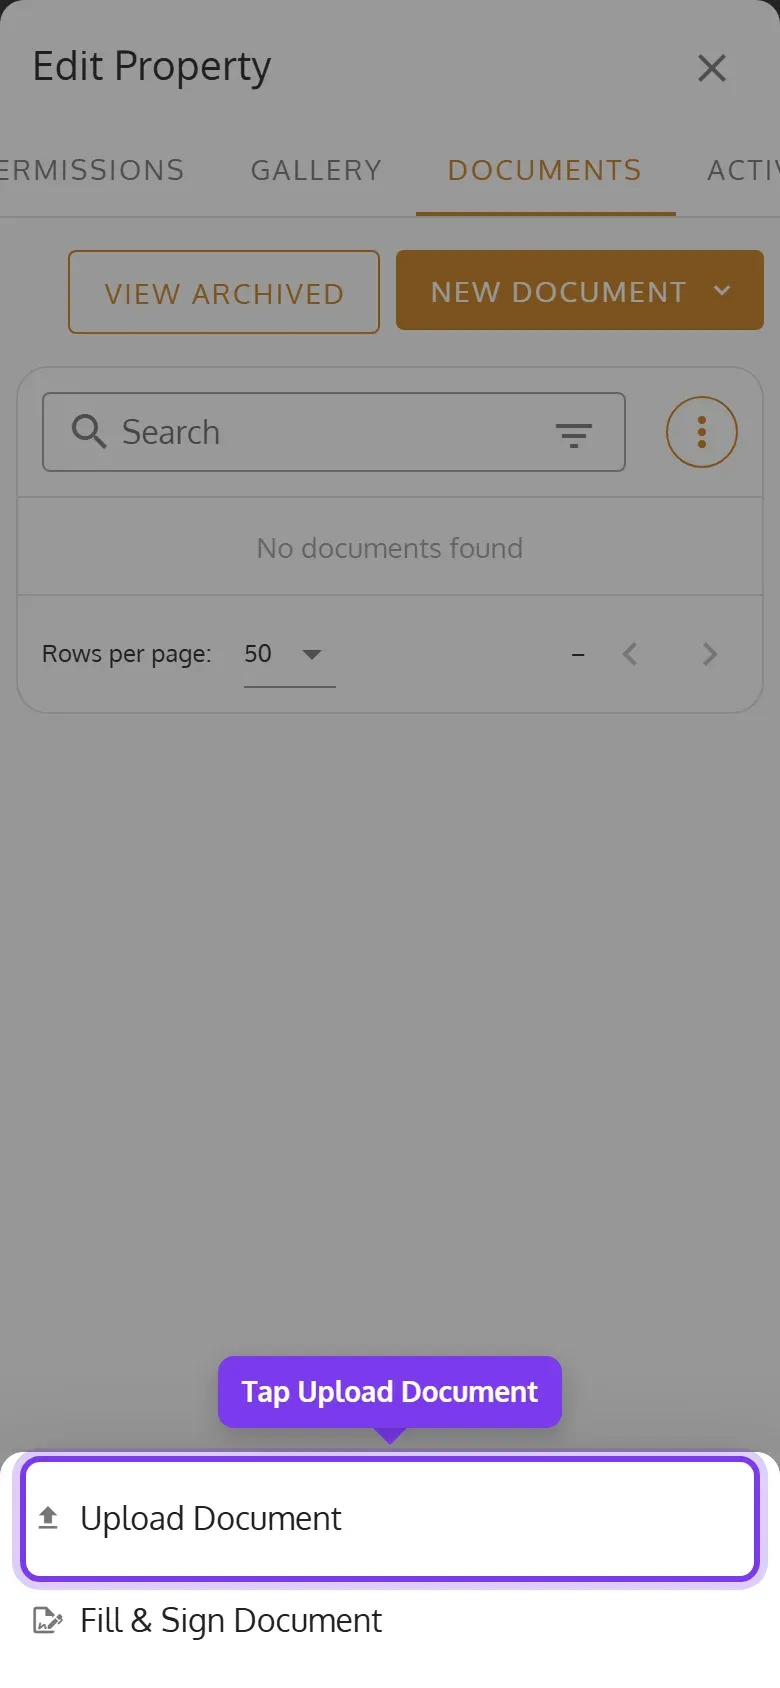
Swipe the property’s tabs and tap Documents, New Document, then Upload Document.
-
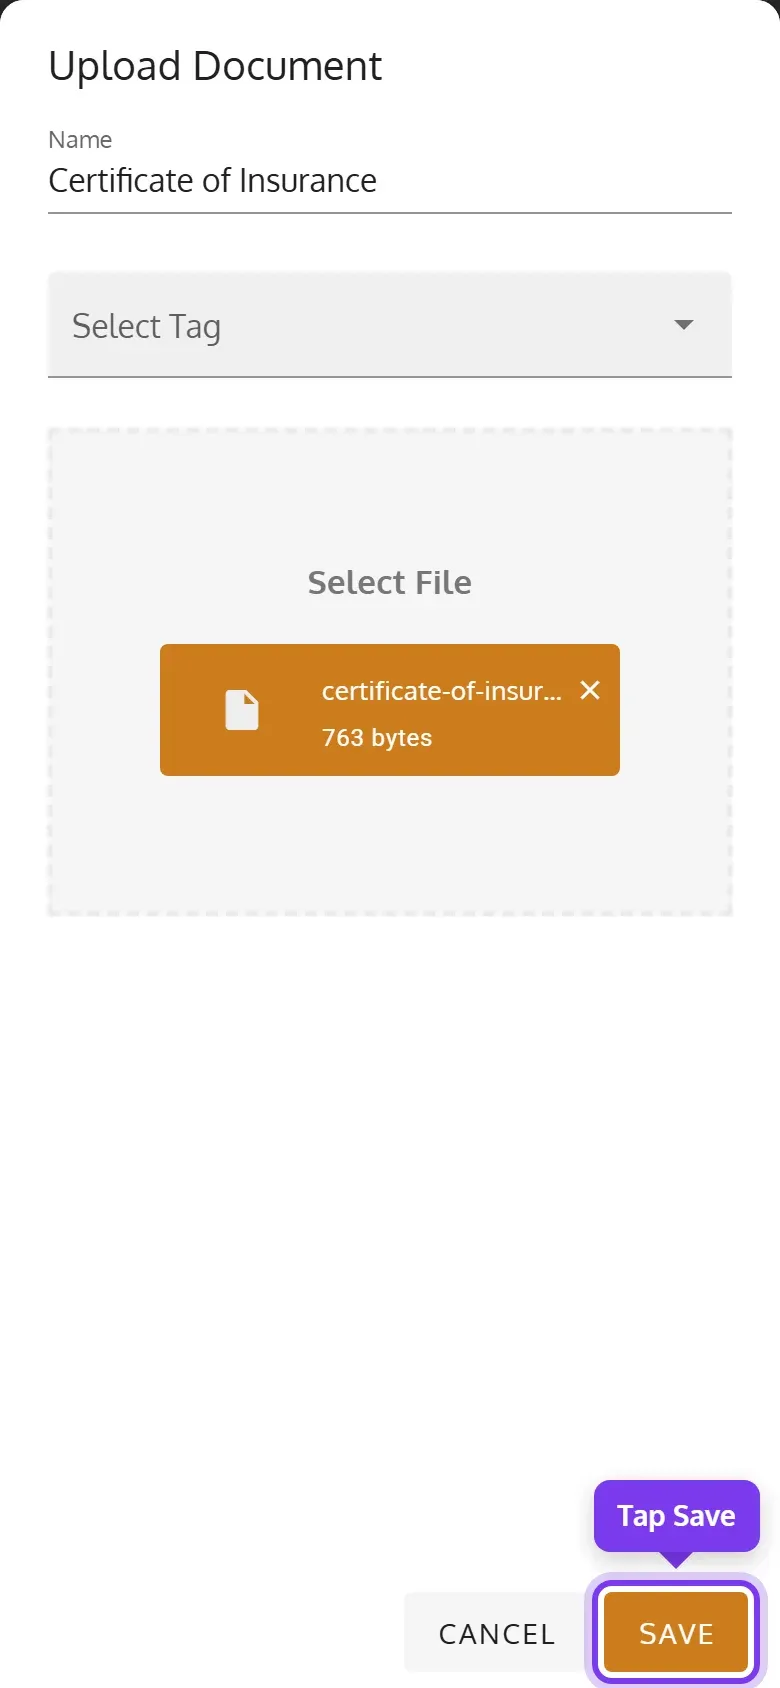
Enter a Name, and pick tags in Select Tag if you like. Tap Select File and choose the file, then tap Save.
To have a document signed, choose Fill & Sign Document instead. See E-Signing Property Documents.
Work with a document
Section titled “Work with a document”-
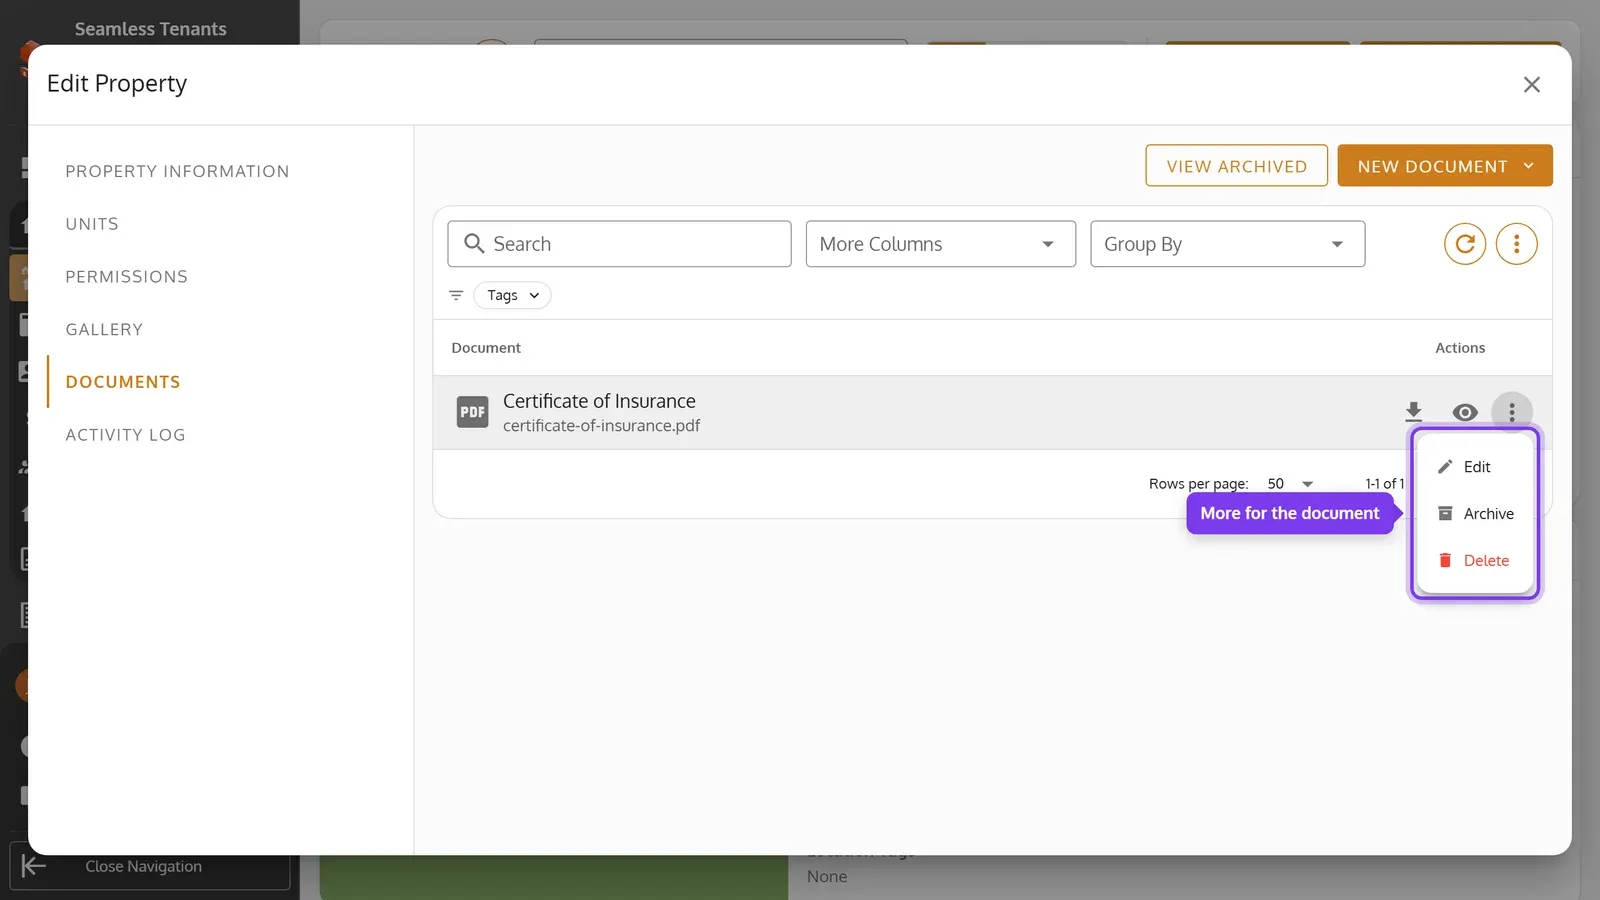
In the document’s row, click the download or preview button, or ⋮ for more: Edit to rename it or change its tag, Archive or Delete.
-
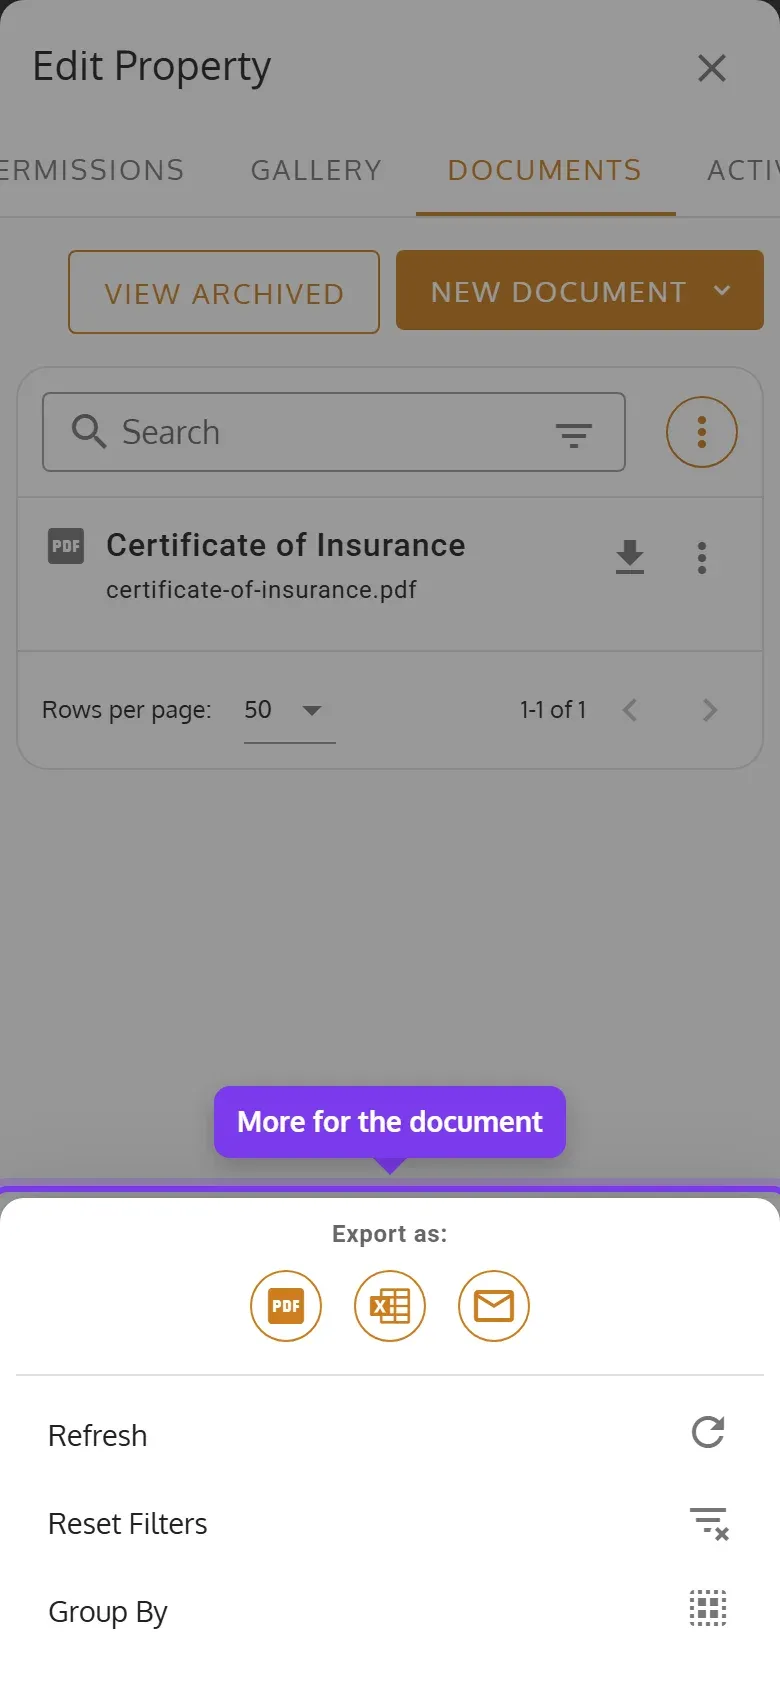
Tap the document’s download button, or ⋮ for more: Preview, Edit to rename it or change its tag, Archive or Delete.
An archived document leaves the list but isn’t deleted. To see archived documents, or restore one, click or tap View Archived.